Hardwood floor installation mistakes: 13 Costly Errors
Hardwood floor installation mistakes can be costly and frustrating. Improper hardwood acclimation, poor inspection of boards, shade variations, improper expansion joint installation, and subfloor neglect are among the most common errors. Each of these can result in structural issues or aesthetic problems that affect your floor’s longevity and beauty.
Hardwood floors are cherished for their natural beauty and ability to improve a home’s value. However, achieving these benefits requires flawless installation. Mistakes during installation undermine the stunning visual appeal and durability hardwood is known for, turning what should be an asset into a costly headache.
As Francisco Romero, owner of Romero Hardwood Floors Inc., I bring over 15 years of experience to the table. I’ve seen how avoiding common hardwood floor installation mistakes is critical to maintaining the timeless appeal of these floors.

Easy Hardwood floor installation mistakes word list:
– Hardwood floor installation guide
– Hardwood floor underlayment types
– Hardwood floor care guide
Failure to Properly Acclimate the Hardwood
One of the most overlooked hardwood floor installation mistakes is failing to let the wood acclimate. This simple step can make or break your flooring project.
Why Acclimation Matters
Hardwood is a natural material that expands and contracts with moisture changes in the air. If the wood isn’t acclimated to the environment where it will be installed, it can warp or shrink. This leads to gaps, buckling, or other structural issues.
Moisture testing is crucial here. You need to ensure that the wood reaches a moisture equilibrium with the room. This means the wood isn’t gaining or losing moisture, which can be checked by testing over several days.
Follow Manufacturer Guidelines
Every hardwood type has its own acclimation requirements. Manufacturer guidelines provide specific instructions on how long the wood should acclimate. This can vary based on the wood species and local climate conditions. Following these instructions is vital to avoid future problems.
Real-World Example
Imagine installing a beautiful oak floor only to find it buckling a few months later because it wasn’t properly acclimated. This is a costly mistake that could have been avoided with a few days of patience.
To avoid these issues, always:
- Test moisture levels before installation.
- Follow the manufacturer’s acclimation guidelines.
- Be patient and allow the wood to adjust to its new environment.
Skipping these steps can lead to costly repairs and a floor that doesn’t meet expectations.
Up next, we’ll explore another common pitfall: Failure to Inspect Hardwood Boards Prior to Installation.
Failure to Inspect Hardwood Boards Prior to Installation
Before you start laying down your hardwood floors, there’s a critical step that can’t be ignored: final inspection of the boards. This isn’t just about aesthetics; it’s about ensuring the quality and longevity of your flooring.
Spotting Manufacturing Defects
Every batch of hardwood can have some boards with manufacturing defects. These might include warping, cracks, or uneven finishes. If these boards make it into your floor, they can lead to uneven surfaces and structural issues. It’s crucial to inspect each board carefully before installation.
Labor Responsibility
The responsibility for inspecting the boards often falls on the installer. As part of their labor responsibility, they should check for defects and ensure that only quality boards are used. This step is essential to prevent future problems that could arise from using defective materials.
Discard Problematic Boards
During the inspection, any board with defects should be discarded or set aside for areas where imperfections won’t be noticeable. This might seem wasteful, but using a problematic board can cause more trouble and expense down the line. It’s better to lose a board now than to face repairs later.
Real-World Example
Consider a homeowner who didn’t inspect their boards thoroughly. After installation, they noticed several areas where the wood was uneven. This led to additional costs for sanding and refinishing. A simple inspection could have prevented this.
To ensure a smooth installation, always:
- Conduct a thorough inspection of all boards.
- Discard or reserve defective boards for less visible areas.
- Communicate with your installer about the importance of this step.
By taking these precautions, you can avoid the hassle and expense of dealing with defective boards post-installation.
Next, we’ll discuss how to manage shade variations in the boards for a cohesive look.
Failure to Deal with Shade Variations in the Boards
When installing hardwood floors, shade variations among the boards can become a major issue if not handled properly. These variations can result in a patchy, inconsistent floor that detracts from the overall beauty of your space.
Mixing Boards for Blending
To achieve a seamless look, it’s crucial to mix boards from different boxes during installation. This strategy helps blend the natural shade differences, creating a more harmonious appearance. Think of it like painting a wall; you wouldn’t use different cans of paint without mixing them first.
Aesthetic Consistency
Maintaining aesthetic consistency is key to a successful hardwood floor installation. By mixing boards, you ensure that the shade variations are distributed evenly across the floor. This approach prevents any abrupt changes in color that might catch the eye and disrupt the room’s design.
Real-World Example
Imagine a large living room where boards from different production runs were installed without mixing. The result? One side of the room appears noticeably darker than the other, making the floor look disjointed. This could have been avoided by following the simple practice of blending boards throughout the installation process.
Practical Tips
Here are some practical tips to avoid shade variation pitfalls:
- Mix Boards: Pull boards randomly from multiple boxes during installation.
- Lay Out Boards: Before nailing them down, lay out the boards to preview the color distribution.
- Communicate with Your Installer: Ensure your installer understands the importance of blending boards for a consistent look.
By following these steps, you can achieve a beautifully consistent floor that improves your home’s aesthetics. Handling shade variations with care ensures that your hardwood floors not only look stunning but also add value to your home.
Next, let’s explore the importance of properly installing expansion joints to accommodate the natural movement of wood.
Failure to Properly Install Expansion Joints
Expansion joints are crucial for the longevity and beauty of your hardwood flooring. They allow the wood to expand and contract with changes in humidity and temperature. Without these joints, you could end up with buckling or gaps in your floor.
Why Expansion Joints Matter
Humidity affects wood, causing it to expand in moist conditions and contract when it’s dry. Both engineered and solid hardwoods experience this movement, though solid hardwood typically expands more. Properly installed expansion joints can prevent damage by giving the wood room to move.
Manufacturer’s Guidelines
Always refer to the manufacturer’s guidelines for the recommended expansion gap. This space is typically around ½ inch for engineered hardwood and up to ¾ inch for solid hardwood. These gaps should be left around the perimeter of the room and around fixed objects like kitchen islands.
Real-Life Consequences
Imagine installing a beautiful hardwood floor in a humid climate without proper expansion joints. As the wood expands, it could push against the walls, causing the floor to buckle. This not only looks bad but can also lead to costly repairs.
Practical Tips for Success
- Measure Carefully: Ensure that all expansion gaps meet the manufacturer’s specifications.
- Use Spacers: During installation, use spacers to maintain consistent gaps around the room’s perimeter.
- Check Humidity Levels: Monitor indoor humidity and use humidifiers or dehumidifiers as needed to maintain stable conditions.
By following these steps, you ensure your hardwood floors can gracefully handle changes in humidity, maintaining their beauty and function for years to come.
Next, we’ll dive into why proper spacing of nails or staples is essential for a stable and secure hardwood floor.
Failure to Properly Space Nails or Staples
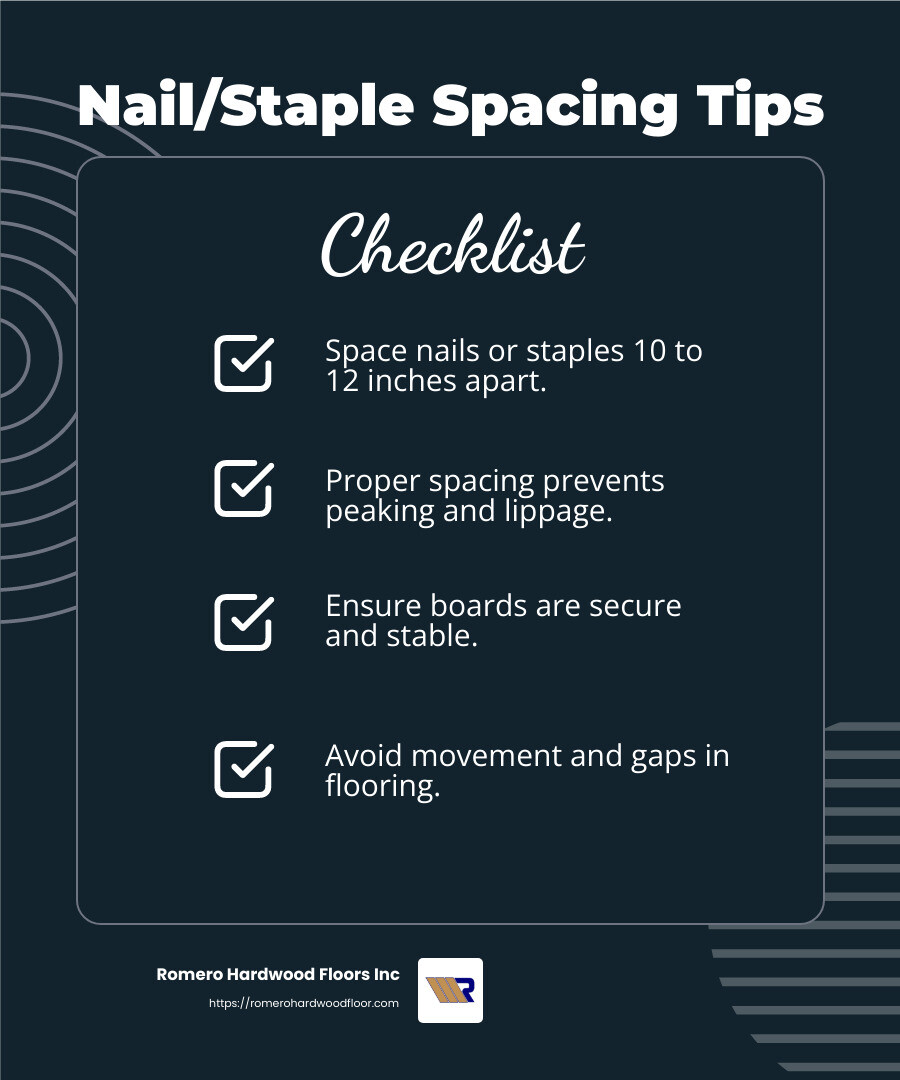
When installing hardwood floors, nail and staple spacing is a critical factor that often gets overlooked. Correct spacing ensures your floorboards are secure, flat, and free from annoying issues like peaking, movement, or lippage.
The Importance of Proper Spacing
Nail and staple spacing directly affects the stability of your hardwood floors. Poorly spaced fasteners can lead to:
- Peaking: This occurs when boards push up at the edges, creating a bumpy surface.
- Movement: Loose boards can shift, leading to gaps and an uneven floor.
- Lippage: Misalignment between boards, creating an uneven surface.
Recommended Spacing Guidelines
To prevent these issues, follow these simple guidelines:
- Nails or staples should be spaced 10 to 12 inches apart.
- Use at least two fasteners per board to ensure each piece is securely attached.
- Refer to the manufacturer’s guidelines for specific instructions, as different wood species may have unique requirements.
Real-World Example
Consider a homeowner who installed a hardwood floor but ignored proper nail spacing. Over time, they noticed the floorboards shifting, causing unsightly gaps. This required costly repairs that could have been avoided with correct spacing from the start.
Practical Tips for Installation
- Use a Tape Measure: Regularly check spacing as you work to maintain consistency.
- Follow a Pattern: Establish a rhythm for nailing or stapling, ensuring even distribution across the floor.
- Inspect Your Work: After installation, walk over the floor to check for any movement or unevenness.
By adhering to these spacing guidelines, you’ll create a stable and beautiful hardwood floor that stands the test of time. Next, we’ll explore why preparing the subfloor is essential before laying your hardwood.
Not Preparing the Subfloor
A well-prepared subfloor is the unsung hero of successful hardwood floor installations. Ignoring this crucial step can lead to a cascade of issues that compromise the beauty and durability of your new flooring. To avoid these pitfalls, focus on three key elements: clean, flat, and dry.
Clean
Before laying any hardwood, ensure the subfloor is spotlessly clean. Dust, debris, and loose particles can interfere with adhesives and cause uneven surfaces. A contractor should scrape off any debris that might prevent the flooring from adhering correctly. Imagine trying to paint on a dirty canvas—the results will never be as good as on a clean one.
Flat
A flat subfloor is critical for a smooth installation. Even minor deviations can cause boards to feel loose or squeak underfoot. According to industry standards, the subfloor should not deviate more than 3/16 of an inch over a 10-foot span. Use a straightedge to check for any uneven spots and address them before proceeding.
Dry
Moisture is the enemy of hardwood floors. A subfloor must be completely dry to prevent future problems like warping or cupping. Use a moisture meter to check the subfloor’s moisture content, ensuring it aligns with the manufacturer’s recommendations. Installing wood on a damp subfloor is like building a house on quicksand—it’s bound to fail.
Structural Damage
Inspect the subfloor for any structural damage. Cracks, rot, or weakened areas should be repaired to provide a stable foundation for your hardwood. Ignoring these issues is akin to building a house on a shaky foundation—eventually, it will crumble.
Real-World Impact
Consider a family who skipped subfloor preparation due to time constraints. Within months, they noticed the floorboards shifting and squeaking. The cost of fixing these issues far exceeded the time they would have spent on proper preparation.
Practical Tips
- Sweep and Vacuum: Thoroughly clean the subfloor to remove all debris.
- Use a Level: Check the flatness with a level and address any high or low spots.
- Moisture Test: Conduct a moisture test to ensure the subfloor is dry.
By focusing on these aspects, you’ll lay a strong foundation that supports the longevity and beauty of your hardwood flooring. Next, we’ll discuss the importance of handling moisture issues accurately to prevent long-term damage.
Not Handling Moisture Issues Accurately
Moisture is the silent saboteur of hardwood flooring. Mishandling it can lead to warping, cupping, and even buckling. To avoid these hardwood floor installation mistakes, it’s crucial to understand and manage both moisture content (MC) and relative humidity (RH).
Moisture Content (MC)
MC refers to the amount of moisture in the wood itself. Before installation, ensure the wood’s MC is in equilibrium with your home’s environment. This prevents the wood from expanding or contracting drastically once installed. A professional installer will use a moisture meter to check this. Monitoring MC is like checking the weather forecast before planning an outdoor event.
Relative Humidity (RH)
RH measures the moisture in the air. Ideally, your home’s RH should be between 30% and 50% for hardwood floors. Too high or too low RH can cause the wood to expand or contract, leading to gaps or warping. Think of RH as the air conditioner of your floors—it keeps conditions just right.
Expansion and Contraction
Wood is a natural material that reacts to its environment. It expands when it absorbs moisture and contracts when it loses moisture. This natural movement can cause significant issues if not accounted for during installation. Leaving adequate expansion gaps around the room’s perimeter helps accommodate this movement. This is especially important for solid hardwood, which expands more than engineered wood.
Engineered Wood: A Stable Choice
For areas prone to humidity fluctuations, engineered wood is often a better choice. It’s more stable than solid wood, thanks to its layered construction. This makes it less likely to warp or cup when exposed to moisture changes. Engineered wood is like the calm friend in a crisis—it holds steady when things get tough.
Real-World Impact
Consider a homeowner who ignored RH levels during installation. After a humid summer, the floors swelled, causing unsightly buckling. The repair costs were hefty, and the disruption was significant. Proper moisture management could have prevented this headache.
Practical Tips
- Use a Moisture Meter: Regularly check the MC of your wood and the RH of your home.
- Install a Humidifier or Dehumidifier: Maintain consistent RH levels throughout the year.
- Choose Engineered Wood for Humid Areas: Opt for engineered wood in basements or kitchens.
By accurately handling moisture issues, you can ensure your hardwood floors remain beautiful and durable for years to come. Next, we’ll explore the importance of paying attention to layout and design for a seamless installation.
Not Paying Attention to Layout and Design
When it comes to hardwood floor installation, layout planning is crucial. Picture this: you’ve spent time and money choosing beautiful hardwood, but once installed, the lines are crooked and the rooms feel off. This is a common error when layout and design are neglected.
The Importance of Measuring
Accurate measuring is the foundation of a successful installation. Even a small mistake can lead to awkward angles and misaligned boards. Imagine a hallway where the boards don’t run straight—this can be both an eyesore and a trip hazard. Precision in measuring ensures that each plank fits perfectly, creating a harmonious flow throughout your home.
Creating a Seamless Look
A seamless look is not just about aesthetics; it’s about the craftsmanship. A well-planned layout considers the longest lines in the home first, ensuring they remain straight and clean. This approach not only improves visual appeal but also prevents crooked lines that can make spaces feel cramped or uneven.
Tips for a Seamless Installation:
- Start with the Longest Wall: Begin laying planks along the longest wall to maintain straight lines.
- Use Chalk Lines: Mark guidelines with chalk to keep your planks aligned.
- Plan for Odd Shapes: Prioritize main areas and work around corners and irregular spaces last.
Real-Life Consequences
Consider a homeowner who skipped detailed layout planning. The result? A living room with boards that veered off-course, creating a jarring visual effect. Correcting this mistake required pulling up and reinstalling several rows, leading to increased costs and wasted time.
Practical Steps for Success
- Double-Check Measurements: Before cutting any planks, measure twice to ensure accuracy.
- Visualize the Layout: Lay out planks without fastening them to visualize the final look.
- Consult with Professionals: If unsure, seek advice from experienced installers who can offer insights and solutions.
By focusing on layout and design, you can avoid these common pitfalls and achieve a professional, polished finish. Next, we’ll dive into the importance of proper racking for a seamless installation.
Improper Racking
Racking is a crucial step in the hardwood floor installation process that involves arranging the planks before securing them. This step ensures a seamless installation and improves the overall aesthetic of the flooring.
Why Racking Matters
Think of racking as creating a puzzle where each piece fits perfectly. Without this step, you risk ending up with mismatched colors and uneven joint spacing. Imagine walking into a room where the floor draws attention for all the wrong reasons—perhaps due to a random dark plank amid lighter ones or unevenly spaced joints. Such issues can disrupt the flow and harmony of a space.
Key Elements of Effective Racking:
- Color Consistency: Mixing planks from different boxes helps blend color variations naturally. This prevents noticeable patches of different shades, ensuring a unified look.
- Joint Spacing: Properly spaced joints add to the floor’s stability and visual appeal. Avoid clustering joints in one area to prevent weak spots.
Real-Life Example
Consider a scenario where a contractor neglected racking. The result was a living room floor with a chaotic mix of tones and uneven joints, creating an eyesore. Fixing this required pulling up and re-laying the floor, causing unnecessary expense and frustration.
Practical Tips for Racking Success
- Pre-Plan the Layout: Before installation, lay out the planks loosely. This helps you see how they fit together and allows for adjustments.
- Stagger Joints: Ensure joints are staggered by at least 6 inches. This not only strengthens the floor but also improves its appearance.
- Mix Planks: Use planks from multiple boxes to balance color variations and achieve a consistent look.
Following these steps in the racking process ensures that the end result is a beautifully installed floor that complements your home. Next, we’ll explore how to avoid leaving unwanted gaps in your hardwood floors.
Leaving Gaps in the Floor
Gaps in hardwood floors can be more than just an eyesore—they can signal deeper issues with the installation process. Let’s explore why these gaps occur and how to prevent them.
Understanding the Causes
- Wet Subfloor: Installing hardwood over a damp subfloor is a recipe for disaster. As the subfloor dries, it can lead to retraction, where the floorboards pull away from each other, creating gaps. Proper moisture testing and allowing the subfloor to dry completely are crucial steps before installation.
- Retraction: Wood naturally expands and contracts with changes in humidity and temperature. If the boards are not properly acclimated to the room’s conditions, they may retract, leaving noticeable gaps. Professional installation includes steps to acclimate the wood, preventing these issues.
Fixing the Problem
- Wood Filler: For minor gaps, wood filler can be a temporary fix. It’s applied between the boards to fill the spaces and can be stained to match the floor color. However, this is not a permanent solution and should not replace proper installation techniques.
- Professional Installation: Hiring a professional ensures that all installation steps are followed carefully. Professionals use precise techniques to account for natural wood movement, ensuring that your floors are gap-free and stable.
The Role of Professionals
A professional installer brings expertise that DIY methods often lack. They understand the importance of moisture control and the correct use of expansion joints, reducing the risk of gaps.
Real-Life Example
Consider a homeowner who installed their hardwood floors without professional help. They skipped the step of testing the subfloor moisture content. Within months, gaps appeared due to the subfloor drying out. A professional was later hired to re-install the floor correctly, emphasizing the importance of expert handling from the start.
Key Takeaways
- Ensure Subfloor is Dry: Always test and allow the subfloor to dry completely before installation.
- Acclimate Wood: Let the wood acclimate to the room’s environment to prevent retraction.
- Hire Professionals: Their expertise can prevent costly mistakes and ensure a flawless finish.
By addressing these potential pitfalls, you can enjoy a beautiful, gap-free hardwood floor that improves your home’s appeal. Next, we’ll dig into the issues of warping and cupping and how to prevent them.
Warping and Cupping
Warping and cupping are common hardwood floor issues that can significantly affect both appearance and structural integrity. They primarily result from moisture damage and improper control of humidity levels.
Understanding Warping and Cupping
- Warping occurs when floorboards bend or twist out of their original shape. This can happen when wood absorbs excess moisture, causing it to expand unevenly. Over time, this uneven expansion can lead to noticeable warping.
- Cupping is a specific type of warping where the edges of a board are higher than its center, creating a concave shape. This often results from moisture imbalance, where the bottom of the board is wetter than the top.
Causes of Moisture Damage
- Water Damage: Leaks, spills, or high humidity can introduce excess moisture to hardwood floors. If not promptly addressed, this moisture can seep into the wood, leading to warping or cupping.
- Humidity Levels: Consistently high or fluctuating humidity levels can cause wood to expand and contract. Without proper control, this can lead to structural changes in the flooring.
Preventing Warping and Cupping
- Monitor Humidity: Use a hygrometer to keep track of indoor humidity levels. Aim for a range between 30-50% to prevent wood from absorbing too much moisture.
- Address Water Damage Quickly: Any spills or leaks should be cleaned up immediately to prevent moisture from seeping into the wood. Regularly check areas prone to water exposure, such as near windows or under sinks.
- Install Vapor Barriers: In areas with potential moisture issues, consider installing a vapor barrier beneath the hardwood to block moisture from reaching the wood.
Real-Life Example
A homeowner noticed their hardwood floors were cupping after a particularly humid summer. Upon investigation, it was found that the crawl space beneath the house lacked proper ventilation, leading to increased moisture levels. By installing a vapor barrier and improving ventilation, they were able to stabilize the humidity and prevent further damage.
Key Takeaways
- Control Humidity: Maintain consistent indoor humidity levels to prevent expansion and contraction of the wood.
- Quickly Address Water Issues: Promptly deal with any sources of water damage to protect your floors.
- Consider Professional Help: If warping or cupping occurs, a professional can assess the damage and provide solutions to prevent future issues.
By taking these preventive measures, you can maintain the beauty and durability of your hardwood floors. Next, we’ll explore the importance of finishing a dirty floor and how to avoid common pitfalls in the finishing process.
Finishing a Dirty Floor
When it comes to hardwood floor installation, one critical step often overlooked is the finishing process. Ensuring a clean and well-prepared surface is essential for achieving a polished and long-lasting finish.
The Importance of Cleaning
Before applying any finish, thorough cleaning is a must. Dirt, dust, and debris can get trapped under the finish, leading to an uneven and unattractive appearance. Use a vacuum with a soft brush attachment to gently remove any particles without scratching the wood. This step ensures that the finish adheres properly and results in a smooth surface.
Proper Finish Application
Choosing the right finish is just as important as cleaning. Different hardwood types and finishes require specific materials to achieve the best results. For instance, oil-based finishes may not be suitable for all wood types. Always check the manufacturer’s guidelines to ensure compatibility.
A proper finish not only improves the wood’s natural beauty but also provides a protective layer against wear and tear. Applying the finish evenly and in thin coats will help avoid streaks and bubbles, ensuring a durable and attractive surface.
Avoiding Common Pitfalls
- Skipping the Cleaning Step: Applying finish over a dirty floor can lead to peeling and flaking. Ensure the floor is spotless before starting the finishing process.
- Using Incompatible Materials: Different finishes work better with specific types of wood. Be sure to use products that are compatible with your hardwood to avoid issues like peeling or discoloration.
- Ignoring Manufacturer Guidelines: Each finish has specific instructions regarding application and drying times. Following these guidelines is crucial for a successful finish.
Real-Life Example
A homeowner decided to refinish their hardwood floors themselves but skipped the cleaning step. As a result, the finish began to peel within weeks, revealing trapped debris underneath. They had to strip the finish and start over, this time ensuring a clean surface before application.
Key Takeaways
- Clean Thoroughly: A clean surface is essential for a smooth and lasting finish.
- Choose Compatible Materials: Ensure the finish is suitable for your hardwood type.
- Follow Instructions: Adhere to the manufacturer’s guidelines for application and drying times.
By paying attention to these details, you can avoid the common mistake of finishing a dirty floor and ensure your hardwood floors look stunning for years to come. Next, we’ll dive into the importance of hiring a professional for your hardwood floor installation.
Not Hiring a Professional
When it comes to hardwood floor installation, many homeowners are tempted to take the DIY route. While this might seem like a cost-saving measure, it often leads to more headaches and expenses in the long run. Here’s why hiring a professional installer is crucial.
Expertise and Training
Professional installers have the training and experience needed to handle the complexities of hardwood floor installation. They understand the nuances of different wood types and finishes and are equipped to tackle any challenges that arise. For instance, they know how to properly acclimate wood to avoid moisture-related issues, a common problem for amateurs.
Avoiding Costly Mistakes
Cutting corners during installation can lead to significant problems such as warping, gaps, or uneven surfaces. Professionals ensure that every step, from subfloor preparation to the final finish, is done correctly. They are meticulous about details like nail and staple spacing, which helps prevent issues like peaking or movement of the floorboards.
Tools and Techniques
Professionals have access to specialized tools and techniques that are not typically available to the average DIYer. These tools help ensure a precise and efficient installation process. For example, they use spacers to maintain even expansion gaps and laser levels to keep lines straight and true.
Real-Life Example
Consider a homeowner who decided to install their hardwood floors to save money. Without the proper tools and expertise, they ended up with uneven boards and large gaps in the flooring. Eventually, they had to hire a professional to redo the job, costing them more than if they had hired an expert from the start.
Peace of Mind
Hiring a professional not only guarantees a high-quality installation but also provides peace of mind. You can rest assured knowing that your floors are installed correctly, and any potential issues are handled promptly and efficiently.
By investing in a professional installer, you protect your hardwood floor investment and ensure it improves the beauty and value of your home for years to come. Next, we’ll explore frequently asked questions about common hardwood floor installation mistakes.
Frequently Asked Questions about Hardwood Floor Installation Mistakes
Where not to install hardwood floors?
Hardwood floors are beautiful and durable, but they are not suitable for every room in your home. Avoid installing them in areas with high moisture levels, like kitchens, bathrooms, and laundry rooms. These spaces are prone to spills and humidity, which can cause the wood to warp or stain. Basements are also risky because they often have higher humidity levels and potential for flooding. Instead, consider moisture-resistant options like tile or vinyl for these areas.
What happens if you install hardwood on an uneven floor?
Installing hardwood on an uneven subfloor can lead to a host of problems. The floor may feel bouncy or squeaky, and the boards might not align properly, creating gaps or lips between them. Over time, this unevenness can cause the wood to crack or wear unevenly. To prevent these issues, use a self-leveling compound to smooth out any irregularities in the subfloor before installation. This ensures a stable and even surface, which is crucial for a long-lasting hardwood floor.
What is an acceptable gap in hardwood floor installation?
Gaps in hardwood floors are normal due to changes in humidity and temperature. Small gaps, about the thickness of a quarter, are generally acceptable. These gaps allow the wood to expand and contract without causing damage. However, if you notice larger gaps or irregular spacing, it could be a sign of improper installation or moisture issues. Maintaining consistent indoor humidity levels can help minimize gap formation and keep your floors looking seamless.
By understanding these common pitfalls, you can avoid costly mistakes and ensure your hardwood floors remain beautiful and functional. Now, let’s move on to the conclusion of our guide on hardwood floor installation.
Conclusion
Choosing the right team for your hardwood floor installation can make all the difference. At Romero Hardwood Floors Inc, we pride ourselves on delivering expert installation services that stand the test of time. Our team, based in Revere, MA, has been enhancing homes and commercial spaces with stunning hardwood floors since 2006.
We understand that installing hardwood floors is more than just a task—it’s an investment in your property’s value and aesthetic appeal. That’s why we focus on providing competitive pricing without compromising on quality. Our goal is to ensure that you get the best value for your money, with floors that are both beautiful and durable.
Our commitment to guaranteed workmanship means that every project we undertake is completed to the highest standards. From the initial consultation to the final touches, we ensure a smooth and satisfying experience for our clients. This dedication to quality and customer satisfaction has helped us build a strong reputation in the flooring industry.
When you choose Romero Hardwood Floors Inc, you’re not just getting a service—you’re gaining a partner who values your home as much as you do. Let us help you improve your property with floors that are crafted with precision and care.
For more information or to schedule a consultation, visit our hardwood flooring contractors service page. Let’s transform your space with the elegance and warmth of hardwood flooring.
