Restoring Old Floors: 7 Powerful Ways for Stunning Results 2025
Bringing Historic Beauty Back to Life
Restoring old floors transforms worn, damaged hardwood into stunning surfaces that showcase your home’s original character while adding significant value to your property.
Quick Guide to Restoring Old Floors:
- Assess the condition – Check for water damage, loose boards, and finish wear
- Prepare the space – Remove furniture, seal doorways, and gather safety equipment
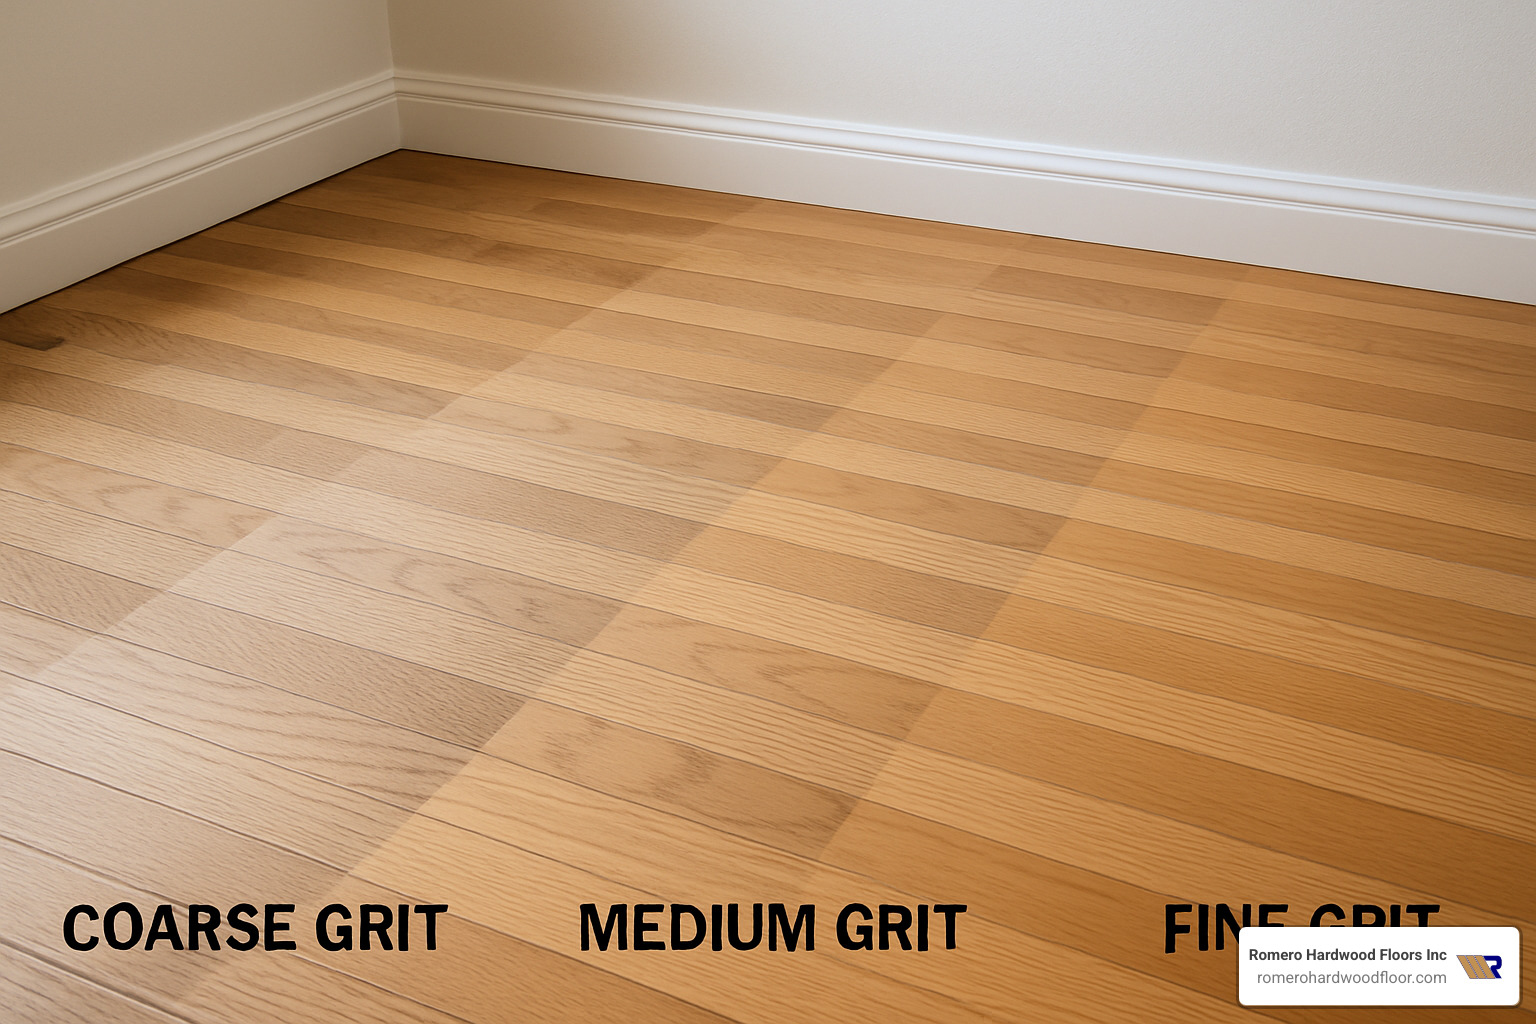
- Sand progressively – Start with coarse grit (40-60), move to medium (80-100), finish with fine (120-150)
- Clean thoroughly – Vacuum dust and wipe with tack cloth between each step
- Apply finish – Choose oil-based or water-based polyurethane, apply 2-3 coats
- Allow proper cure time – Wait 24-72 hours before walking, longer before moving furniture
When you step into a home with historic hardwood floors, you’re walking on pieces of living history. The charm of ancestral floors lies not just in their beauty, but in their sustainability. According to industry research, refinishing hardwood floors yourself typically costs less than $500 per 275 square feet, while professional services average $1,000 to $2,400 for the same area.
I’m Francisco Romero, owner of Romero Hardwood Floors Inc., and I’ve spent over 15 years helping homeowners in Revere, MA find the hidden potential beneath their feet. My experience restoring old floors has taught me that with the right approach, even the most worn surfaces can be transformed into stunning focal points.

Restoring old floors terms simplified:
– fixing floorboard squeaks
– fixing dents in wood
– fixing scratched floors
The Charm Beneath Your Feet
Every old hardwood floor has a story to tell. When we work on historic properties throughout Beverly, Salem, and Gloucester, we often uncover floors that have witnessed decades of family gatherings and daily life. These floors aren’t just surfaces—they’re time capsules that connect us to earlier generations.
The heritage value goes beyond nostalgia. The lumber used in these floors often came from old-growth forests, creating boards with tight grain patterns and exceptional durability that modern manufacturing cannot replicate. The natural patina and authentic wear patterns create warmth and character that new floors take decades to develop naturally.
Why Restore Old Floors Instead of Replacing Them?
When homeowners find worn hardwood floors, they face a crossroads: restore what’s there or start fresh. After working with countless floors throughout Revere and the North Shore, I can tell you that restoring old floors almost always wins—and for good reason.
The Hidden Value of Ancestral Planks
The wood beneath your feet could be more valuable than anything at a modern flooring store. Those old planks came from old-growth forests where trees grew slowly over centuries, creating incredibly dense lumber with character that can’t be manufactured today.
The patina that develops over decades creates depth and richness that new floors spend years trying to achieve. Many historic homes feature wide boards that are 8, 10, or even 12 inches across from massive trees no longer available commercially.
Environmental & Financial Upside
According to scientific research on life-cycle wood use, restoring old floors dramatically reduces your project’s carbon footprint compared to replacement while keeping valuable materials out of landfills.
The financial benefits are equally impressive. Based on average internet data (not Romero Hardwood Floors Inc pricing), professional refinishing typically ranges from $1,000 to $7,200 for a standard 275-square-foot room, while DIY restoration can cost as little as $500 to $1,500. Compare that to full replacement, which easily runs $10,000 to $30,000 for the same space.
Professional refinishing generally costs between $1.50 to $9.00 per square foot. Quality hardwood floors can be sanded and refinished up to 10 times during their lifetime, meaning your restoration investment keeps paying dividends for decades.
Assessing & Preparing for a Successful Restoration
Assessment and preparation make or break your restoring old floors project. I’ve seen too many homeowners dive straight into sanding, only to find problems that could have been easily addressed with upfront planning.
Safety gear isn’t optional—you’ll need safety glasses, dust masks, hearing protection, and work gloves. Older floors often contain lead-based finishes, especially in homes built before 1978, making proper ventilation and dust containment essential.
A moisture meter spots hidden water damage that looks fine to the naked eye. Try the squeak test by walking across every inch, marking loose boards with painter’s tape. These need fixing before sanding.
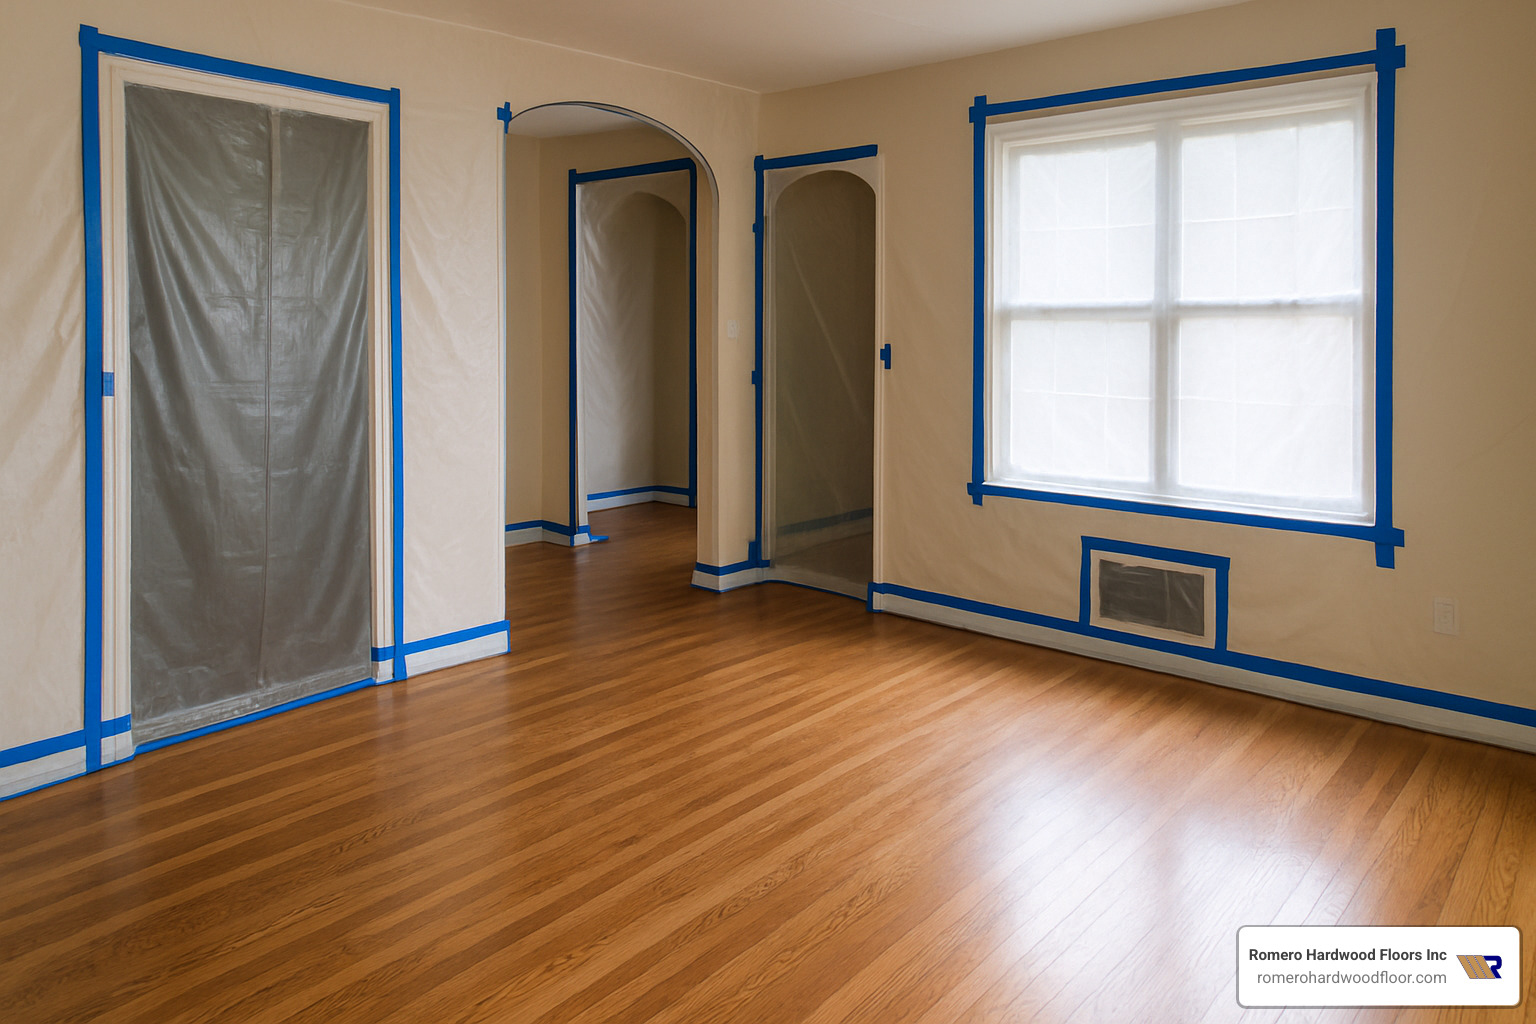
Furniture removal requires strategy. Clear everything from the room and seal doorways, vents, and windows with plastic sheeting. This prevents dust from infiltrating your entire home.
Restoring Old Floors: Inspection Checklist
Scratches come in two varieties. Surface scratches that don’t penetrate the finish often respond to screening and recoating. Deeper scratches that reach the wood mean full sanding and refinishing.
Water stains appear as dark patches where moisture penetrated the finish. Test with water drops: if water soaks in immediately, your finish is compromised. If it beads up, your polyurethane is still working.
Loose boards announce themselves when you walk—they move, creak, or show gaps. Check for protruding nails that could damage sanding equipment.
For detailed repair techniques, check our guide on step-by-step hardwood floor repair techniques.
Essential Tools & Materials
Rent professional-grade equipment rather than struggling with inadequate consumer tools. A drum sander handles heavy lifting, while a buffer offers more control for beginners.
Your sandpaper progression from 40 to 120 grit creates the change. Start coarse (40-60), move to medium (80-100), finish fine (120-150). Wood filler repairs holes and imperfections.
For equipment selection and techniques, see our hardwood floor sanding guide.
Step-by-Step Guide to Restoring Old Floors
The moment has arrived—time to transform those worn planks into stunning floors. Through years of restoring old floors in Malden, Medford, and surrounding communities, I’ve learned that success comes from following a logical sequence.
When & How to Sand
Not every floor needs full treatment. If the existing finish shows only minor scratches, you might get away with screening—a gentler process using fine-grit sandpaper.
When floors need full restoration, sanding becomes essential. The secret lies in the coarse-to-fine sequence. Begin with 40-60 grit to strip old finishes and level uneven spots. Move to 80-100 grit to smooth scratches, then finish with 120-150 grit for the perfect surface.
Keep edge sanders moving constantly—they’re more aggressive than they look. Hand-sand details around radiators and tight spaces using the same grit progression. For stubborn finishes, see our guide on removing old varnish from wood floors.
Cleaning Without Damage
Between each sanding stage, thorough cleaning prevents dust particles from creating imperfections in your final finish.
Vacuum first, tack cloth second—use a shop vacuum with fine filter, then follow with slightly damp tack cloth. For oil-based finishes, mix 1/4 to 1/2 cup white vinegar per gallon of warm water. Use oil-safe soap designed for hardwood floors.
Our hardwood floor restoration services include professional cleaning techniques that preserve historic finishes.
Repairing Scratches, Squeaks & Gaps
Wood putty fills small holes and scratches. Choose putty that matches your floor’s color and accepts stain consistently. Apply slightly proud, then sand flush after drying.
Countersunk screws provide superior holding power for loose boards compared to nails. Pre-drill to prevent splitting, drive screws below surface, and fill holes with matching putty.
For specific damage types, see our guide on repairing hardwood floor scratches.
Finishes, Stains & After-Care
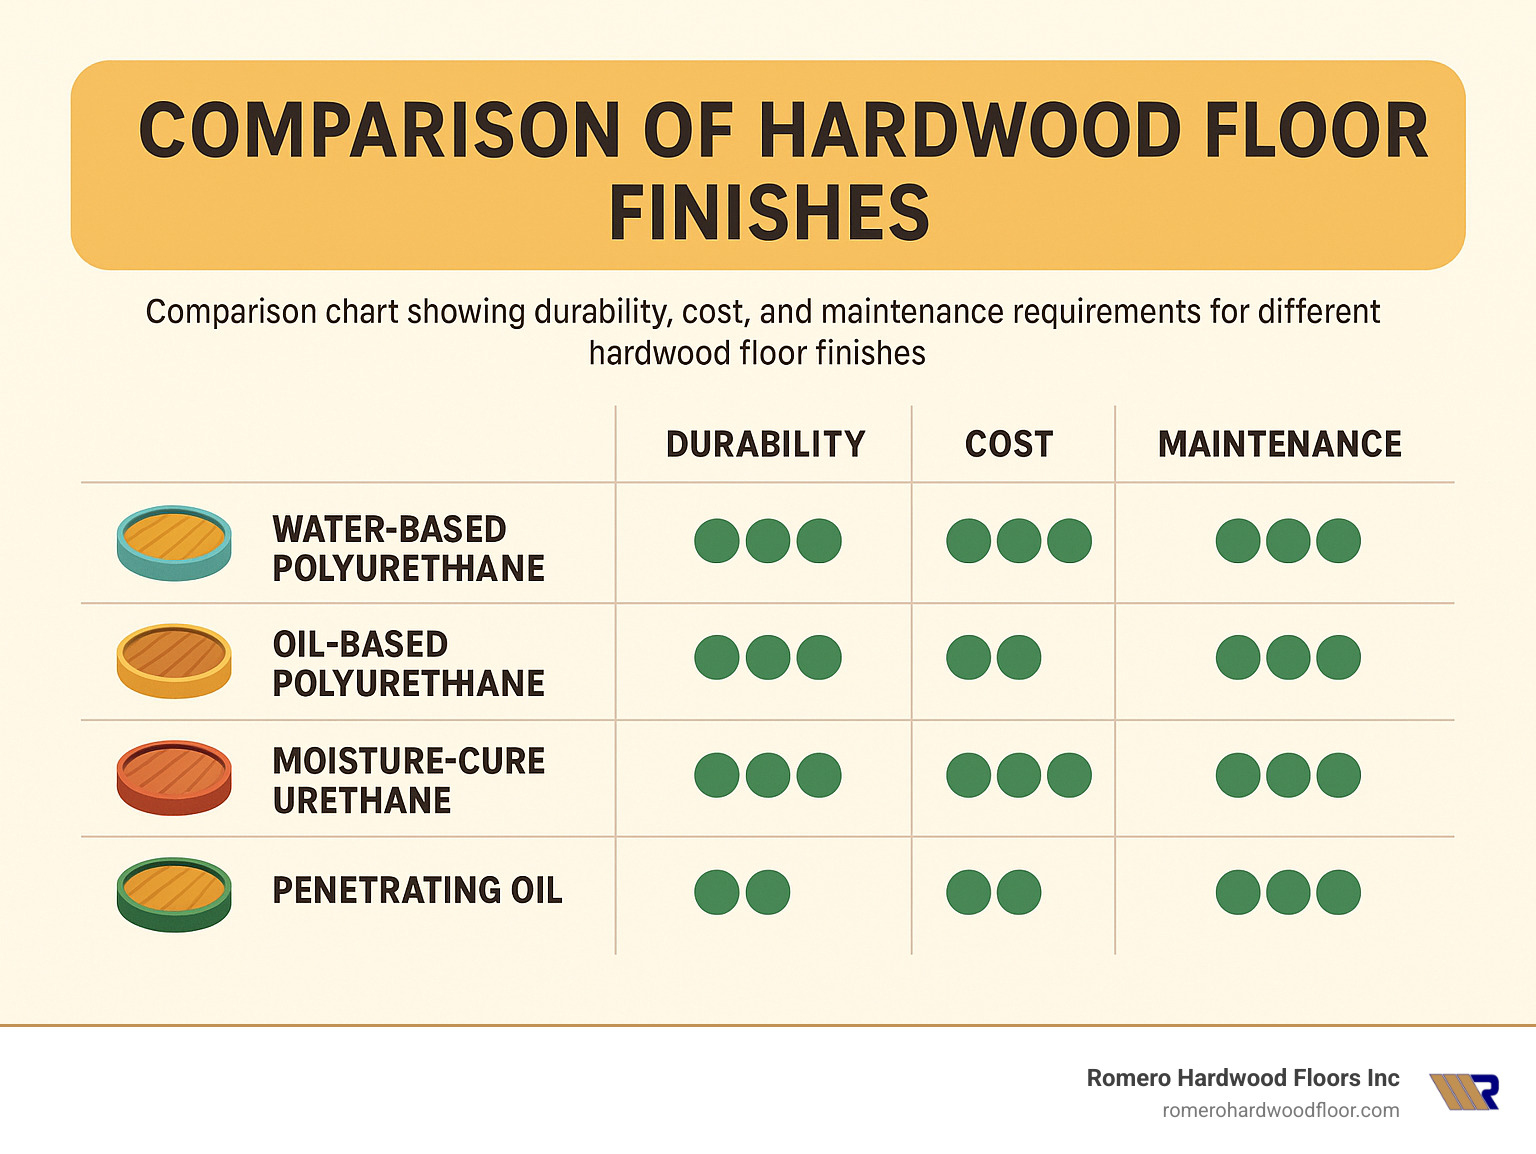
Choosing the right finish protects your restored floor while enhancing its natural beauty. The finish affects both appearance and maintenance for years to come.
Choosing the Right Finish for Restoring Old Floors
Oil-based polyurethane remains the gold standard for durability, creating that warm, amber glow. It takes 8-12 hours between coats but flows and levels beautifully.
Water-based polyurethane works faster and keeps wood’s natural color intact. It’s easier on your lungs with lower VOC levels and dries in 3-4 hours.
Traditional wax finishes give floors that soft, natural glow with excellent repairability. Hard-wax oil finishes offer the best of both worlds—they soak in like oil but provide surface protection like wax.
For detailed information on oil finishes, check this scientific research on oil finishes.
Pro-Level Application Techniques
Maintaining a wet edge prevents lap marks. Work systematically, always blending into previously applied areas while still workable.
Lambswool applicators distribute finish more evenly than brushes or rollers. Buffing between coats with 220-grit sandpaper removes imperfections and improves adhesion.
The water-popping method using denatured alcohol and water raises grain slightly, allowing stain to penetrate more evenly and preventing blotchy areas.
Longevity & Maintenance Tips
Recoating every few years prevents the need for full refinishing. When finish looks dull or shows wear patterns, a fresh topcoat brings back the shine at a fraction of refinishing cost.
Felt pads under furniture act like insurance policies. Replace them regularly—worn pads cause more damage than no pads. Humidity control between 30-50 percent minimizes wood movement and prevents gaps or cupping.
When issues arise, our guide on fixing warped hardwood floors provides solutions.
Safety, Budget & Common Pitfalls
Restoring old floors can be rewarding, but cutting corners on safety or rushing important steps leads to serious problems.
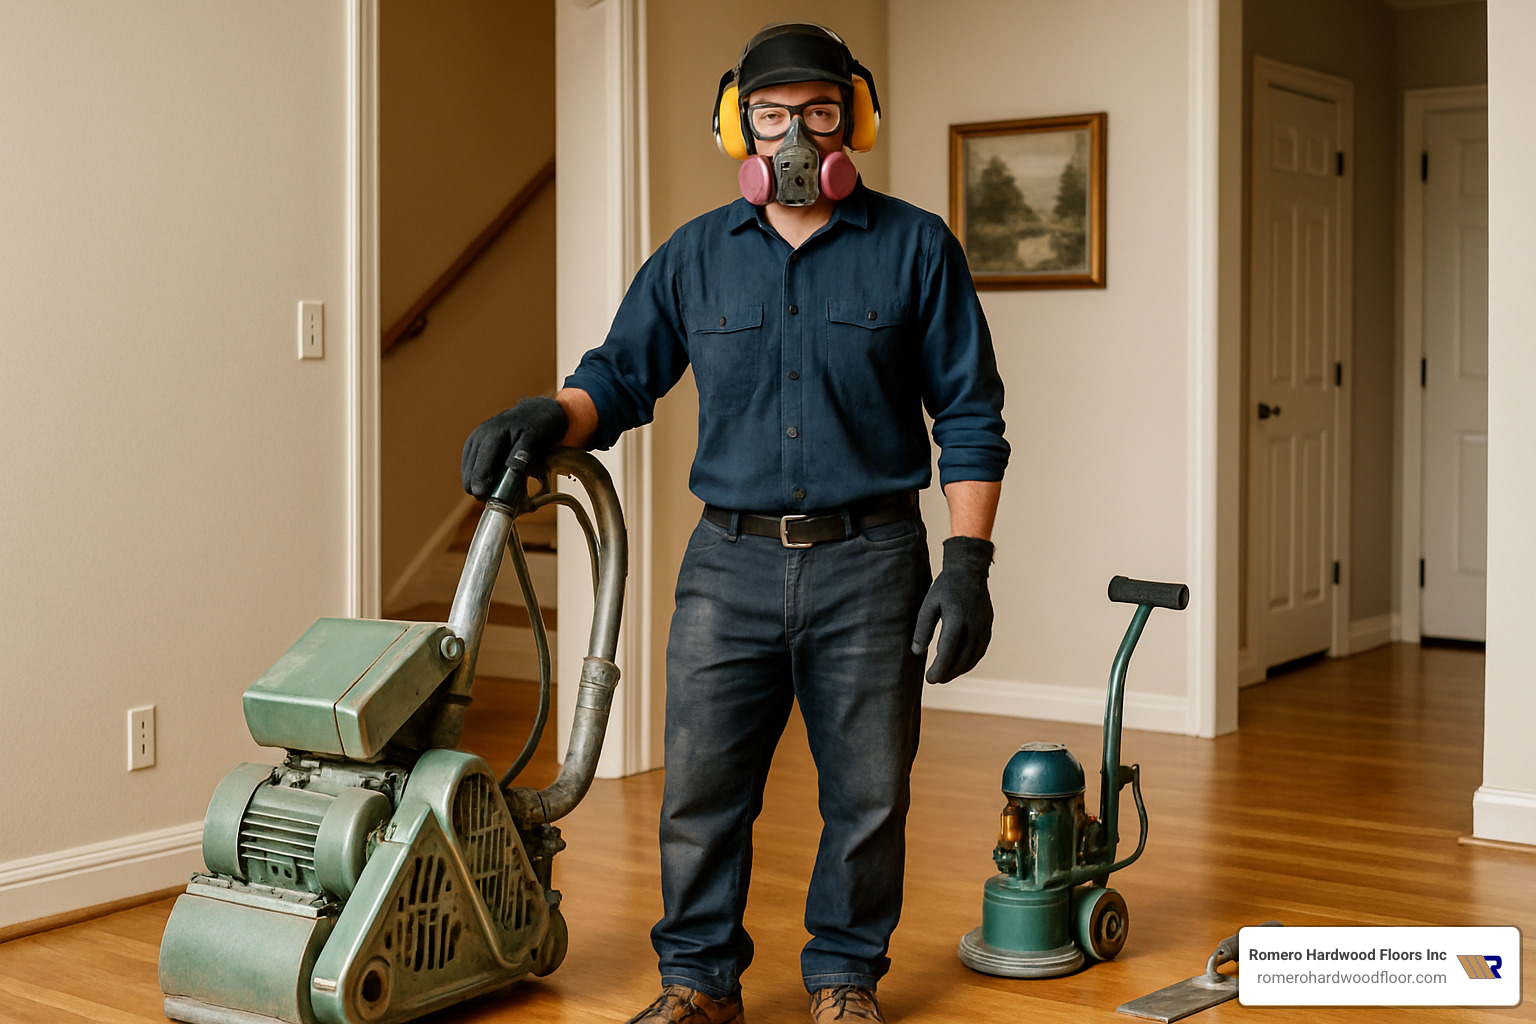
Ear protection prevents permanent hearing damage from loud sanders. Fire risk from dust is real—fine sawdust can ignite spontaneously. Keep areas well-ventilated and clean up dust regularly.
Lead paint awareness is critical for homes built before 1978. Test for lead content and follow EPA guidelines for safe work practices.
Based on average internet data (not Romero Hardwood Floors Inc pricing), DIY restoration costs typically range from $500 to $2,000, while professional services range from $1,500 to $15,000 depending on square footage and complexity.
Mistakes to Avoid When Restoring Old Floors
Skipping grits creates scratches that show through your finish. Each grit serves a specific purpose—don’t skip steps.
Stopping the drum sander while touching the floor creates permanent gouges. Keep sanders moving whenever running.
Ignoring acclimation for repair materials causes problems later. Wood needs time to adjust to your home’s temperature and humidity.
Historic Home Considerations
Minimal sanding preserves original thickness and character. Sometimes accept minor imperfections that tell the home’s story.
Matching reclaimed wood for repairs maintains authentic appearance. Preservation ethics means balancing restoration with conservation—not every mark needs removal.
Frequently Asked Questions about Restoring Old Floors
After helping hundreds of homeowners in Revere, Beverly, and surrounding communities, the same questions come up repeatedly about restoring old floors.
Is sanding always necessary?
No—sanding isn’t always required. If your floor has only minor surface scratches and existing finish has life left, screening might suffice. This involves light sanding with fine grit (120-150) followed by fresh finish—much gentler and less expensive.
Examine floors under good lighting. If scratches don’t penetrate the finish to bare wood, and finish isn’t flaking or completely worn in high-traffic areas, screening might work.
However, floors with deep gouges, water stains that penetrated wood, peeling finish layers, or areas worn to bare wood need full sanding for professional results.
How do I know my floor’s finish type?
Try the water-drop test in an inconspicuous corner. If water beads up and sits on the surface, you have polyurethane finish. If water creates a white ring, you likely have shellac or varnish. If water soaks in immediately, the floor is unsealed or finish has worn away.
Home age provides clues—homes built before 1960 often have traditional finishes like shellac, varnish, or wax. Understanding finish type determines the best removal method and what new finish works best.
What’s the typical downtime for a household?
Plan on your space being off-limits for 4 to 7 days. Preparation and sanding take 1-2 days, staining adds another day, and applying finish takes 2-3 days for multiple coats.
You can walk on floors with socks after 24-72 hours, but wait a full week before moving furniture back. Water-based finishes dry faster—ready for recoating in 3-4 hours and light traffic in 24 hours. Oil-based finishes take 8-12 hours between coats with longer cure times.
Conclusion
Restoring old floors gives your home a beautiful gift that keeps on giving. When you restore rather than replace, you’re breathing new life into pieces of history that have been waiting beneath your feet.
The heritage preserved through restoration connects you to craftsmen who originally installed these floors decades ago. Every restored plank tells a story, showcasing character that only time can create. Modern floors simply can’t replicate the charm and authenticity of well-restored historic hardwood.
Your investment is protected beyond immediate visual change. Property values increase significantly with properly restored historic floors, and buyers recognize the value of authentic materials and craftsmanship. The eco-friendly choice keeps valuable old-growth lumber out of landfills while avoiding environmental impact of harvesting new trees.
At Romero Hardwood Floors Inc, we’ve transformed countless floors throughout Revere, Peabody, Winchester, and surrounding Massachusetts communities since 2006. Our expertise in restoration techniques comes from years of working with historic materials while meeting today’s performance standards.
Francisco Romero and our team have seen how restoring old floors transforms not just rooms, but entire homes. The warmth and character from properly restored floors creates atmosphere that new materials cannot match. Our guaranteed workmanship ensures your restoration showcases your floors’ natural beauty for generations.
Whether you tackle this project yourself or work with professionals, patience and respect for materials are your best tools. The process takes time, but the results—floors that honor your home’s history while providing modern durability—make every step worthwhile.
Ready to find treasures beneath your current flooring? Our comprehensive floor refinishing and resurfacing services can transform those hidden gems into stunning focal points. Let’s work together to bring your floors’ story back to life.
