flooring restoration and refinishing: 7 Powerful Tips for Success 2025
The Truth About DIY Floor Refinishing
I’ve seen the look of determination on homeowners’ faces when they decide to tackle flooring restoration and refinishing themselves. That sparkle of DIY ambition is admirable! But before you rent that drum sander, let’s have an honest chat about what you’re getting into.
Flooring restoration and refinishing can absolutely transform tired hardwood into stunning surfaces that make you fall in love with your home all over again. The question isn’t whether it’s possible, but whether DIY is the right path for your specific situation.
Quick Answer: Is DIY Floor Refinishing Worth It?
| Consideration | DIY Refinishing | Professional Service |
|—————|—————-|———————|
| Cost | $1-3/sq ft for materials | $3-12/sq ft total |
| Time | 3-7 days for beginners | 2-5 days with pros |
| Skill Level | Requires careful technique | Expert results guaranteed |
| Equipment | Rental costs: $150-300 | Included in service |
| Dust Control | Limited with rentals | Pros use dustless systems |
| Common Issues | Uneven sanding, visible edges | Minimal with experienced pros |
Here’s something most articles won’t tell you: in my 15+ years of experience, I see about 2-3 DIYers every month who call us in a panic halfway through their project. The drum sander left deep gouges, the edges look noticeably different from the center, or they simply underestimated the physical demands of the work. There’s no shame in this – floor refinishing has a steeper learning curve than most home improvement projects.
Want a simple test to know if refinishing is even needed? Try the water droplet test. Just place a few drops of water on your floor in a high-traffic area. If they bead up nicely, your finish is still doing its job. If they soak in quickly, leaving a dark spot, your protective finish has worn away and it’s time for action.
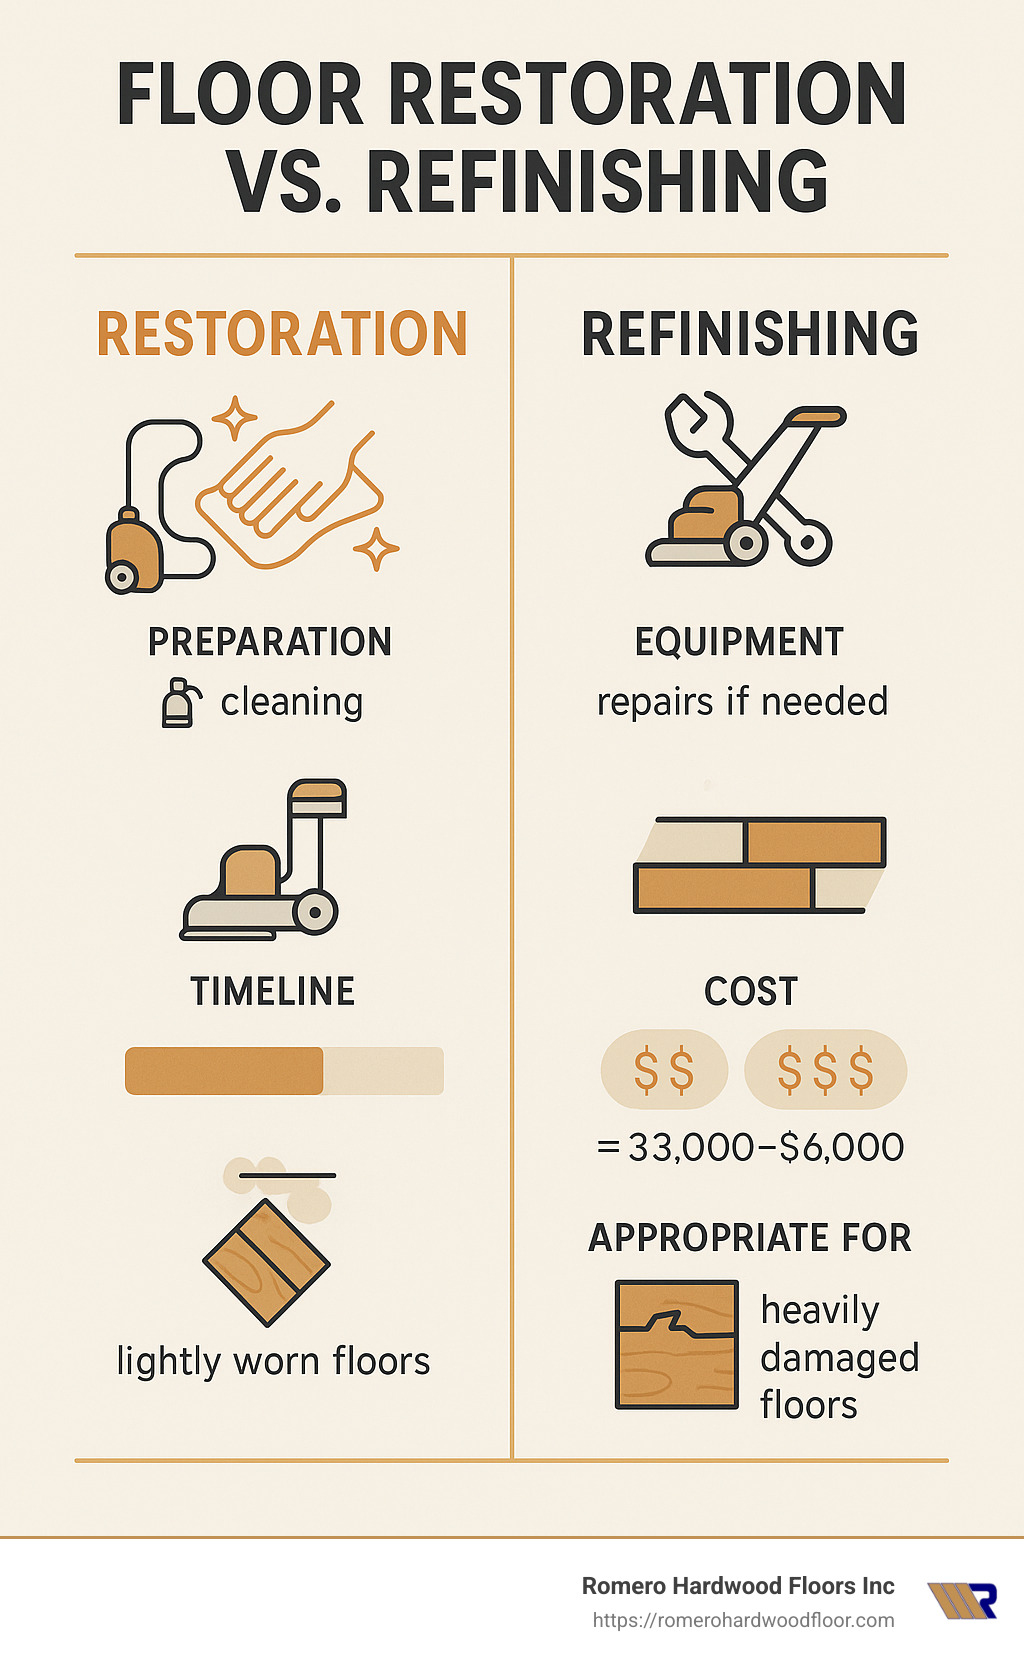
Restoration vs. Refinishing: What’s the difference?
Many people use these terms interchangeably, but they’re quite different:
Refinishing addresses surface-level wear by sanding down the existing finish and applying fresh stain and polyurethane. This typically takes 3-5 days and is appropriate when your floor’s structure is sound but the surface looks worn.
Restoration goes deeper, repairing structural damage including warped boards, deep gouges, and even subfloor issues. This can take up to 2 weeks depending on the extent of repairs needed, but can save historically significant floors or severely damaged hardwood.
I’m Francisco Romero, owner of Romero Hardwood Floors Inc., and I’ve guided countless Boston-area homeowners through this decision. Some DIY successfully, while others benefit from professional expertise. There’s no one-size-fits-all answer, but understanding what you’re facing helps make the right choice.
If you’re facing more serious floor issues, you might want to explore these flooring restoration and refinishing resources:
– Hardwood Floor Repair – For addressing specific damaged areas
– Fixing Warped Hardwood Floors – When moisture has caused cupping or crowning
– Warped Wood Repair – Techniques for straightening distorted boards
In the next sections, we’ll dive deeper into both DIY approaches and professional services so you can make an informed decision that gives your floors the care they deserve.
Restoration vs Refinishing: Know the Difference
Your hardwood floors tell a story—sometimes it’s about years of family gatherings, sometimes it’s about that time you dropped a cast iron pan in the kitchen. Understanding whether your floors need a simple refresh or major surgery can save you time, money, and heartache.
Refinishing is like giving your floors a facial. It focuses on surface-level improvements:
– Sanding away a thin top layer (about 1/32″)
– Stripping off old, worn finish
– Applying fresh stain (if you want to change or improve color)
– Sealing everything with protective polyurethane
Restoration, on the other hand, is more like physical therapy for your floors. It digs deeper to address:
– Structural problems that affect how your floor feels underfoot
– Replacing boards that have seen better days
– Fixing issues in the subfloor (the hidden foundation)
– Eliminating those annoying squeaks and gaps
– And yes, refinishing everything once the repairs are done
As Lance Hemsarth from Minwax puts it, “refinishing addresses cosmetic issues, while restoration tackles the underlying structural problems that affect floor performance and longevity.”
| Feature | Refinishing | Restoration |
|---|---|---|
| Timeline | 3-5 days | 1-2 weeks |
| Focus | Surface appearance | Structural integrity + appearance |
| Cost Range | $3-8 per sq ft | $5-25 per sq ft |
| DIY Difficulty | Moderate to High | Very High |
| Equipment Needed | Drum sander, edger, buffer | Specialized tools, board replacement equipment |
| Frequency Needed | Every 7-10 years | Every 20-30 years or when damaged |
Signs You Need Refinishing
Not sure if your floors just need a facelift? Here’s how to tell:
The water droplet test is your simplest diagnostic tool. Place a few drops of water on your floor—if they soak in rather than sitting prettily on top, your protective finish has worn away. Time for refinishing!
Surface scratches that haven’t gouged deeply into the wood can usually be sanded away during refinishing. Those white lines from moving furniture? Typically just surface damage.
When your floors look dull despite regular cleaning, your polyurethane has likely worn thin. No amount of polish will bring back that shine—only refinishing will do the trick.
Edge wear appears first in high-traffic zones like doorways and hallways. If you notice these areas looking duller or more scratched than the rest, refinishing can even things out.
A client from Revere once told us: “I thought my floors were beyond saving with all the scratches from my dogs, but after refinishing, they look brand new again.” We hear this kind of happy surprise all the time!
For more detailed information about your options, check out our Floor Restoration page.
Signs You Need Full Restoration
Sometimes your floors need more than just a pretty face. Here’s when to call in the restoration cavalry:
Cupping or crowning happens when moisture causes boards to warp—either concave (cupping) or convex (crowning). This isn’t just an appearance issue; it signals moisture problems that need addressing.
When boards buckle and pull away from the subfloor, sometimes rising several inches, you’re looking at a restoration job. This usually happens after flooding or severe moisture exposure.
Missing or broken boards create more than just an eyesore—they’re trip hazards and can lead to further damage. Board replacement is a restoration task that needs to happen before any refinishing.
If your floor has soft spots that feel spongy underfoot, beware! This often indicates rot or subfloor damage that refinishing alone can’t fix.
Historical floors in older homes deserve special care. Restoration techniques can preserve their unique character while ensuring they’ll last another century.
Excessive squeaking might seem like a minor annoyance, but it often signals loose boards or subfloor issues that need proper restoration.
After significant water damage, floors often turn gray or black—a sign the damage goes deeper than the surface. One Salem homeowner shared: “After a pipe burst, several boards were warped beyond repair. The restoration team not only replaced the damaged sections but matched the 100-year-old oak perfectly.”
At Romero Hardwood Floors, we’ve been helping Boston-area homeowners make this decision since 2006. Whether your floors need a simple refresh or major rehabilitation, we’ve got the expertise to guide you to the right solution.
Flooring Restoration and Refinishing Without Tears: DIY Step-By-Step
Ready to tackle your hardwood floors yourself? I’ve guided hundreds of homeowners through this process, and I’ll be honest – flooring restoration and refinishing is rewarding but challenging. This isn’t a weekend project, but with careful preparation and the right approach, you can achieve beautiful results.
Before you rent that drum sander, take a moment to gather everything you’ll need. Your local home improvement store typically rents the big equipment – expect to spend about $55-75 daily for a drum sander, $35-45 for an edger, and $25-35 each for a buffer and shop vacuum. You’ll also need to purchase multiple grits of sandpaper (coarse 36/40, medium 60/80, and fine 100/120), protective gear, and finishing supplies.
The most important tool? Patience! As one of my customers joked, “I thought I was saving money on labor, but I didn’t factor in the cost of my sanity!”
Flooring Restoration and Refinishing: Decision Flowchart
First things first – not all floors are candidates for DIY refinishing. You need to determine what you’re working with:
Solid vs. Engineered Wood: Solid hardwood can typically handle 4-6 refinishing cycles over its lifetime, while engineered floors usually can only be refinished once or twice due to their thinner wear layer.
The 1/8-inch rule is critical here – you need at least 1/8″ of wood above the tongue and groove for safe refinishing. Any less and you risk damaging your floor’s structural integrity.
For engineered floors, try the nickel test – if the wear layer is thinner than the edge of a nickel (about 3mm), you might need professional help or replacement instead of refinishing.
When in doubt, get a professional opinion. I’ve seen too many DIYers realize halfway through that their engineered floors couldn’t handle a full sanding. For detailed guidance on the sanding process itself, our How to Sand Hardwood Floors guide will walk you through each step.
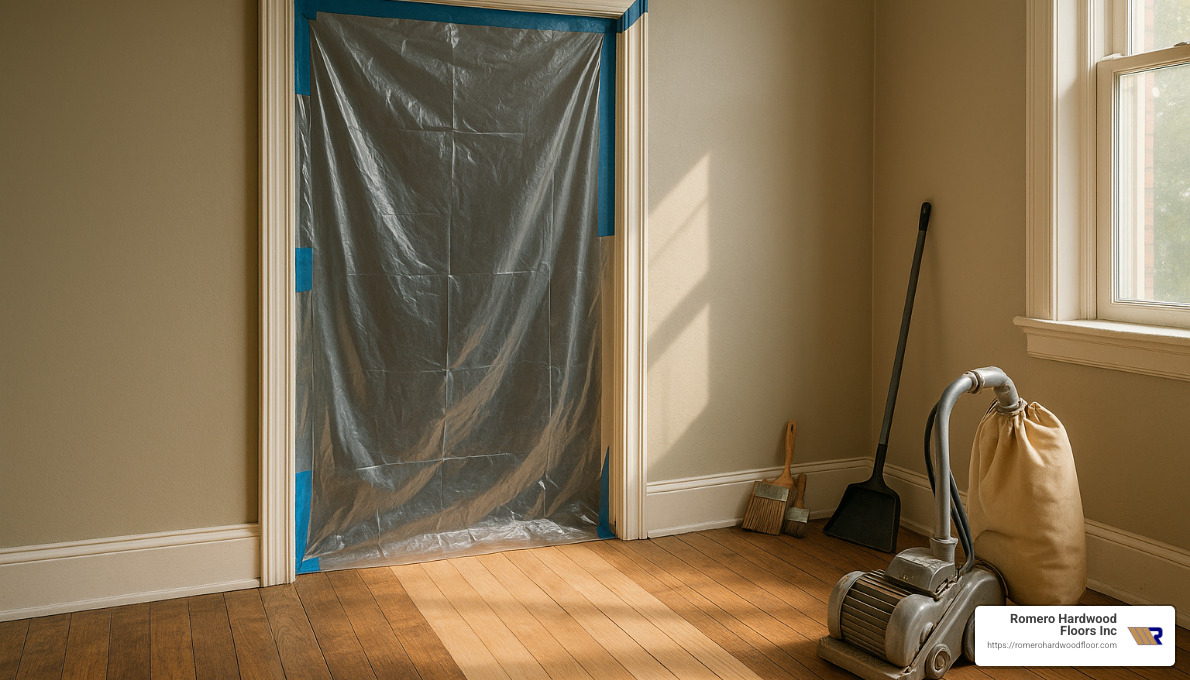
Preparation & Room Setup
Proper prep isn’t just helpful – it’s essential. Your future self will thank you for taking the time to set up correctly.
Start by clearing the room completely – furniture, curtains, pictures, everything. Next, create a dust containment system by sealing off the area with plastic sheeting and painter’s tape. Cover doorways, vents, and cabinet edges to prevent dust from migrating throughout your home.
Before sanding, check for protruding nails that could damage your sander (and potentially cause sparks). Use a hammer and nail set to countersink any you find. If possible, remove baseboards and quarter round molding, labeling each piece for easier reinstallation later.
Take time to check your floor’s integrity – repair loose boards and fill large gaps before starting. Finally, vacuum thoroughly to remove all debris.
One safety tip I always emphasize: Never store bags of sawdust indoors! They can spontaneously combust. Always dispose of sawdust outdoors immediately after collection.
Sanding or Screening Passes
The sanding process is where DIY refinishers typically face the biggest challenges. Here’s my approach after years of experience:
Start with coarse-grit sandpaper (36-40) for floors with thick finishes or significant damage. For floors with minimal finish, you might begin with 60 grit instead. The key is to maintain proper technique – keep the sander moving constantly, overlap passes by about a third, and always sand with the grain when possible.
Never, ever let the drum hit the floor while stationary – it will create a depression that’s nearly impossible to fix without replacing boards.
After your initial pass, vacuum thoroughly and progress through the grits – medium (60-80) and then fine (100-120). Each pass removes the scratches left by the previous grit.
For those tricky perimeter areas, use an edge sander working through the same grit progression. You’ll need to hand-sand corners and tight spots that machines can’t reach.
Finish with a buffer and screening pad (120-150 grit) to blend any edger marks with the main floor and create a uniform surface for finishing.
One homeowner from Marblehead told me, “The hardest part was keeping the drum sander moving consistently. My first attempt left visible waves in the floor that I had to resand.” Take your time – rushing leads to mistakes that are difficult to correct.
For truly professional results, many homeowners ultimately choose our Floor Sanding & Floor Refinishing services after realizing the skill involved.
Staining & Finish Coats
Once you’ve achieved that beautifully sanded surface, it’s time for staining (if desired) and finishing – the steps that will define how your floors look for years to come.
Begin by removing all dust with a thorough vacuuming, followed by wiping the entire floor with a tack cloth. Even tiny dust particles can ruin your finish, creating a gritty surface.
If you’re staining, apply it with a lambswool applicator, working in manageable sections and wiping excess after a few minutes. Allow 24-48 hours for complete drying before applying any finish coats.
When choosing your finish, you have two main options:
Oil-based polyurethane offers greater durability and a warm amber glow that many homeowners love. However, it comes with stronger odors, longer dry times (24+ hours between coats), and yellows over time.
Water-based polyurethane provides low odor, quick drying (2-3 hours), and remains clear rather than yellowing. The trade-offs are slightly less durability, higher cost, and typically requiring more coats.
Apply thin, even coats using a lambswool applicator, T-bar, or synthetic pad. The secret is maintaining a wet edge to prevent visible lap marks. Allow proper drying time between coats (follow the manufacturer’s instructions precisely), and lightly sand between coats with 220-grit sandpaper or a screening pad.
Plan on applying 3 coats for oil-based or 4 coats for water-based polyurethane. While floors may be walkable within 24-48 hours, full curing takes 7-30 days depending on the product. Avoid placing furniture or rugs until fully cured.
For quality stains and finishes suitable for DIY application, Minwax offers excellent options that balance quality and ease of use.
Flooring Restoration and Refinishing: Common Mistakes
Even experienced DIYers make these common mistakes during flooring restoration and refinishing:
Skipping sandpaper grits leaves visible scratches that become glaringly obvious after applying finish. Always work through the complete progression.
Gouging edges happens when you let the edger dig into the floor, creating permanent damage that’s difficult to hide. Keep the edger moving and maintain light pressure.
Inadequate dust removal between steps traps particles in your finish, creating a rough surface. Vacuum thoroughly and use tack cloths between every step.
Applying finish too thick leads to bubbles, extended dry times, and potential peeling. Multiple thin coats always outperform fewer thick ones.
Creating lap marks occurs when you fail to maintain a wet edge during finishing. Once you start a section, complete it without stopping.
Rushing between coats without allowing proper drying time results in finish failure – often not visible until days later when the floor begins to cloud or peel.
Walking on floors too soon can permanently damage the finish. Follow curing guidelines religiously, even if it means staying out of the room longer than you’d like.
As one satisfied customer noted after deciding to hire our professionals instead: “Amazing company, will hire again definitely! Clean, respectful, and professional!”
Sometimes the best DIY decision is knowing when to call the experts. At Romero Hardwood Floors, we’ve rescued many DIY projects that hit unexpected challenges, turning potential disasters into beautiful floors that last for decades.
Methods, Costs & Timelines Compared
Let’s be honest – when it comes to flooring restoration and refinishing, there’s no one-size-fits-all approach. Each method has its own set of benefits, drawbacks, and ideal use cases that can make all the difference in your project’s success.
Method Showdown
The world of floor refinishing has evolved significantly over the years, giving homeowners more options than ever before. Let’s break down the main contenders:
Traditional Sanding remains the gold standard for seriously damaged floors. Using powerful drum and edger sanders, this method removes the old finish and a thin layer of wood to create a fresh canvas. While it’s the most thorough option and allows for complete color changes, it does generate significant dust and requires skill to avoid damaging your floors. I’ve seen many a DIYer create unwanted “waves” in their floors with improper drum sander technique!
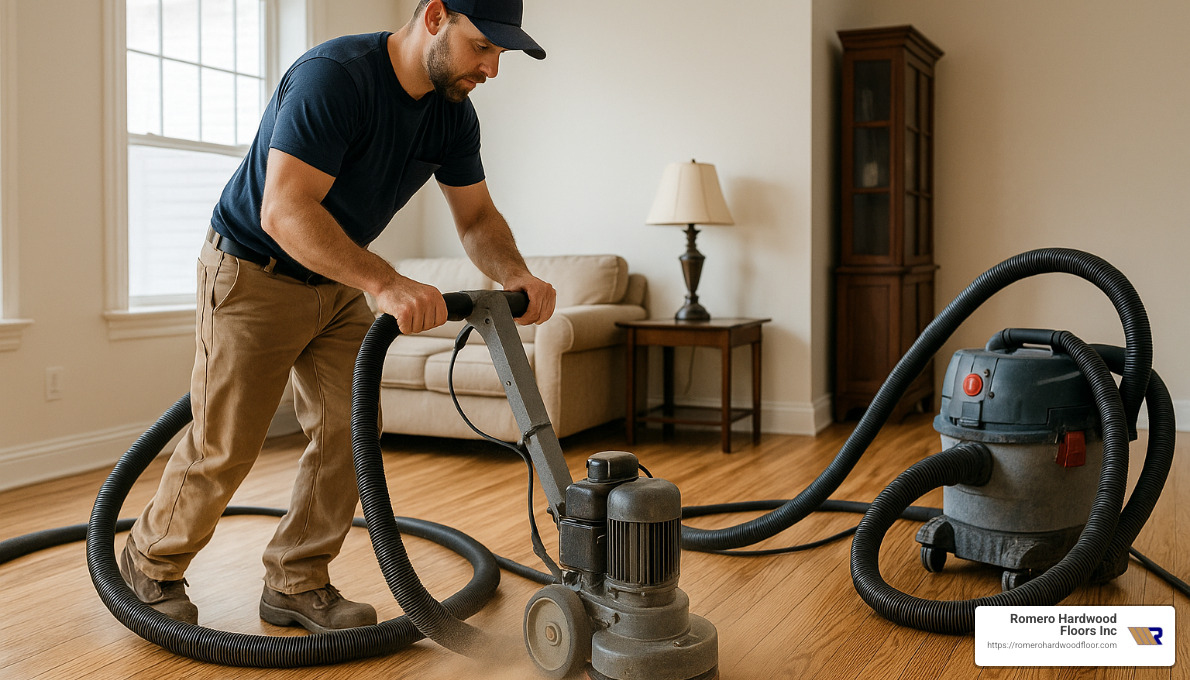
Dustless HEPA Sanding is the cleaner cousin of traditional sanding. The process is essentially the same, but with powerful vacuum systems that capture 90-95% of the dust. This is a game-changer for homes with asthma sufferers or when moving out isn’t practical. One client told me, “I couldn’t believe how clean the house was after dustless sanding – nothing like the horror stories I’d heard about refinishing!”
Sandless (Chemical) Refinishing uses specialized chemicals to etch the old finish before applying new coats. The biggest advantage? It can be completed in a single day with virtually no dust. The catch is that it can’t repair actual damage or change the color – it only refreshes the appearance of floors that are in decent shape to begin with.
Screening and Recoating is like giving your floors a facial rather than a facelift. The process lightly abrades the existing finish with a buffer and screening pad before applying a new topcoat. It’s quick, creates minimal dust, and can extend your finish’s life significantly. The key is timing – this only works on floors with intact finish and no deep wear.
Passive Refinishing is the specialized approach for historic treasures. Using gentle chemicals to remove surface contaminants without sanding, this method preserves the original material. It’s perfect for those antique floors where every scratch tells a story you want to keep.

Average Costs & Project Length
When budgeting for your flooring restoration and refinishing project, it helps to understand the typical investment ranges. Please note that the following are average costs based on internet data and not actual costs for Romero Hardwood Floors Inc.
Traditional Sanding typically runs $3-$12 per square foot and takes 3-5 days to complete. This wide range reflects variables like your location, floor condition, and whether you’re changing stain colors. It’s the go-to for floors with deep damage or when you want a completely different look.
Dustless HEPA Sanding commands a premium at $5-$15 per square foot with a similar 3-5 day timeline. The extra cost buys you cleaner air and less post-project cleanup. For families with allergies or respiratory issues, this premium is often well worth it.
Sandless Refinishing is easier on the wallet at $1.50-$5 per square foot and can be completed in just one day. If your floors just need a refresh and you’re on a tight timeline, this could be your best bet.
Screening and Recoating is the budget-friendly preventative option at $0.90-$4.50 per square foot, typically taking just 1-2 days. Think of it as maintenance rather than restoration – catch your floors before they show serious wear, and this can extend their life considerably.
Passive Refinishing ranges from $6-$18 per square foot and requires 3-7 days. The specialized nature of this service explains the higher price point, but for irreplaceable historic floors, it’s an investment in preservation.
Full Restoration represents the most comprehensive approach at $13-$40 per square foot over 1-2 weeks. This addresses not just the surface but structural issues as well – replacing damaged boards, fixing subfloor problems, and eliminating squeaks before refinishing.
Your project timeline can stretch or shrink based on several factors: the square footage (larger areas naturally take longer), existing floor condition, furniture that needs moving, whether you’re applying stain (which adds 24-48 hours), your finish choice (oil-based takes longer to dry than water-based), and even the humidity and temperature in your home.
For a deeper dive into our professional refinishing services, check out our Hardwood Floor Repair and Refinishing page.
When to Hire a Pro vs DIY
The DIY route certainly has its appeal – mainly to your wallet. But before you rush to rent that drum sander, consider whether it’s truly the right approach for your situation.
DIY makes sense when you already have experience with power tools (a drum sander is not the equipment to learn on!), your project covers a relatively small area under 300 square feet, the damage is mostly cosmetic, you have nearly a week to dedicate to the project, you’re physically up for handling heavy equipment, and saving money is your primary goal.
Professional help is worth considering when your floors have significant damage, you’re dealing with engineered hardwood that has a thin wear layer (where mistakes can be catastrophic), your flooring has historical significance, you need dustless refinishing for health reasons, you want specialty finishes or precise color matching, your time is limited, or you value the peace of mind that comes with warranty protection.
I’ve personally witnessed countless DIY attempts gone wrong. As one contractor in our network observed, “We typically intercept 2-3 DIY refinishing jobs per month where homeowners give up after hours of unproductive sanding.” The most common issue? Uneven sanding that creates visible waves in the floor – a problem that often requires even more aggressive sanding to fix.
When you consider the value of your floors and the cost of potential mistakes, professional refinishing often represents the better long-term investment. For help finding qualified professionals in your area, our Floor Refinishers Near Me guide can point you in the right direction.
For more specific information about our refinishing services, visit our Floor Refinishing Service page.
Health, Safety & After-Care
Flooring restoration and refinishing can transform your home beautifully, but it’s also important to consider the health aspects of the process—both during the project and long after the last coat of polyurethane has dried.

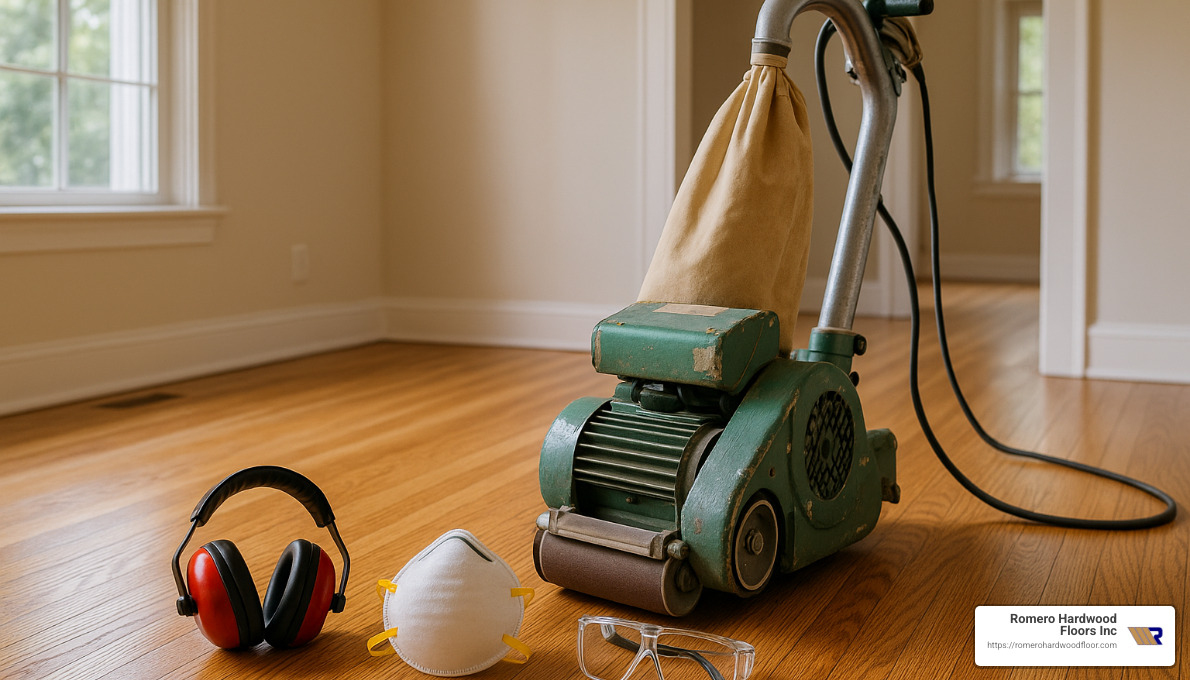
Ventilation & Protective Gear
When I talk to homeowners about safety during refinishing projects, I always emphasize that proper protection isn’t optional—it’s essential.
Your lungs deserve better than standard dust masks. Always wear a proper N95 respirator (or better) when sanding or applying finishes. The microscopic wood particles from sanding can penetrate deep into your lungs, while finish fumes contain chemicals you definitely don’t want to breathe.
Your eyes and ears need protection too. Safety glasses shield against flying debris and chemical splashes, while ear protection is non-negotiable when operating drum sanders—these machines typically generate noise levels above 85 decibels, which can permanently damage your hearing after just a few hours of exposure.
Creating a smart ventilation strategy makes all the difference in air quality. I recommend sealing off vents with plastic sheeting to prevent dust from circulating throughout your home. Position fans in windows to create cross-ventilation, with some blowing outward to create negative air pressure that draws fumes outside. This ventilation should continue for 24-72 hours after applying finish.
VOCs are a big concern with traditional oil-based polyurethanes, which can off-gas for weeks. Water-based finishes have significantly lower VOC levels, making them a better choice for households with children, elderly members, or people with respiratory conditions. For particularly sensitive individuals, consider low-VOC or zero-VOC products, which have come a long way in quality and durability.
“We had a client with severe asthma who needed her floors refinished,” recalls Francisco Romero. “We used a combination of dustless sanding equipment and zero-VOC finishes, allowing her to remain in the home throughout most of the process with no breathing difficulties.”
After finishing, some temporary lifestyle adjustments are wise. Keep pets off newly finished floors for at least 7 days (their claws can damage uncured finish). Children should wear socks instead of going barefoot for about two weeks. And pregnant women or those with respiratory conditions should minimize exposure to freshly finished areas until the cure is complete.
For more scientific information about indoor air quality considerations during refinishing, the National Wood Flooring Association offers excellent resources at Scientific research on indoor air quality.
Maintenance to Maximize Lifespan
The first month after refinishing is critical for your floor’s long-term performance. Treat your newly refinished floors gently during this time—no shoes, no area rugs, and cleaning only with a dry microfiber mop. Maintaining moderate humidity between 40-60% helps the finish cure properly without cracking or bubbling.
Daily care is simpler than most people think. A good microfiber dust mop used several times weekly prevents tiny grit particles from scratching your finish. Clean spills immediately, but avoid excessive moisture. One client told me, “I was surprised how little maintenance my refinished floors needed—just a quick dust-mopping a few times a week keeps them looking amazing.”
Little preventative steps make a big difference. Place felt pads under all furniture legs to prevent scratches when pieces are moved. Use high-quality entry mats at all exterior doors to trap dirt and moisture before they reach your beautiful floors. Strategic placement of area rugs (with breathable backing) in high-traffic zones can significantly extend finish life.
Sunlight can be surprisingly damaging to hardwood floors. Consider using window treatments to prevent UV fading, especially in rooms with southern exposure. One homeowner in Swampscott shared: “After investing in a professional refinishing job, I follow their maintenance plan religiously, including keeping my blinds partially closed during peak sun hours. Five years later, my floors still look new.”
The secret to long-lasting floors isn’t just good initial refinishing—it’s proactive maintenance. Consider scheduling a professional screening and recoating every 3-5 years before visible wear occurs. This simple step can double or triple the time between full refinishing projects, saving you thousands over the life of your floors.
Seasonal humidity changes can affect your floors dramatically. In New England, winter heating can cause wood to shrink and create gaps between boards, while summer humidity can cause expansion. Using a humidifier in winter and dehumidifier in summer helps maintain optimal conditions for your hardwood.
For more detailed guidance on maintaining your beautiful floors for decades to come, visit our Refinish Hardwood Floors page.
Conclusion
Flooring restoration and refinishing is a journey that can transform worn, damaged hardwood into stunning surfaces that become the centerpiece of your home. Whether you’ve tackled this as a DIY warrior or entrusted the work to professionals, the results directly impact not just how your floors look today, but how they’ll perform for decades to come.
For the brave DIY souls among us, refinishing offers a tremendous sense of accomplishment and significant cost savings. There’s something deeply satisfying about running your hand across a smooth, gleaming surface you restored yourself. However, it’s important to recognize that the path isn’t easy – the equipment can be temperamental, the techniques take practice to master, and mistakes aren’t always fixable. As one of our customers in Medford told us, “I thought I’d save a few hundred dollars doing it myself, but after renting equipment three times to fix my mistakes, I should have called professionals from the start!”
The professional advantage becomes clear when you consider:
– Peace of mind with results backed by experience and warranty protection
– Health benefits from advanced dustless technology that protects your family
– Time efficiency that gets your home back to normal in days, not weeks
– Access to premium commercial-grade finishes that last longer
– Expert assessment that determines whether you need simple refinishing or more comprehensive restoration
Since 2006, Romero Hardwood Floors Inc. has been breathing new life into tired hardwood throughout the Greater Boston area. Our team approaches every job with the perfect balance of technical expertise and artistic craftsmanship. We understand that these aren’t just floors – they’re the stage where your family’s memories unfold.
From Beverly to Chelsea, Danvers to East Boston, we’ve helped countless homeowners refind the beauty hiding beneath years of wear. Our specialized equipment and proven techniques ensure results that don’t just look good on day one, but continue to impress for years after we’ve packed up our tools.
The floors beneath your feet are more than just wood – they’re the foundation of your home’s character and beauty. When you’re ready to reveal their true potential without the stress, dust, and uncertainty of DIY approaches, we’re here to help.
Ready to transform your tired hardwood into stunning surfaces that make you smile every time you walk through the door? Visit our hardwood floor repair page to explore our services or reach out for a personalized consultation.
Your floors have stories to tell. Let’s make sure the next chapter is their most beautiful one yet.
")