Hardwood Floor Repair Techniques: 10 Proven Fixes for 2025
Why Hardwood Floor Repair Matters
There’s something magical about hardwood floors. They bring warmth, character, and timeless beauty to any home. But as anyone who’s lived with wood floors knows, life happens – pets scratch, furniture drags, and that glass of red wine somehow finds its way to the floor.
That’s where hardwood floor repair techniques come into play. Knowing how to address different types of damage isn’t just about aesthetics – it’s about protecting your investment. A well-maintained hardwood floor can last generations, while neglected damage can lead to costly replacements.
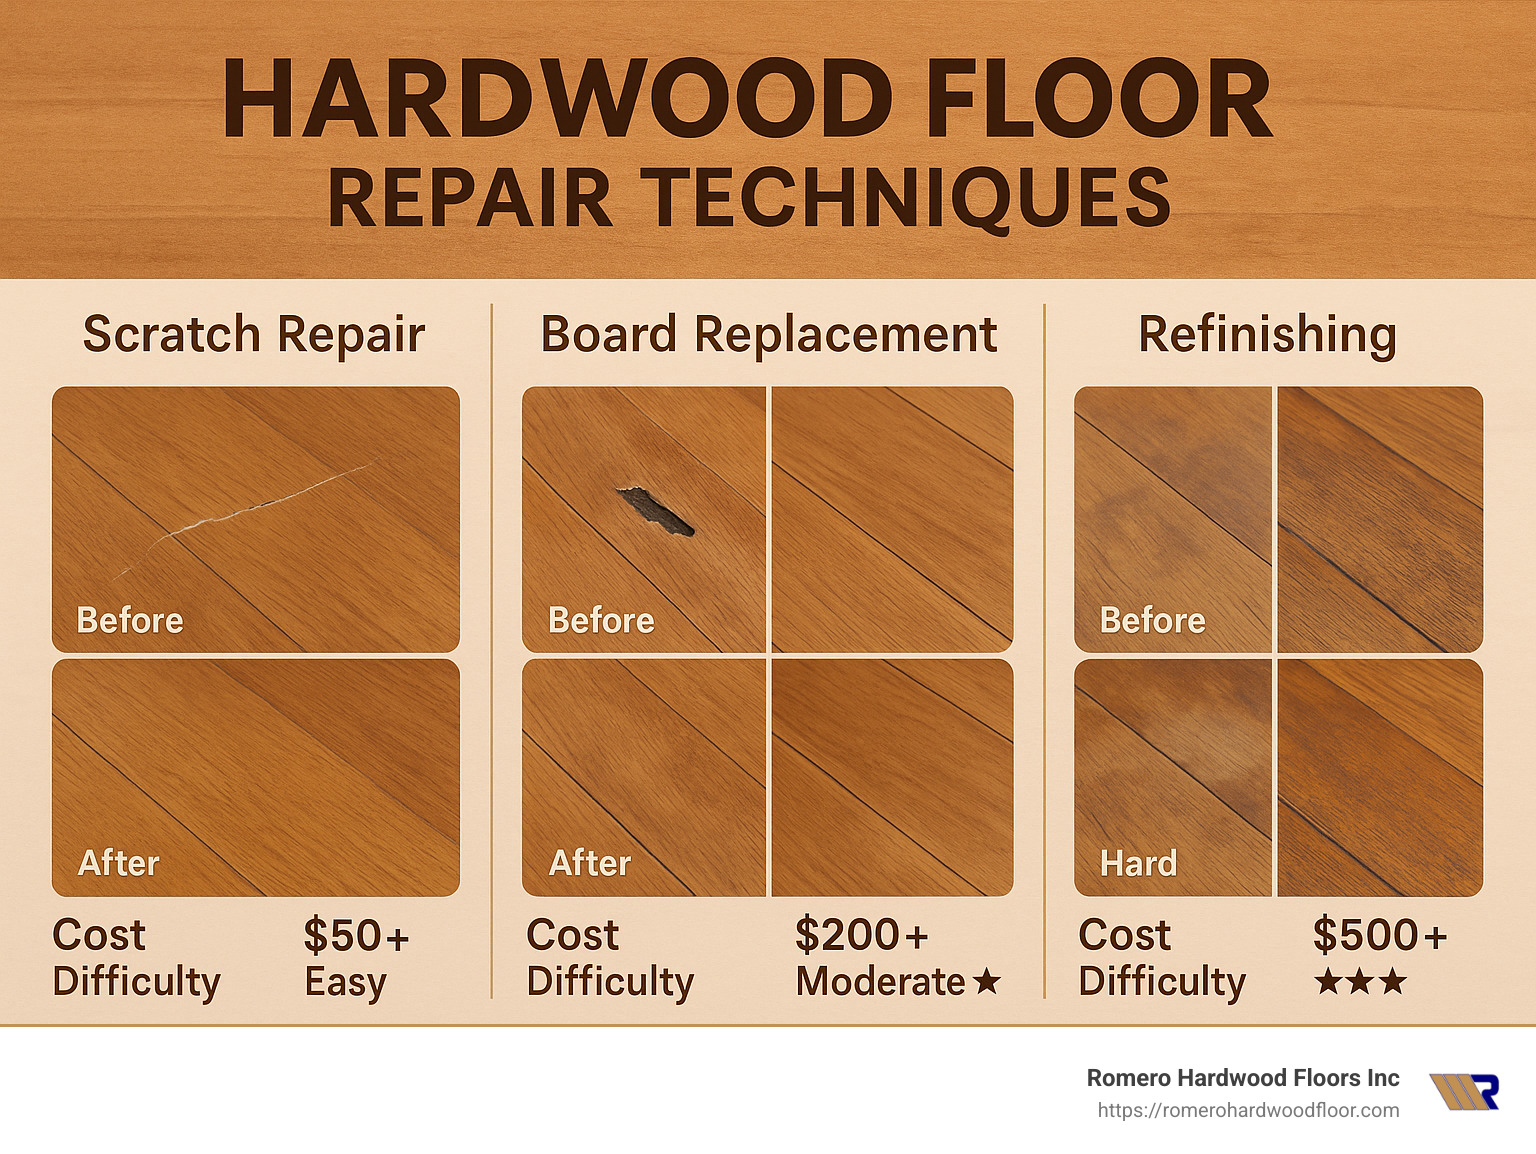
When you notice damage, understanding your options makes all the difference. For those tiny surface scratches, a simple color marker or walnut oil might do the trick. Deeper gouges might need wood filler and some refinishing work. Water stains often require sanding and bleaching, while those annoying squeaks can usually be fixed with shims and counter-screws. For seriously damaged planks, replacement is your best bet.
“Natural warmth and beauty make wood a favorite for floors,” as one restoration specialist put it. I couldn’t agree more. In my 15+ years working with hardwood floors throughout Revere, I’ve seen how proper repairs not only restore beauty but add decades to a floor’s life.
The economics make sense too. According to internet data, the average cost to repair wood floors ranges from $478 to $1,624, while complete replacement can run between $2,480 and $7,028 or more. That’s a compelling reason to repair rather than replace when possible.
Most hardwood floors can be refinished up to 10 times throughout their lifetime. Think about that – with proper care and timely repairs, your floors could outlast your mortgage!
I’ve always believed that hardwood floors tell a home’s story. Each scratch and dent is a memory – kids racing toy cars, holiday gatherings, the family dog skidding around a corner. With the right hardwood floor repair techniques, we don’t erase those stories – we just make sure they’re told in a beautiful way.
My name is Francisco Romero, owner of Romero Hardwood Floors Inc., and my team and I are passionate about helping homeowners preserve their hardwood floors’ beauty through expert repair solutions that respect both the wood’s character and structural integrity.
Assessing & Diagnosing Hardwood Floor Damage
Before diving into repairs, it’s crucial to properly assess and diagnose the damage to your hardwood floors. Different types of damage require different hardwood floor repair techniques, and correctly identifying the problem is the first step toward an effective solution.
Common Types of Damage
Walking across your hardwood floors every day, you might notice various issues developing over time. Those gorgeous oak planks that once gleamed with perfection can eventually show their age through several common problems.
Scratches range from light surface marks that only affect the finish to deep gouges that penetrate the wood itself. You might spot these when sunlight hits your floor at just the right angle, revealing a network of tiny lines you hadn’t noticed before.
Dents and gouges happen when your teenager’s backpack drops with a thud or when someone drags rather than lifts that heavy coffee table. All processed wood is dried at the mill, creating tiny hollow spaces that make even the hardest woods susceptible to denting under the right conditions.
Water damage is perhaps the most insidious enemy of hardwood. As one of our specialists often reminds clients, “Water is the enemy of hardwood floors.” A forgotten spill or leaky dishwasher can cause staining, warping, cupping (where edges rise higher than centers), and even mold growth if left untreated.
Those gaps between boards that seem to appear out of nowhere? They typically result from seasonal humidity changes or installation issues. “If you can keep your house between 30% and 50% relative humidity year-round, you can expect to see minor seasonal movement and your filler to perform well under those conditions,” explains flooring expert Chris Pester.
Squeaky floors might have charm in an old farmhouse, but they’re usually just announcing loose boards rubbing against nails or against each other. And don’t forget about UV fading, where sunlight gradually bleaches sections of your floor, creating uneven tones that no amount of cleaning will fix.
Signs You Need Repair, Refinishing, or Replacement
How can you tell when your floors need professional attention? Several warning signs should prompt you to action.
When your once-gleaming floors show persistent finish dullness despite your best cleaning efforts, the protective coating is likely worn thin. More concerning is the appearance of gray wood, which indicates the finish has worn away completely, exposing raw wood that’s beginning to oxidize.
Do you feel visible board movement underfoot? Boards that shift or make noise when walked on suggest underlying structural issues. Similarly, multiple scratches and gouges that catch your socks or create splinters aren’t just unsightly—they’re hazardous.
Water damage signs like discoloration, cupping, buckling, or musty odors require immediate attention before problems spread. And while the occasional creak adds character, excessive creaking in multiple spots suggests widespread loosening of the floorboards.
It’s also important to know whether your floor is site-finished (finished after installation) or prefinished (finished at the factory). Site-finished floors typically can be sanded more times and offer more repair options, while prefinished floors often have beveled edges and thinner wear layers that limit refinishing options.
As a practical guideline, if damage affects less than 25% of your floor, targeted repairs usually make the most sense. For widespread damage or wear, refinishing the entire floor may be more appropriate. Replacement becomes necessary when boards are structurally compromised or when engineered floors have been refinished too many times.
Repair vs. Refinish vs. Replace
Choosing between repair, refinishing, or replacement depends on several factors that balance cost, aesthetics, and practicality.
Repair shines when damage is limited to specific areas and the overall floor remains in good condition. It’s perfect for preserving as much of your original floor as possible while keeping costs manageable. Think of it as spot-treating problem areas rather than overhauling your entire floor.
Refinishing makes more sense when your entire floor looks worn but remains structurally sound. If you’re noticing widespread scratches or color issues, or if you’re simply ready for a change in color or sheen, refinishing can breathe new life into your floors. Just remember that solid hardwood floors can typically be refinished 6-10 times during their lifetime, while engineered floors may only support 1-3 refinishings.
Replacement becomes necessary in cases of severe structural damage, extensive water damage or mold, or when your floor has reached its refinishing limit. It’s also the right choice when you’re ready to upgrade to a different type of flooring altogether.
From a cost perspective, the differences are significant. Based on internet averages (not actual costs for Romero Hardwood Floors), refinishing hardwood floors costs around $1,200–$2,400, while replacement can run $2,480–$7,028 or more. Targeted repairs typically cost $478–$1,624, depending on the extent of damage.
One of our clients in Revere recently finded that repairing a water-damaged section of their oak flooring cost about one-third of what full replacement would have cost, while preserving the character of their historic home. This kind of value is why proper assessment is so crucial before making any decisions about your floors.
For more detailed information about the repair and refinishing process, check out our guide on hardwood floor repair and refinishing.
Hardwood Floor Repair Techniques
Now that you’ve assessed your floor’s condition, let’s explore the specific hardwood floor repair techniques for different types of damage. The right approach depends on the severity and type of damage you’re facing.
As Tom Silva, a respected flooring expert, wisely advises: “Match the grain, not the stain.” This principle guides many successful hardwood floor repairs, focusing on structural integrity first, then aesthetic matching.
DIY Hardwood Floor Repair Techniques for Minor Scratches
Those light, annoying scratches that haven’t penetrated through to the raw wood don’t have to be a permanent eyesore. For surface scratches, color markers and stain pens work wonders when matched to your floor color. Simply apply to the scratch, let dry, then buff lightly. Always test in an inconspicuous area first to ensure a good match.
Believe it or not, the walnut oil rub technique is an old carpenter’s secret that still works beautifully today. Just rub a raw walnut over fine scratches and watch as the natural oils fill in the damage and blend with many medium-toned woods. A client in Salem, MA tried this on her red oak floors and was amazed: “I was skeptical, but the scratches virtually disappeared after rubbing the walnut and wiping away excess oil.”
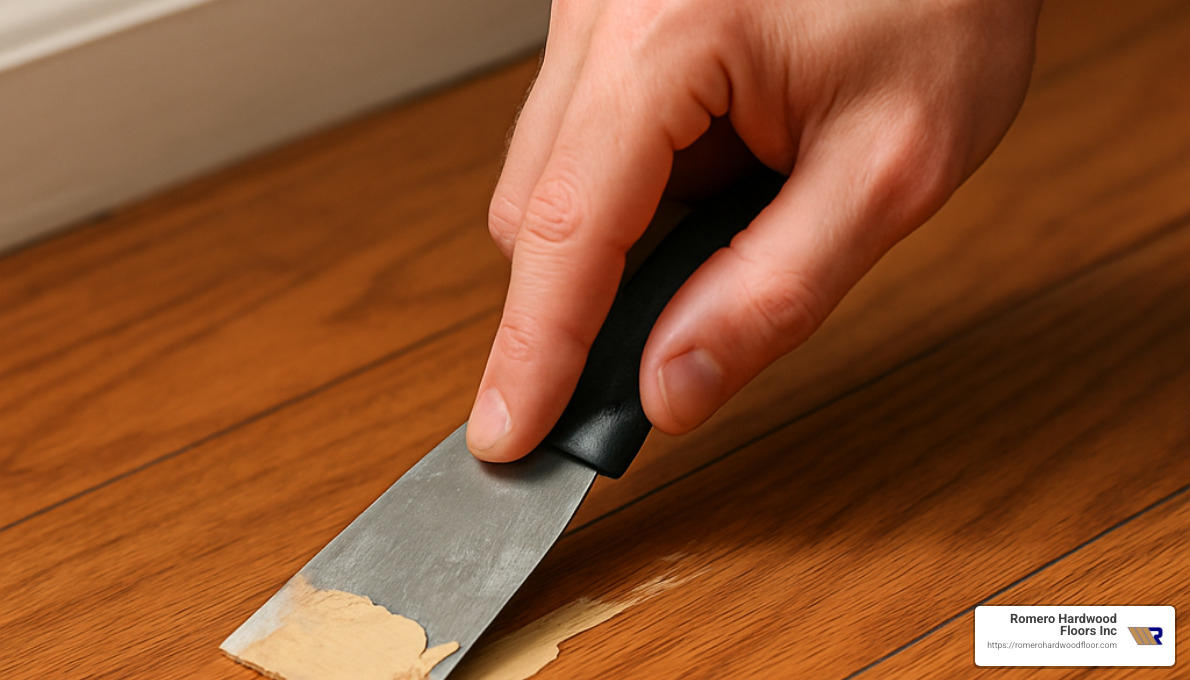
For slightly deeper scratches, pre-mixed wood filler can save the day. Clean the area thoroughly, apply a color-matched filler with a plastic putty knife, let it dry completely, and sand it flush with 180-grit sandpaper for a smooth finish.
When surface scratches are widespread but not deep, a buff and recoat can work miracles. This refreshes your entire floor without full sanding. It costs $1 to $2.50 per square foot professionally, or you can DIY with a rented buffer if you’re feeling adventurous.
Hardwood Floor Repair Techniques for Deep Gouges
Deep gouges require more substantial repair techniques. Solvent-based wood fillers are your best friend here as they bond better with the wood and accept stain more readily than water-based alternatives. Clean the gouge thoroughly, apply the filler with a putty knife (overfilling slightly), let it dry completely, then sand flush with 120-grit sandpaper.
For particularly deep damage, epoxy fillers provide superior strength. As professional floor restorer doker0 advises, “Epoxy glue/resin is the best thing. Then sand.” Two-part epoxy cures quickly, often allowing sanding within 10-15 minutes, making it perfect for deep repairs that need structural integrity.
The damp-ironing technique can work wonders for certain damages. This wood fiber restoration method involves dampening the gouged area, covering it with a damp rag, and applying low heat with an iron to raise compressed wood fibers before filling. It’s like giving your floor a chance to heal itself!
When working with deeper gouges, remember Chris Pester’s advice about layered application: “Apply filler in thin layers (about 6mm) and let each layer dry to prevent cracks.” This technique prevents shrinkage and cracking that often happen when thick filler dries too quickly.
Always sand thoroughly with progressively finer grits (starting at 80-100 and finishing with 150-180) to prevent splinters in repaired areas. Your fingers will thank you later!
Fixing Gaps, Cracks, and Squeaks
Those annoying gaps between boards and squeaky floors have solutions too. For gaps and cracks, latex fillers are ideal because they expand and contract with the wood’s natural movement. Apply with a plastic putty knife, wipe away excess, and let dry before sanding.
For a custom color match that blends perfectly, try the sawdust and wood glue mix. Collect fine sawdust from your floor (or similar wood), mix it with wood glue to create a paste, pack it into gaps, let it dry completely, then sand flush. The result is nearly invisible since you’re using the actual wood material.
Wider gaps call for the rope filler technique. Lightly hammer rope into the gap, then coat with wood filler that matches your floor color. The rope provides stability while the filler gives you the finished look.
For those midnight squeaks that wake up the household, shims can be a quick fix. Slide a thin wooden shim under loose boards to secure them, but be careful not to hammer too far or you’ll create an unsightly hump.
When you have access to the subfloor, counter-sink screws offer a permanent solution. Drive trim-head screws up through the subfloor into the hardwood to secure loose boards. These specialized screws sink below the surface, eliminating the noise without creating visible damage.
A client in Melrose, MA successfully tackled squeaks in their 80-year-old oak floors using the shim method: “We thought we’d need to replace entire sections, but strategic shim placement fixed 90% of the squeaks for less than $50.” Now that’s a bargain for a good night’s sleep!
Matching Stain & Finish Seamlessly
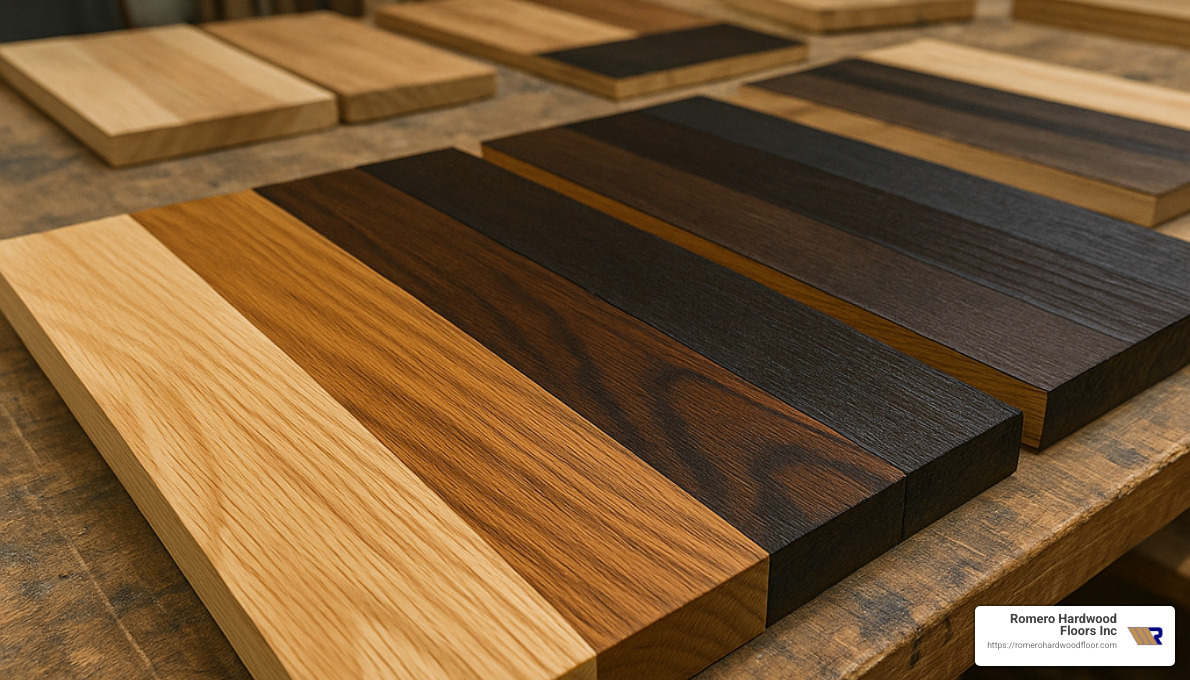
The ultimate challenge in hardwood floor repair is matching the color and finish of the repaired area to the surrounding floor. As Chris Pester emphasizes, “Test. Test. Test. If you’re not sure, do a test on a board in your workshop the night before installation.” Always test stain colors on scrap pieces of the same wood species to avoid disappointing results.
The feathering technique is essential when refinishing a repaired area. Sand slightly beyond the repair and gradually blend the new finish into the existing finish to avoid that telltale line that screams “repair job!”
Professional floor refinishers often use water-popping before staining to help the wood accept stain more evenly. This technique involves lightly dampening the wood with denatured alcohol and water, which opens the grain for more consistent color absorption.
Don’t forget about sheen matching – even with the perfect color, a sheen mismatch will make repairs obvious. Whether your existing floor is matte, satin, semi-gloss, or high-gloss, match it exactly for an invisible repair.
Sometimes a single stain won’t do the trick, which is why pros often use blending stains, mixing different colors to achieve the perfect match. As Chris Pester notes, “I’ve seen leveling compound and other atrocities used as filler,” highlighting why using proper materials is crucial for lasting repairs.
For more detailed information about repair costs and options, check out How Much Does Hardwood Floor Repair Cost? from HomeAdvisor.
Board Replacement & Full Refinishing Process
When simple repairs won’t cut it, you might need to replace damaged boards or refinish your entire floor. These more extensive hardwood floor repair techniques require careful planning but can breathe new life into your worn floors.
Single-Board Replacement Step-by-Step
Replacing a damaged board is like surgery for your floor – precise and focused. Done right, it saves you from refinishing everything:
First, measure the damaged board carefully and find a matching replacement. Nothing beats using leftover boards from your original installation for a perfect match.
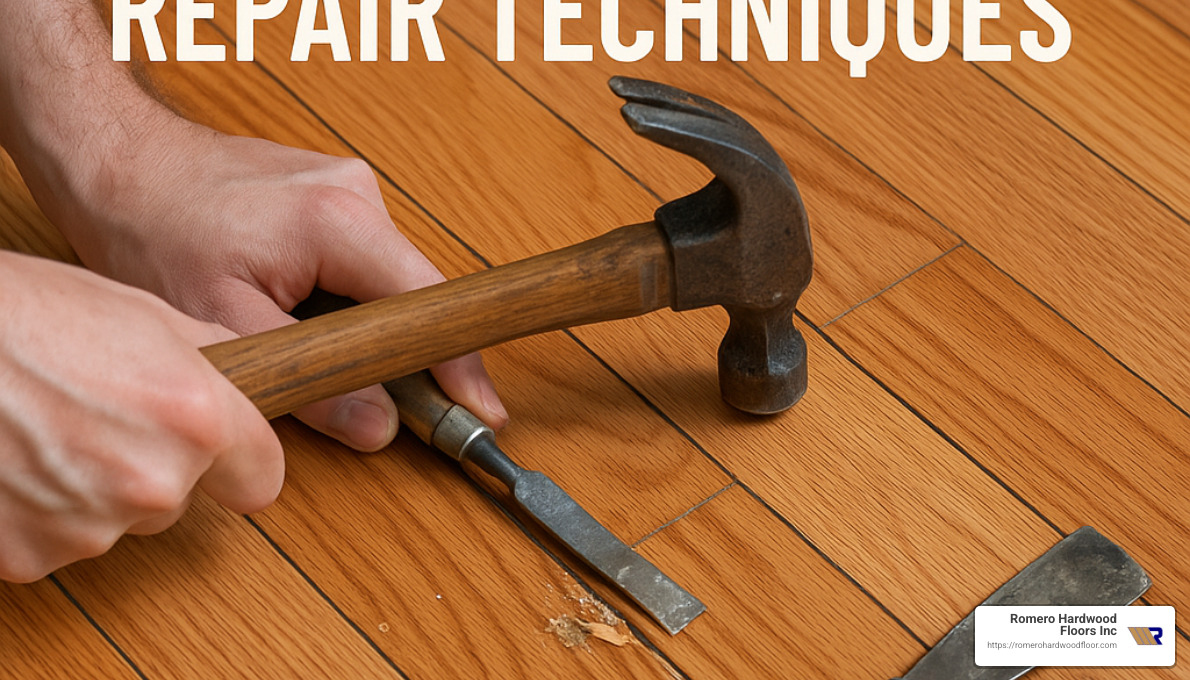
Creating access is your next challenge. Set your circular saw to the exact thickness of your flooring (typically 3/4″) and make two parallel relief cuts about 1/2″ from each edge. Drill 1″ holes at the board ends with a spade bit – these serve as your starting points for removal.
“The trick is patience,” says one of our Revere clients. “Rush this step and you’ll damage the surrounding boards.”
Remove the center section by making a diagonal cut between your parallel lines, then carefully chisel it out. Next, extract the remaining edges with gentle chisel work. Take your time here – neighboring boards should remain untouched.
Preparing your replacement board requires precision. Cut it to the exact length needed, and for tongue-and-groove flooring, remove the bottom lip of the groove side and the end facing the existing groove. Always test-fit before committing – this saves headaches later.
When you’re ready for installation, apply wood glue to the tongue and groove connections, slide the board into place, and tap it home using a block to protect the edge. For face-nailing, pre-drill holes, countersink the nails, and fill the holes with matching wood putty.
Finish by sanding the new board flush with surrounding flooring, applying matching stain, and finishing with the same product used on the rest of your floor. As one delighted customer told us, “The replacement board blended so perfectly I couldn’t tell where the repair was!”
For more detailed guidance, check out our Step-by-Step Hardwood Floor Repair Techniques.
Full-Floor Refinishing Workflow
When your floor needs a complete makeover, refinishing restores its beauty from edge to edge:
Start with thorough preparation – remove all furniture, seal vents and doorways with plastic sheeting to contain dust, and clean your floor completely. This isn’t the fun part, but it’s essential for quality results.
Before sanding, repair all visible damage. Fill scratches, dents, and gouges with appropriate fillers and let them dry completely.
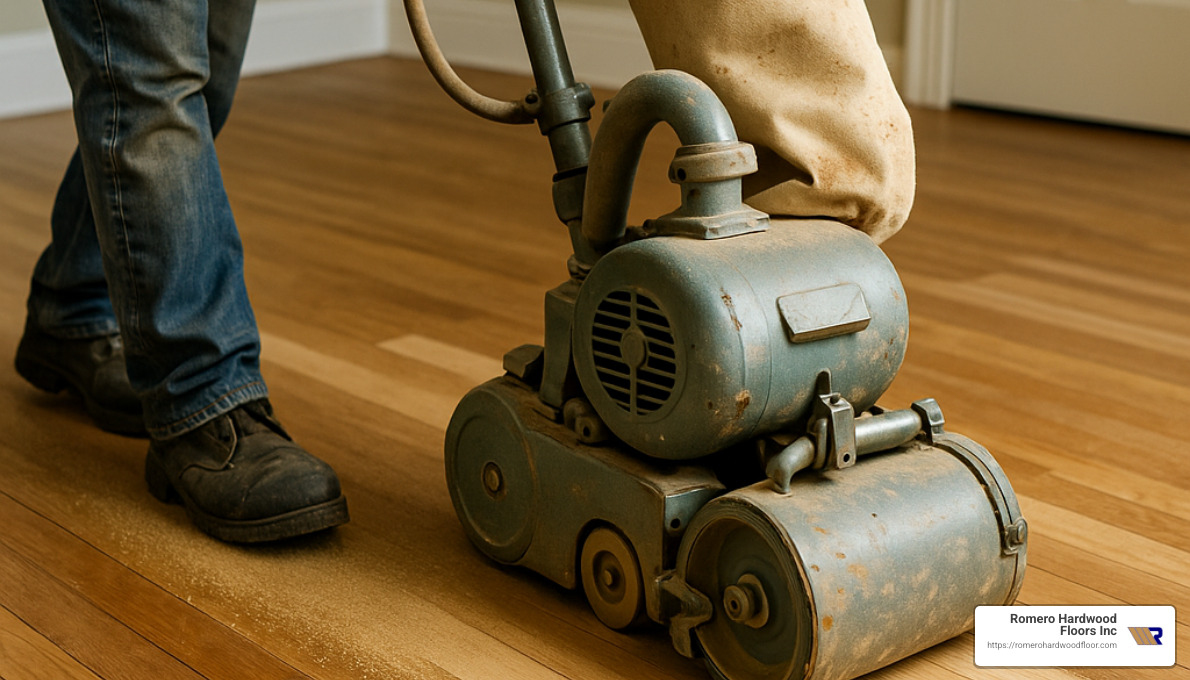
The sanding process follows a progression of grits. Begin with coarse-grit sandpaper (36-40) using a drum sander for the main floor area. This removes the old finish and levels the surface. Progress to medium grit (60-80), then finish with fine grit (100-120) for smoothness. Use an edge sander for corners and edges, and hand-sand areas machines can’t reach.
“Sanding is where amateur refinishers often go wrong,” notes our lead technician. “Rushing through grits or pressing too hard can create swirl marks that show up dramatically once stain is applied.”
After sanding, remove all dust with thorough vacuuming and wiping with a tack cloth. Even tiny dust particles can ruin your finish.
If you’re changing color, apply stain evenly with a lambswool applicator, working in small sections and wiping excess. Allow 24 hours to dry completely.
For the finishing touch, apply polyurethane (water-based or oil-based) with a high-quality brush or applicator. Plan for 2-3 coats, lightly sanding between coats with 220-grit sandpaper for proper adhesion.
When choosing between water-based and oil-based polyurethane, consider these differences:
| Finish Type | Dry Time | Odor | Color | Durability |
|---|---|---|---|---|
| Water-based | 2-3 hours | Minimal | Stays clear | Good |
| Oil-based | 8-24 hours | Stronger | Ambers over time | Excellent |
| Wax | 1 hour | Mild | Natural | Requires regular maintenance |
Finally, patience pays off during curing. Allow at least 24 hours before light foot traffic and 72 hours before replacing furniture. For oil-based finishes, waiting a full week before placing area rugs gives the best long-term results.
One budget-friendly tip from a flooring specialist: “Buffing with a pole sander is more affordable and easier to control than renting an industrial buffer,” making this step more accessible if you’re tackling refinishing yourself.
Proper refinishing takes time – rushing any step compromises your results. But the change of worn, damaged floors into gleaming, smooth surfaces makes the effort worthwhile.
Costs, DIY vs Professional Help
When it comes to fixing your hardwood floors, the big question is always: should you tackle it yourself or call in the pros? Let’s break down what you can expect to pay and help you make that decision with confidence.
Average Cost Breakdown (Repair, Refinish, Replace)
Hardwood floor repairs come in all shapes and sizes, and so do their price tags. Based on internet averages (not actual costs for Romero Hardwood Floors), here’s what homeowners typically spend:
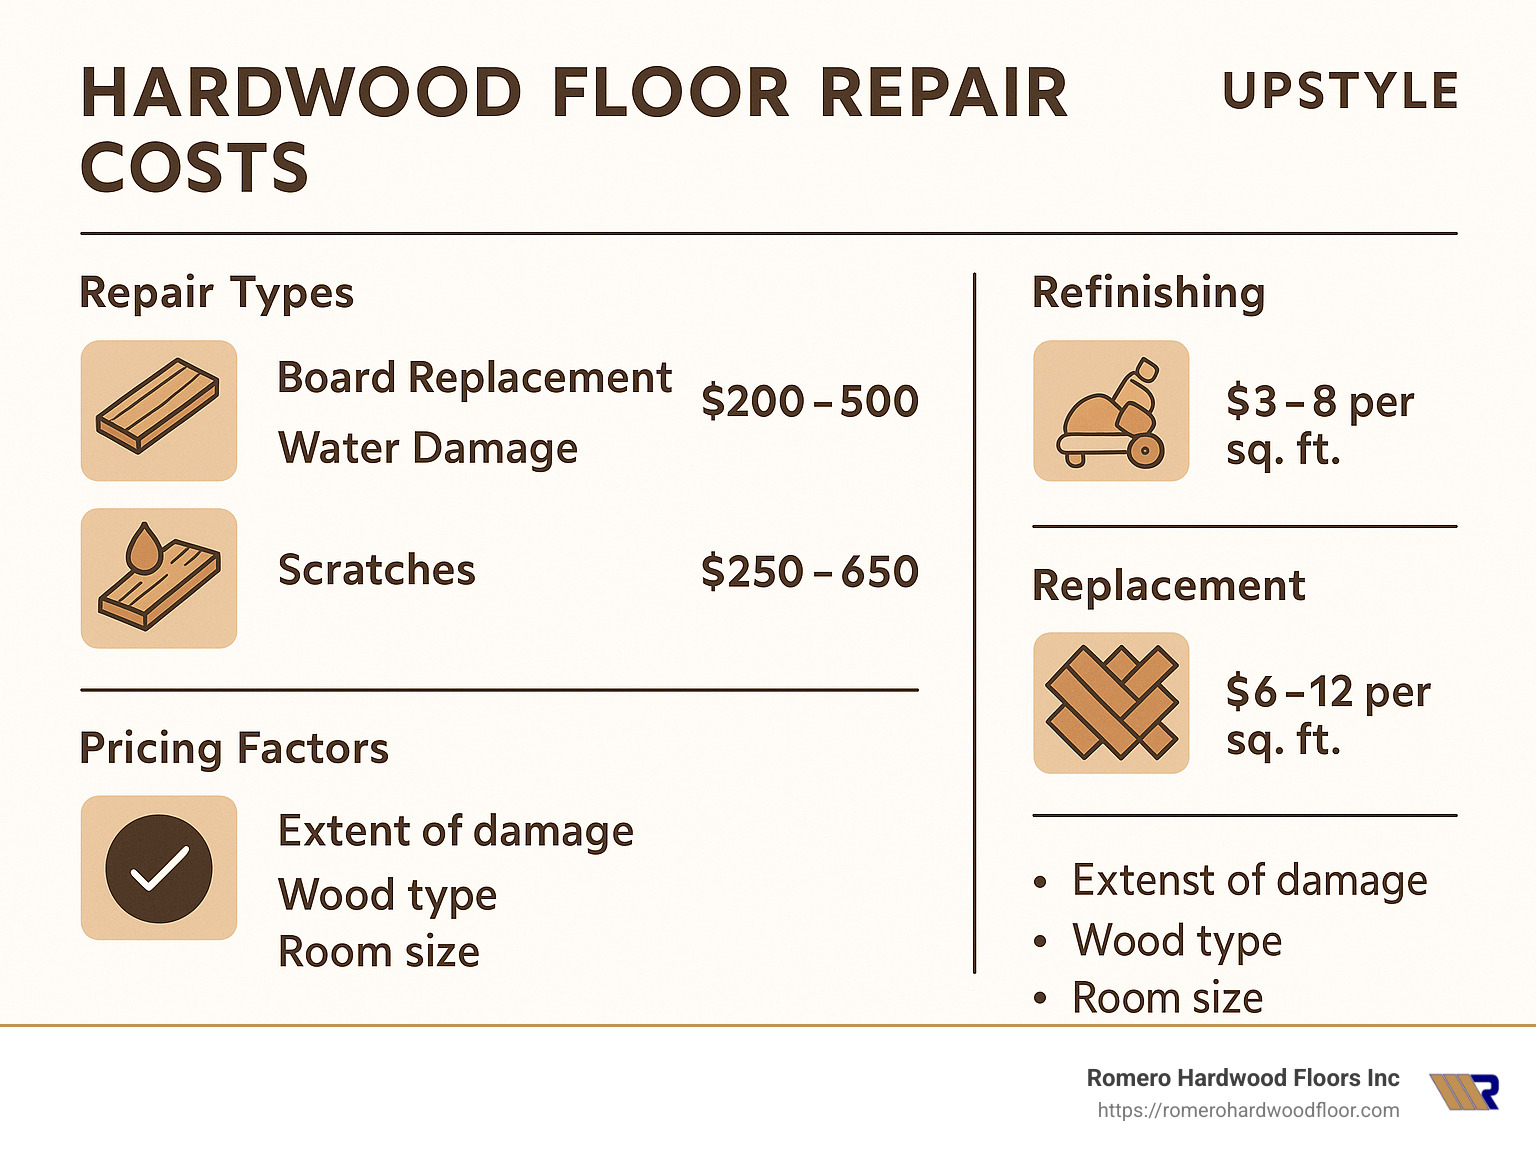
For basic repairs, expect to pay between $478 and $1,624 overall. This breaks down to about $75-$300 for minor fixes like filling a few scratches, $400-$1,200 for moderate work like fixing several boards, and $1,000-$1,624 for major repairs addressing structural issues.
When it comes to refinishing, the investment typically ranges from $2 to $7 per square foot. This means refreshing an average living room (250 sq ft) might cost $500-$1,750, while doing an entire house (2,000 sq ft) could run $4,000-$14,000. If you’re just looking for a buff and recoat to refresh the surface, you might get away with $1-$2.50 per square foot.
Full replacement is naturally the most expensive option, with materials running $3-$12 per square foot and labor adding another $3-$8 per square foot. All told, replacing hardwood floors typically costs between $2,480 and $7,028 or even more for premium woods or complex installations.
Some specialty repairs have their own price points. Refinishing stair steps might cost $25-$85 per step, fixing water damage runs about $200-$600 per 100 square feet, and eliminating those annoying squeaks typically costs $100-$250 per area.
DIY Cost vs Time Commitment
The DIY route definitely saves money on paper, but remember – your time has value too!
If you decide to refinish a floor yourself, you’ll need to rent equipment: a drum sander ($50-$80 per day) and an edge sander ($30-$50 per day). Add to that sandpaper ($20-$100), stain ($30-$70 per gallon), polyurethane ($40-$100 per gallon), and various tools like putty knives and brushes ($30-$100).
All told, DIY refinishing materials for a small room might cost $100-$250 – a significant savings over professional work. As one enthusiastic DIYer shared, “A DIYer can refinish a 2,000 sq ft home in four days for about $700 versus a professional charge of up to $8,000.”
But there’s more to consider than just dollars. Time investment varies widely:
– Minor scratch repair might take just 30 minutes to 2 hours
– Replacing a single board typically requires 2-4 hours
– Full room refinishing demands 3-5 days including drying time
And don’t forget the learning curve! First-time floor refinishers often make mistakes that can damage floors and require professional intervention anyway. That “cheap” DIY project can quickly become more expensive than hiring pros from the start.
When to Call a Professional
While many hardwood floor repair techniques can be DIY-friendly, some situations definitely call for professional expertise:
Water damage beyond surface staining should always trigger a call to professionals. When water has caused widespread warping, cupping, or buckling, experienced eyes can assess whether the floor can be saved and what methods will work best.
Structural issues like subfloor damage or significant floor movement require professional attention. These problems often indicate deeper issues that DIY fixes won’t adequately address.
Historic or exotic floors deserve special care. If you have valuable antique flooring or rare wood species, the specialized knowledge required to properly repair them justifies professional handling.
Multiple previous refinishings can leave too little wear layer for another sanding. Professionals can gauge whether there’s enough wood left to work with and recommend alternatives if needed.
Engineered hardwood comes with special considerations. As one East Boston homeowner learned: “I tried to sand an engineered floor myself and sanded right through the veneer in spots. It would have been cheaper to hire professionals from the start.”
At Romero Hardwood Floors Inc., we understand that every floor and budget is different. That’s why we offer free estimates throughout Revere, Salem, Malden, and surrounding communities. Our team can quickly assess your floor’s condition and recommend the most cost-effective approach – whether that’s a simple repair you can handle yourself or a more complex job requiring professional expertise.
Maintenance & Prevention Tips
The best repair is the one you never have to make. Proper maintenance and preventive measures can extend the life of your hardwood floors and reduce the need for repairs.
Routine Cleaning & Buffing
Your daily habits make a world of difference for hardwood longevity. I always tell my clients that a microfiber dust mop is your floor’s best friend—use it daily to sweep away the tiny grit particles that act like sandpaper underfoot. These invisible enemies cause most of the micro-scratches that eventually dull your beautiful floors.
Weekly cleaning should involve a pH-neutral hardwood cleaner—nothing too harsh or alkaline. As one of my Salem clients finded, “Those fancy oil soaps actually left a dulling residue that took professional help to remove.” Oxygenated floor cleaners have become my go-to recommendation since they lift embedded dirt without leaving any film behind.
Monthly polishing adds a protective layer that keeps your finish looking fresh. Think of it as sunscreen for your floors—a little prevention goes a long way. For the ultimate protection, consider a professional buff-and-coat (sometimes called screen and recoat) every 2-3 years. This refreshes your finish without the dust and disruption of full sanding.
One client told me after their first maintenance coat: “I can’t believe we waited so long—it looks like we got new floors for a fraction of the price!”
Climate & Moisture Control
Wood is constantly responding to its environment—it’s literally alive to humidity changes. Maintaining indoor humidity between 30% and 50% is the magic formula for preventing many common hardwood problems.
As flooring expert Chris Pester wisely notes, “If you can keep your house between 30% and 50% relative humidity year-round, you can expect to see minor seasonal movement and your filler to perform well under those conditions.”
In our New England climate, this typically means running a humidifier during our dry winters and possibly a dehumidifier during muggy summer months. I’ve seen dramatic improvements in floors just from adding a whole-house humidifier. A Wakefield client installed one after we repaired gaps in their floors, and three years later, they happily report, “The floors stopped creaking, and the gaps haven’t returned—best investment we made!”
When it comes to spills, remember the 30-second rule: wipe them up within half a minute, and you’ll prevent most water damage. Use a slightly damp cloth followed by a dry one to ensure no moisture remains to seep between boards.
Regular leak checks around water sources—dishwashers, refrigerators, sinks, and exterior doors—can catch problems before they cause serious damage. One client in Malden finded a tiny, slow refrigerator leak that would have eventually ruined their kitchen floor if not caught during routine inspection.
Protective Finishes & Furniture Pads
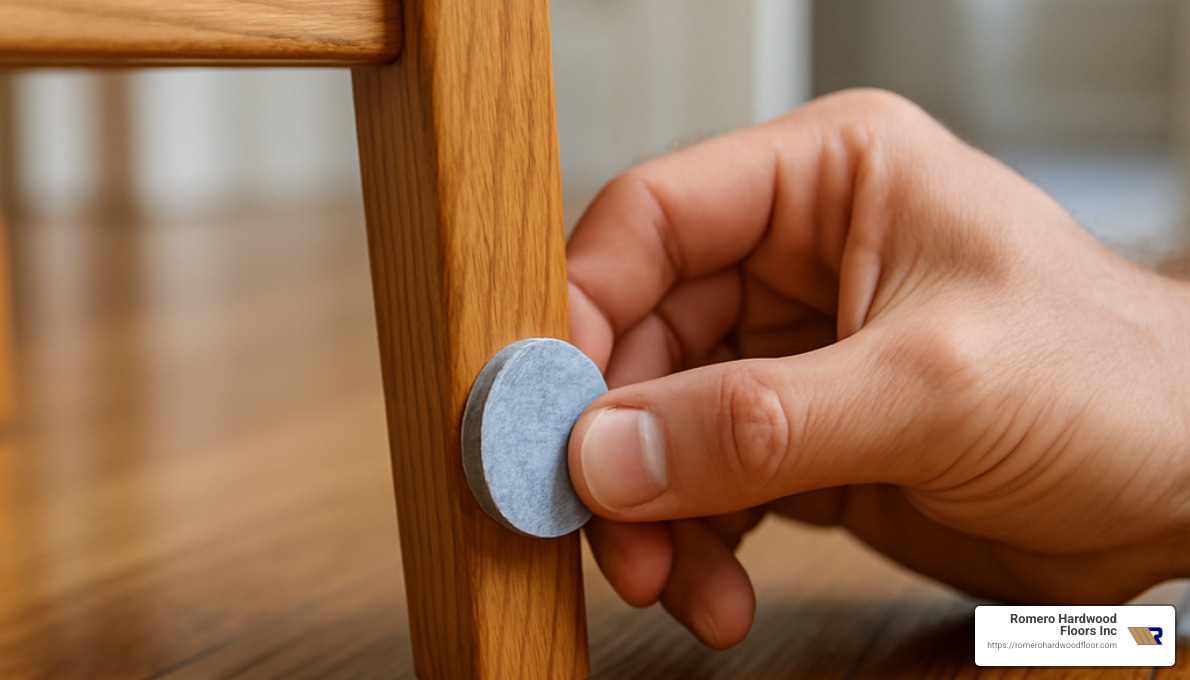
Physical protection creates a buffer between your precious floors and daily wear. Felt furniture pads are inexpensive insurance against scratches and gouges. I recommend checking them monthly, as they tend to collect grit and need replacement more often than most people realize.
Strategic placement of area rugs makes sense in high-traffic zones, but be cautious with rubber-backed mats. They trap moisture against the wood and can cause discoloration over time. Opt for breathable natural fiber rugs when possible.
Pet owners, take note: a regular nail trimming routine for your furry friends can save hundreds in floor repairs. As one relieved dog owner told me, “A $10 professional nail trim every month has completely eliminated the clicking and scratching sounds I used to hear.”
Consider implementing a no-shoes policy, especially for high heels, which concentrate tremendous force on tiny contact points. A client in Revere calculated that a 125-pound person wearing stiletto heels exerts over 2,000 pounds of pressure per square inch—enough to dent even the hardest woods!
For homes with large windows, UV protection becomes crucial. Sunlight fades wood floors over time, creating uneven coloration where rugs or furniture block the rays. Installing blinds or UV-filtering window film can prevent this subtle but permanent damage.
Modern finish technology offers exciting options for high-traffic homes. Ceramic-infused or titanium-oxide polyurethanes provide exceptional scratch resistance compared to traditional formulations. While they cost more initially, they can extend the time between refinishing by years.
“Proper maintenance and periodic DIY repair can extend hardwood lifespan for decades,” notes one flooring specialist. At Romero Hardwood Floors Inc., we’ve seen well-maintained floors last over 100 years in some of the historic homes we service in Salem and Marblehead. Your floors are an investment worth protecting—and with these simple habits, they’ll remain beautiful for generations.
For more information on environmentally friendly cleaning methods, check out Washington State University’s guide on Green Cleaning.
Frequently Asked Questions about Hardwood Floor Repair Techniques
Is it cheaper to repair or replace hardwood floors?
Repair is almost always more economical than replacement. When comparing costs, the numbers speak for themselves. Based on internet averages (not actual costs for Romero Hardwood Floors), refinishing hardwood floors typically runs $1,200–$2,400, while complete replacement can cost $2,480–$7,028 or more. Targeted repairs are even more budget-friendly, usually ranging from $478–$1,624 depending on damage extent.
Your decision should factor in the floor’s overall condition. As a general rule of thumb, if less than 25-30% of your floor shows damage, repair will be your most cost-effective route. For floors with widespread issues or those that have already been refinished multiple times over decades, replacement might make better long-term financial sense.
I’ve seen this with many clients in Revere. One homeowner recently told me, “I was convinced I needed all new floors, but Romero Hardwood Floors saved me thousands by repairing just the damaged sections and refinishing the whole floor to match.” Those savings made a significant difference in their renovation budget.
Can I refinish only part of a hardwood floor and make it blend?
Yes, but it requires skill and careful technique. Partial refinishing (sometimes called “spot refinishing”) can effectively address localized damage or high-traffic areas without disrupting your entire home. The secret lies in properly feathering the sanded edges and carefully matching both stain and finish.
For successful spot refinishing, you’ll want to sand slightly beyond the damaged area, gradually reducing pressure as you move outward. Use progressively finer grits just as you would with full refinishing. The most challenging part comes with color matching—test stain mixtures on scrap wood until you achieve an exact match, then apply your finish in thin coats that extend slightly beyond the stained area. Between coats, lightly buff the transition areas to eliminate any visible lines.
Professional refinishers like our team use a technique called “chasing the grain” with a sharp scraper to blend new and old finishes seamlessly without visible “halos” or lines. That said, there are limitations. Floors with custom stains or those that have aged significantly present greater challenges for invisible blending. In these situations, refinishing the entire room often delivers more consistent, beautiful results.
How many times can my hardwood floor be sanded safely?
The number of possible refinishings depends on your floor type and thickness. Traditional solid hardwood floors that measure 3/4″ thick typically support 6-10 complete sandings throughout their lifetime. Each professional sanding removes approximately 1/32″ of wood—not much individually, but it adds up over decades.
Engineered hardwood comes with more limitations. The wear layer on engineered products varies dramatically, ranging from whisper-thin 0.6mm veneers to premium 4.5mm layers (about 1/42″ to 3/16″). Thin-veneer engineered floors might only withstand 1-2 very light sandings, while high-quality engineered products with thicker wear layers could handle 3-5 refinishings over their lifetime.
Want to determine how much wear layer remains on your existing floor? Look for an air vent or threshold where you can see the floor’s cross-section. For tongue-and-groove flooring, measure the thickness above the tongue. If less than 1/8″ remains above the tongue, proceed with extreme caution before sanding.
Most flooring experts recommend refinishing hardwood floors every 7-10 years depending on foot traffic and wear patterns. However, with proper maintenance and timely spot repairs like the hardwood floor repair techniques we’ve discussed, many of our clients in Revere and surrounding areas have extended this timeline considerably, preserving their beautiful floors for generations.
Conclusion
Mastering hardwood floor repair techniques allows you to preserve the beauty, value, and character of your wood floors for generations. From simple scratch repairs to complete board replacements, the right approach can save you thousands while maintaining your home’s warmth and charm.
At Romero Hardwood Floors Inc., we’ve been helping homeowners throughout Revere, Salem, Malden, and surrounding Massachusetts communities restore their hardwood floors since 2006. Our experience has taught us that timely repairs not only save money but often preserve the unique character that makes each hardwood floor special.
Remember these key takeaways about hardwood floor care: First, assess damage carefully to choose the right repair approach. The difference between a minor scratch and structural damage determines whether you need a simple DIY fix or professional intervention. Second, always match the grain first, then worry about matching the stain – this principle will guide you toward repairs that look natural rather than patchy. Third, controlling indoor humidity between 30-50% prevents many common floor issues before they start, saving you headaches down the road.
Don’t hesitate to call professionals for structural concerns or extensive damage – what seems like a simple repair can sometimes reveal deeper issues that require expert attention. And perhaps most importantly, regular maintenance prevents most serious problems from developing in the first place. A little daily care goes a tremendously long way in extending floor life.
Whether you’re dealing with minor scratches that catch your socks, deep gouges from a dropped pan, mysterious water damage, or those annoying squeaky boards that wake the baby, there’s a repair technique that can restore your floor’s beauty and function. The investment in proper repairs pays dividends in both home value and the simple daily joy of walking across beautiful, solid floors in your own home.
For those in our service areas who would like professional assistance with hardwood floor repairs, refinishing, or installation, we invite you to contact us for a free consultation. Our team brings expertise, quality materials, and guaranteed workmanship to every project, ensuring your floors remain beautiful for years to come.
Your hardwood floors tell your home’s story—let us help you keep that story going for generations. After all, these aren’t just boards beneath your feet; they’re the foundation of your home’s character and a heritage worth preserving through proper care and timely repairs.
