Hardwood floors installation process: Top 5 Essential Steps
When you think about upgrading your home, installing hardwood floors is a fantastic option. The hardwood floors installation process can be a game-changer for any space, adding charm, warmth, and increasing its value. To give you a snapshot:
- Choosing the Right Type: Decide between solid or engineered hardwood based on your room and needs.
- Preparation: Clear the space and ensure your subfloor is ready.
- Installation Methods: Options include nail-down, glue-down, click-lock, and staple-down methods.
- Finishing Touches: Don’t forget to seal or stain your new floors for a perfect finish.
Each of these steps contributes to changing your space into something beautiful and enduring.
A testament to quality within the industry, Romero Hardwood Floors Inc stands out for its commitment to customer satisfaction and expert craftsmanship. With years of experience in the hardwood floors installation process, I, Francisco Romero, have led my company to become a trusted name in Revere, MA, offering personalized flooring solutions custom to homeowners and commercial property managers alike.
With this foundation, let’s dive deeper into the nuances and benefits hardwood floors can bring to your style and comfort.

Hardwood floors installation process basics:
– Hardwood floors installation cost
– Hardwood floors cleaning tips
– Benefits of hardwood floors
Types of Hardwood Flooring
When it comes to choosing hardwood flooring, understanding the differences between solid hardwood and engineered hardwood is crucial. Each type offers unique benefits and suits different needs.
Solid Hardwood
Solid hardwood floors are crafted from a single piece of wood. This type of flooring is known for its durability and classic appeal. It can be sanded and refinished multiple times, making it a long-lasting option. Solid hardwood is ideal for areas with stable humidity levels, as excessive moisture can cause it to warp.
Engineered Hardwood
Engineered hardwood, on the other hand, consists of a top layer of hardwood veneer bonded to multiple layers of plywood or high-density fiberboard. This construction makes it more stable and resistant to moisture. Engineered hardwood is perfect for basements or areas with fluctuating humidity. Despite its layered construction, it can still be sanded and refinished, though not as many times as solid hardwood.
Prefinished vs. Unfinished
Another consideration is whether to choose prefinished or unfinished hardwood.
Prefinished hardwood comes with a factory-applied finish. This option offers several advantages: you know exactly what color and finish you’re getting, and the installation process is quicker and less messy since there’s no on-site finishing required. Prefinished floors are also more tolerant of humidity changes.
Unfinished hardwood is sanded and finished on-site. This option is ideal if you want to match existing flooring or achieve a specific color or finish. Unfinished floors allow for a seamless integration with other wooden elements in your home, like cabinets or trim. However, they do require more time and effort during installation.
Choosing the right type of hardwood flooring involves considering factors like location, moisture levels, and personal preferences. Each option has its own set of benefits, so select the one that best suits your needs and improves your home’s aesthetic.
Preparing for Hardwood Floor Installation
Before diving into the hardwood floors installation process, proper preparation is key to a successful outcome. Preparing your space ensures that your new floors will look great and last for years to come. Let’s break it down into a few simple steps.
Room Preparation
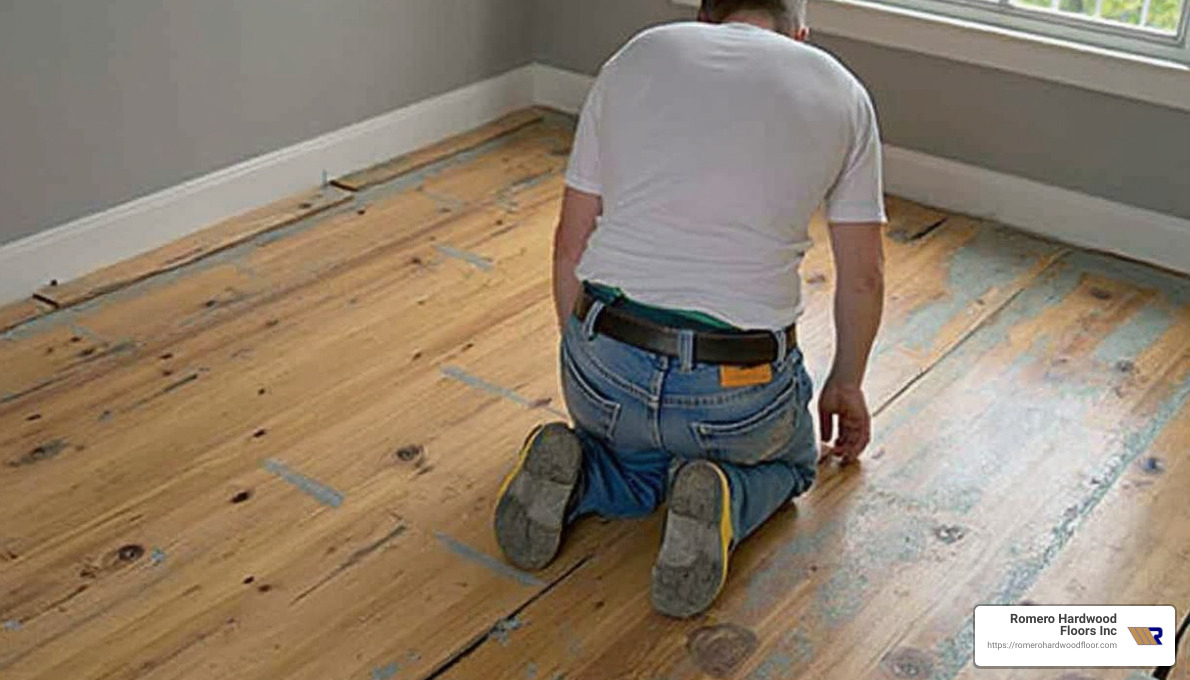
Start by clearing the room where your new floors will be installed. Remove all furniture, drapery, and wall hangings to avoid any damage during the installation. If you plan to reuse baseboards, carefully remove them with a pry bar, taking care not to damage them.
If you encounter any old flooring materials that might contain asbestos, it’s crucial to consult with a professional before proceeding. This ensures safety and compliance with regulations.
Acclimation
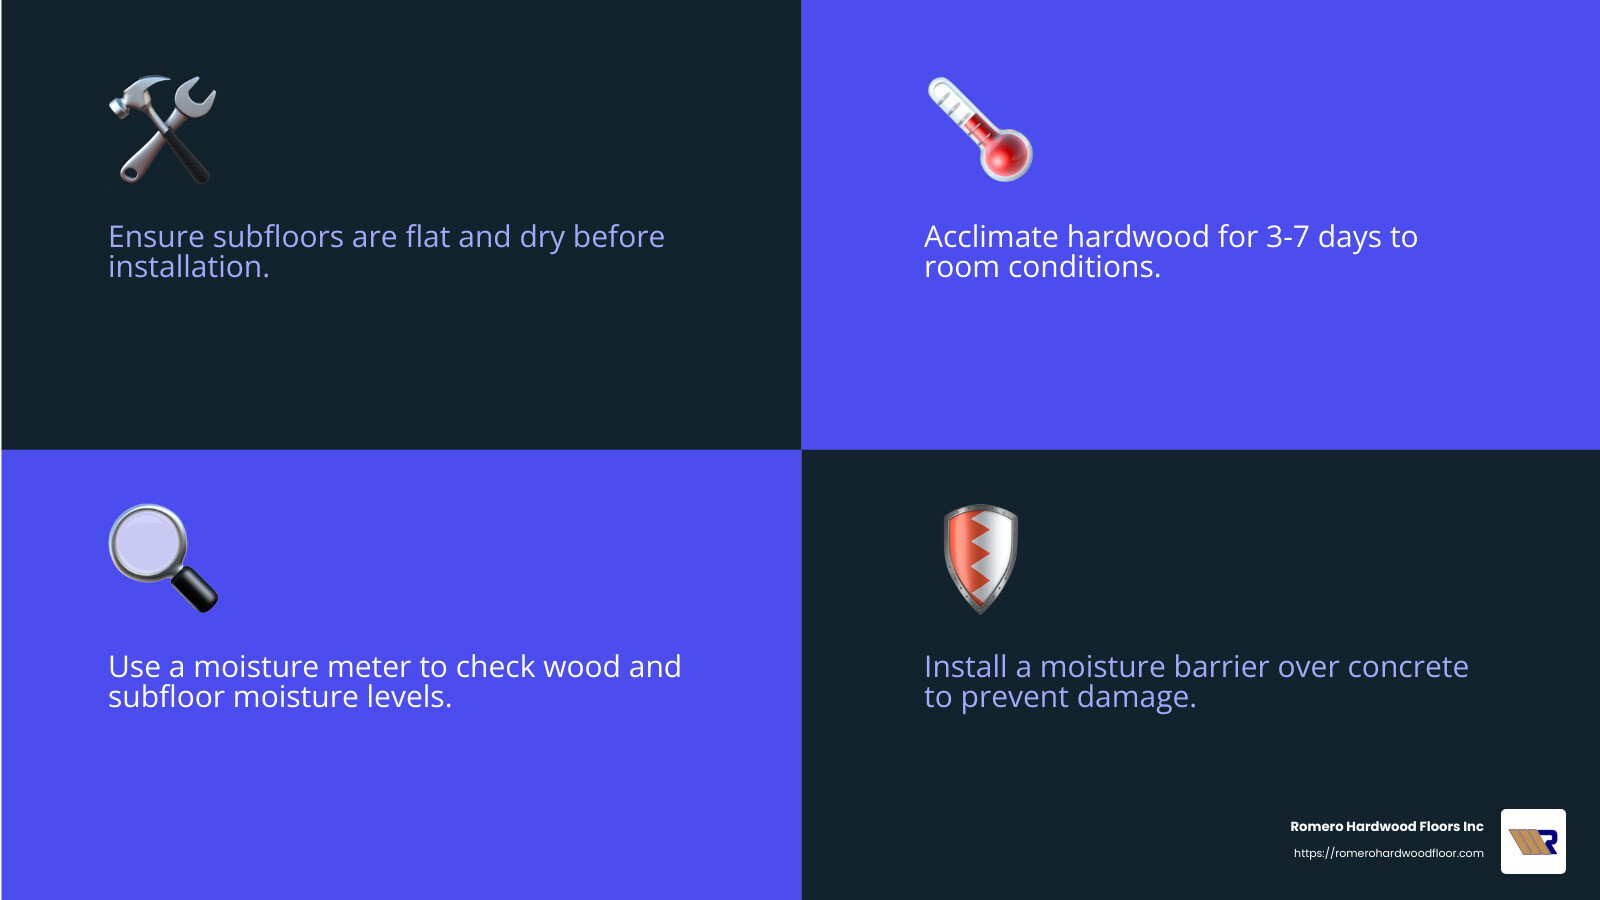
Acclimating your hardwood flooring is a critical step. Hardwood expands and contracts with changes in temperature and humidity. By allowing the wood to adjust to your home’s environment, you prevent potential issues like gaps or buckling.
Here’s how to acclimate your flooring:
- Place the planks in the installation room.
- Remove any plastic packaging to allow air circulation.
- Use spacers between stacks for better airflow.
- Let the wood sit for three to seven days, maintaining normal room conditions.
- Check moisture content with a moisture meter to ensure it’s within 2% of the subfloor’s moisture content.
Subfloor Assessment
A solid foundation is essential for a successful hardwood floor installation. Start by inspecting the subfloor for any signs of damage, moisture, or unevenness. Repair any issues before moving forward.
- For wood subfloors: Ensure they are at least 3/4-inch thick and securely fastened to the joists.
- For concrete subfloors: Make sure they are fully cured and dry.
Use a long level to check for high or low spots. Sand down any high areas and fill low spots with a leveling compound.
Moisture Barrier
When installing over concrete, a moisture barrier is often essential. This barrier helps prevent moisture from seeping up into the hardwood, which can cause warping or damage.
- Choose the right barrier: Consult your flooring’s manufacturer guidelines for the appropriate type of moisture barrier.
- Install carefully: Lay the barrier flat with overlapping edges to ensure complete coverage.
By following these preparation steps, you’re setting the stage for a smooth and successful hardwood floor installation. Up next, let’s explore the different methods for installing your new floors.
Hardwood Floors Installation Process
When it comes to installing hardwood floors, there are four main methods: nail-down, glue-down, click-lock, and staple-down. Each method has its own set of steps, tools, and safety considerations. Let’s explore each one.
Nail-Down Installation Method
Tools Needed:
– Hammer
– Nail punch
– Pneumatic floor nailer
– Tape measure
– Chalk line
– Saw (for cutting boards)
Step-by-Step Guide:
1. Prepare the Subfloor: Ensure it is clean, dry, and level.
2. Layout the First Row: Align the first row of boards along the longest wall, using spacers for expansion gaps.
3. Nail the First Row: Use a hammer and nail punch to drive nails at a 45-degree angle through the tongue of each board.
4. Continue Laying Boards: Use a pneumatic floor nailer after the third row to speed up the process.
5. Finish with Face Nailing: For the last rows, face nail the boards and fill nail holes with matching wood putty.
Safety Considerations:
– Wear safety goggles and ear protection.
– Be cautious with power tools to avoid injury.
Glue-Down Installation Method
Tools Needed:
– Trowel
– Adhesive (as recommended by the flooring manufacturer)
– Tape measure
– Chalk line
– Saw (for cutting boards)
Step-by-Step Guide:
1. Prepare the Subfloor: Ensure it’s clean and dry, especially if it’s concrete.
2. Spread Adhesive: Use a trowel to evenly spread adhesive over a small section of the subfloor.
3. Lay the Boards: Press each board firmly into the adhesive, ensuring they fit snugly together.
4. Continue Laying Boards: Work in small sections to prevent the adhesive from drying out.
5. Clean Excess Adhesive: Wipe away any excess adhesive immediately to avoid staining.
Safety Considerations:
– Work in a well-ventilated area to avoid inhaling fumes.
– Follow all safety instructions on adhesive packaging.
Click-Lock Installation Method
Tools Needed:
– Rubber mallet
– Tape measure
– Saw (for cutting boards)
Step-by-Step Guide:
1. Prepare the Subfloor: Ensure it is clean, dry, and level.
2. Lay Underlayment: If required, lay down underlayment for added cushioning and moisture resistance.
3. Start Laying Boards: Begin at one corner of the room, clicking the tongue and groove together.
4. Continue Across the Room: Use a rubber mallet to ensure a tight fit without damaging the boards.
5. Finish the Last Row: Cut boards to fit and use a pull bar to lock them into place.
Safety Considerations:
– Handle sharp tools with care.
– Wear knee pads to protect your knees during installation.
Staple-Down Installation Method
Tools Needed:
– Staple gun
– Tape measure
– Chalk line
– Saw (for cutting boards)
Step-by-Step Guide:
1. Prepare the Subfloor: Ensure it is clean and dry.
2. Layout the First Row: Align the first row of boards along the longest wall with spacers for expansion gaps.
3. Staple the Boards: Use a staple gun to fasten each board to the subfloor.
4. Continue Across the Floor: Ensure each board is snug before stapling.
5. Finish with Face Nailing: For the last rows, face nail the boards and fill nail holes with matching wood putty.
Safety Considerations:
– Wear safety goggles to protect your eyes from flying staples.
– Be cautious with power tools to avoid injury.
Each installation method has its own advantages and is suited for different types of subfloors and personal preferences. Up next, we’ll explore some post-installation tips to ensure your new hardwood floors stay beautiful for years to come.
Post-Installation Tips
Once you’ve completed the hardwood floors installation process, it’s time to focus on the finishing touches and long-term care. These steps will ensure your new floors not only look great but also last for many years.
Replacing Baseboards
After installing your hardwood floor, you’ll need to replace or install new baseboards. Baseboards cover the expansion gap around the room’s perimeter, giving your floors a polished look.
Steps to Install Baseboards:
1. Measure and Cut: Measure the walls and cut the baseboards to fit. Use a miter saw for precise angles.
2. Attach to the Wall: Position the baseboard so that its lower edge is even with the top of the floor. Nail it to the wall, not the floor, to allow for natural movement.
3. Add Shoe Molding: If the gap between the baseboard and floor is too large, consider adding shoe molding for a seamless finish.
Installing Threshold Strips
Threshold or transition strips are essential where your new hardwood floor meets other flooring types. They provide a smooth transition between different surfaces and help protect the edges of the hardwood.
Steps to Install Threshold Strips:
1. Select the Right Strip: Choose a strip that matches your floor’s finish and fits the height difference between surfaces.
2. Measure and Cut: Measure the doorway or transition area and cut the strip to fit.
3. Secure in Place: Position the strip and secure it using adhesive or nails, depending on the manufacturer’s instructions.
Maintenance Tips
Proper maintenance will help your hardwood floors maintain their beauty and durability.
Daily Care:
– Sweep or Vacuum: Use a soft-bristled broom or a vacuum designed for hardwood floors to prevent scratches from dirt and debris.
– Dry Mop: Use a dry microfiber mop to pick up any remaining dust.
Periodic Care:
– Slightly Damp Mop: For deeper cleaning, use a slightly damp mop, but avoid excessive water.
– Humidity Control: Maintain indoor humidity levels between 30% and 50% to prevent the wood from expanding or contracting.
Protective Measures:
– Felt Pads: Attach felt pads to the legs of furniture to prevent scratches.
– Area Rugs: Use rugs in high-traffic areas to reduce wear and tear.
By following these post-installation tips, you can ensure that your new hardwood floors remain in top condition. Up next, we’ll address some frequently asked questions about hardwood floor installation to help you further understand the process and care requirements.
Frequently Asked Questions about Hardwood Floor Installation
Installing hardwood floors can seem daunting, but breaking it down into steps makes it manageable. Here are some common questions to help you understand the hardwood floors installation process better.
What are the steps of installing wood flooring?
Installing wood flooring involves several key steps:
- Preparation: Start by preparing the room. Remove old flooring and ensure the subfloor is clean, dry, and level. This is crucial for a smooth installation.
- Acclimation: Acclimate your wood planks to the room’s temperature and humidity for 3-7 days. This prevents future warping or gaps.
- Layout Planning: Measure the room and plan your layout. Decide the direction of the planks and calculate the amount of material needed, adding 10% for cuts and waste.
- Installation: Depending on the method (nail-down, glue-down, click-lock, or staple-down), follow specific steps to secure the planks. Each method requires different tools and techniques.
- Finishing Touches: Once installed, sand (if necessary), stain, and seal the floor. Finally, install baseboards and threshold strips to complete the look.
What should I put down before installing hardwood floors?
Before installing hardwood floors, consider these essential underlayment options:
- Moisture Barrier: Especially important for installations over concrete, a moisture barrier prevents water damage.
- Underlayment: Provides a smooth surface for flooring installation and can help with soundproofing and insulation. Materials like foam or cork are common choices.
- Vapor Barrier: If installing over a wooden subfloor, a vapor barrier can prevent moisture from seeping up into the wood.
Ensuring a proper foundation will improve the durability and longevity of your hardwood floors.
How long does it take to install 1000 sq ft of hardwood floor?
The time it takes to install 1,000 square feet of hardwood flooring can vary based on several factors:
- Installation Method: Nail-down or glue-down methods typically take longer than click-lock installations.
- Room Complexity: Simple, open spaces are quicker to install than rooms with many corners or obstacles.
- Experience Level: Professional installers can complete the job faster than DIYers.
On average, professional installation might take 3-5 days, while a DIY project could extend to a week or more, depending on your pace and expertise.
Understanding these FAQs will help you plan and execute your hardwood floor installation smoothly. Next, we’ll dive into more detailed steps for each installation method.
Conclusion
Installing hardwood floors is a rewarding project that can transform your home. The benefits are clear: hardwood floors improve beauty, add value, and are easy to maintain. They also offer long-term durability, making them a wise investment for any homeowner.
At Romero Hardwood Floors Inc, we pride ourselves on delivering top-notch service and quality craftsmanship. Our years of experience ensure that your flooring project is in expert hands. We understand that every home is unique, and we work closely with you to bring your vision to life.
Why choose us?
- Expertise and Experience: With over a decade in the industry, we have honed our skills in hardwood floor installation. Our team is dedicated to excellence, ensuring each project is completed to the highest standards.
- Customer Satisfaction: We value your trust and strive to exceed your expectations. Our commitment to customer satisfaction means we listen to your needs and provide personalized solutions.
- Reliable Service: We are known for our punctuality and adherence to project timelines. Our transparent process keeps you informed every step of the way, ensuring a hassle-free experience.
- Quality Materials: We use only the best materials, ensuring that your hardwood floors are not only beautiful but also built to last.
In summary, choosing hardwood floors is a decision that pays off in aesthetics, functionality, and value. And with Romero Hardwood Floors Inc, you get a partner committed to making your flooring dreams a reality. Contact us today to start your journey towards stunning hardwood floors that will improve your home for years to come.
