How to Install Hardwood Flooring on Concrete Slab: 7 Powerful Steps for Success 2025
Why Installing Hardwood on Concrete Changes Everything
Learning how to install hardwood flooring on concrete slab can transform cold, uninviting spaces into warm, beautiful rooms that add significant value to your property. The process requires careful planning and specific techniques, but the results are worth the effort.
Quick Answer: How to Install Hardwood Flooring on Concrete Slab
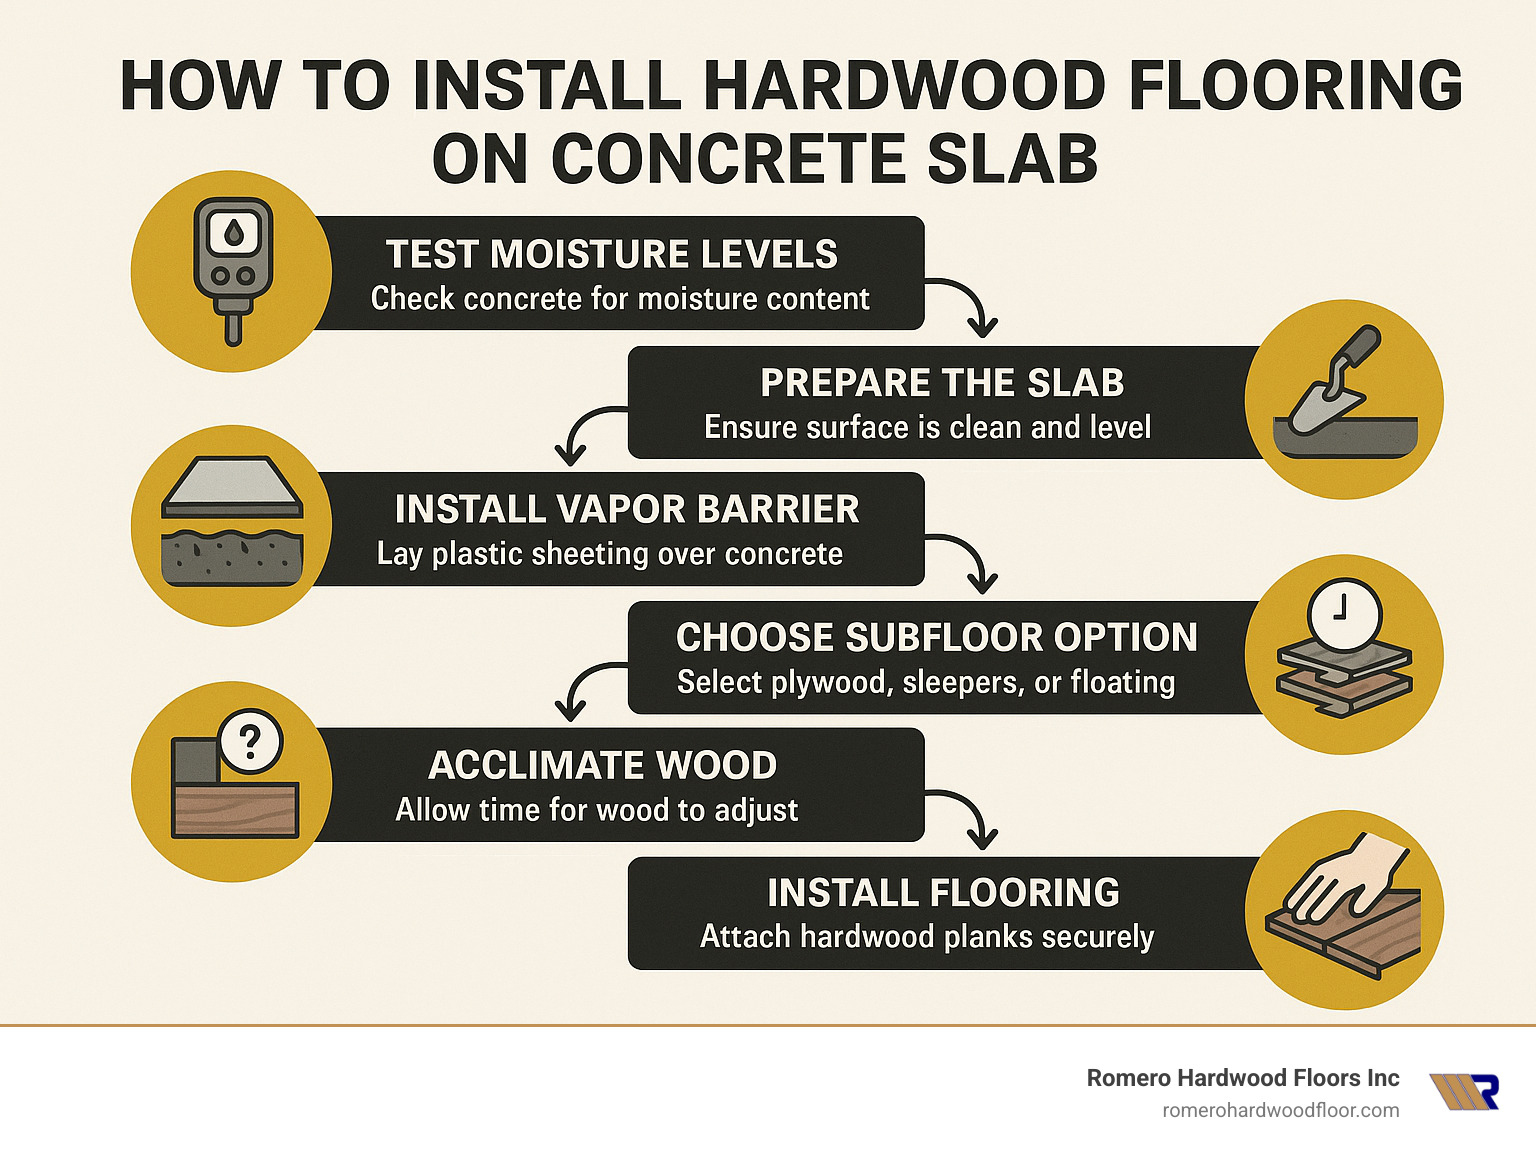
- Test moisture levels – Concrete must be below 4% for solid wood, 12% for engineered
- Prepare the slab – Level to within 1/8″ over 6 feet, clean thoroughly
- Install vapor barrier – Use 6 mil polyethylene or approved membrane
- Choose subfloor method – Plywood-on-slab, sleeper system, or floating
- Acclimate wood – Allow 48-168 hours for proper moisture balance
- Install flooring – Glue-down, nail-down, or floating method
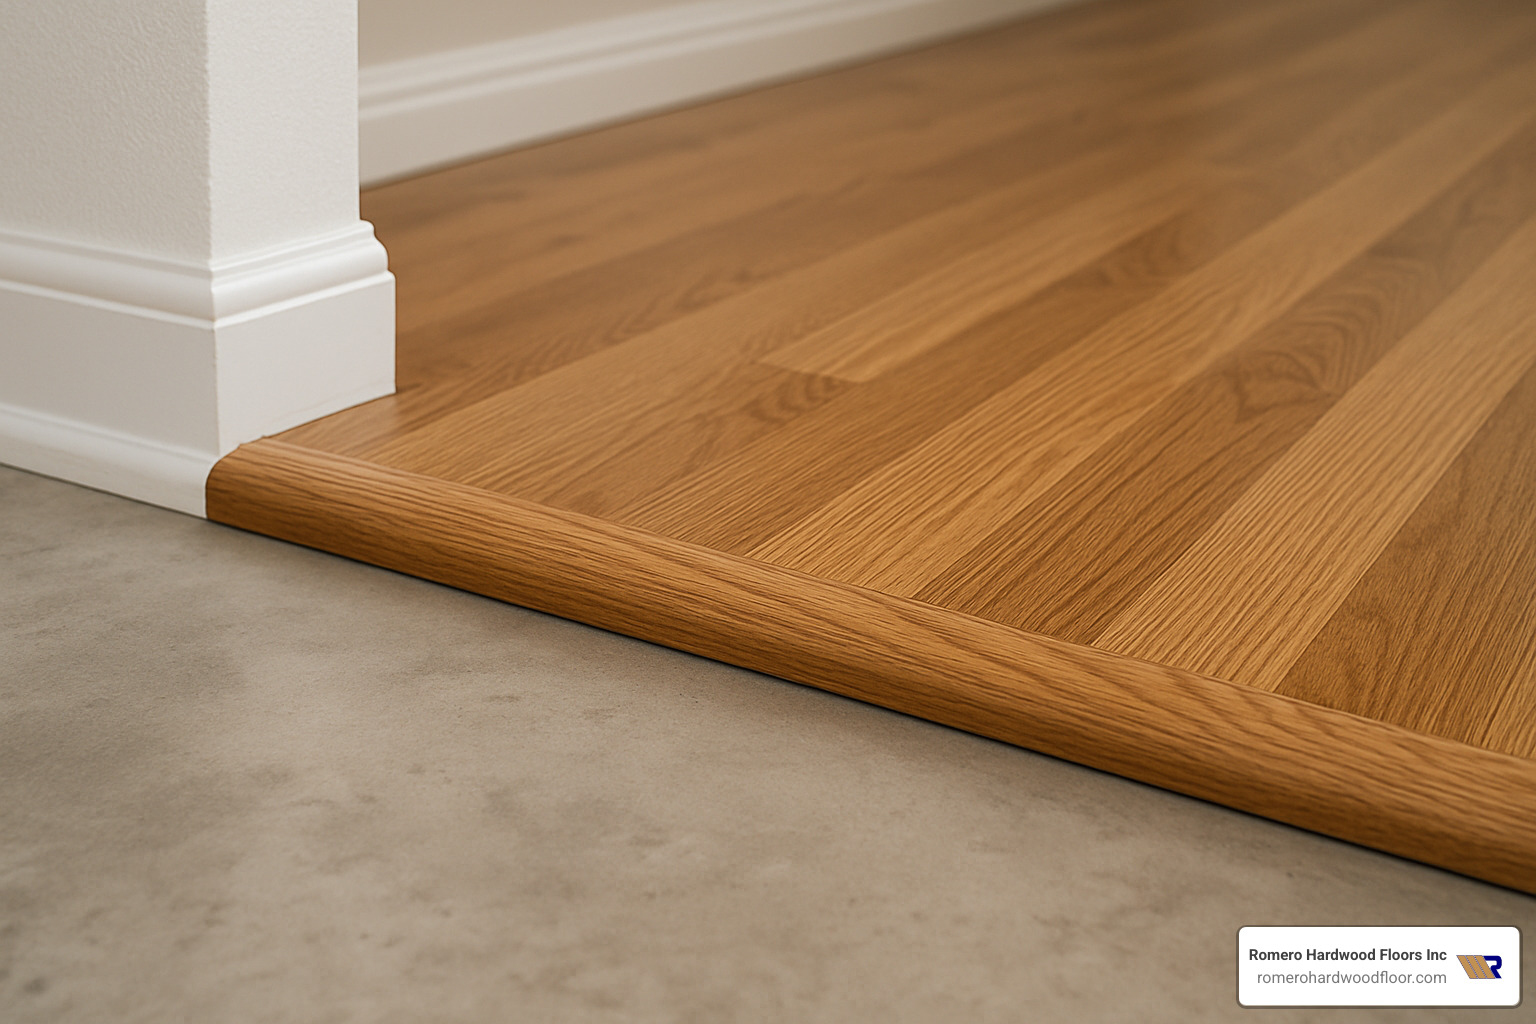
- Finish edges – Install trim and transitions, maintain expansion gaps
Many homeowners think concrete floors are permanent limitations, but they’re actually solid foundations for beautiful hardwood installations. The key is understanding that concrete is porous and allows moisture transmission, which can damage hardwood if not properly controlled.
As Francisco Romero, owner of Romero Hardwood Floors Inc., I’ve spent over 15 years perfecting techniques for how to install hardwood flooring on concrete slab installations throughout the Greater Boston area.
Quick how to install hardwood flooring on concrete slab definitions:
– heated hardwood floors on concrete
– gluing solid hardwood floors to concrete
– floating wood floor over concrete
Why Concrete Needs Special Prep for Wood Floors
Concrete acts like a giant sponge that never fully dries. While it looks solid, concrete is porous and continuously pulls moisture from the ground, pushing it upward through tiny pores. This moisture migration happens through capillary action and never stops.
The Moisture Migration Problem
Wood floors expand when they absorb moisture and contract when they dry out. Uncontrolled moisture can cause buckling, warping, or gaps. That’s why moisture testing and vapor barriers aren’t optional – they’re absolute necessities.
Getting Your Slab Perfectly Flat
Concrete rarely dries perfectly flat. Your slab needs to be flat within 1/8 inch over a 6-foot radius for most installations. High spots create pressure points that can crack boards, while low spots leave gaps that allow movement and noise.
Strength and Curing Requirements
Your concrete needs minimum compressive strength of 3,000 psi and must cure for at least 30 to 60 days before hardwood installation.
The Vapor Retarder Solution
A proper vapor retarding membrane with a perm rating of 0.13 or less blocks moisture transmission. We typically install 6 mil polyethylene film as insurance for your floors.
Step-by-Step: How to Install Hardwood Flooring on Concrete Slab
Proper preparation makes the difference between a beautiful installation and a costly disaster. After 15 years of changing concrete slabs into gorgeous hardwood floors, I’ve learned that respect for the process is essential.
The Foundation: Project Planning
Understand your concrete’s location: basement (below grade), garage conversion (on grade), or second-floor slab (above grade). Each scenario demands different approaches. Below-grade installations are trickiest because moisture loves basements. Most solid hardwood manufacturers void warranties for below-grade work, making engineered hardwood your best choice in these situations.
Your building needs to be completely closed-in and conditioned before starting. Maintain occupancy-level temperature and humidity throughout the process.
Essential Tools
Key tools include: moisture meter (pin-type and pinless), concrete grinder with OSHA-compliant dust collection, self-leveling compound and primer, power-actuated fastener gun, circular saw with concrete blade, and 100-pound roller for glue-down installations.

Safety First
Concrete work generates silica dust. Use OSHA-approved respirator, safety glasses, hearing protection, knee pads, and work gloves. Keep a first aid kit nearby.
More info about installing hardwood floors on concrete
1. Moisture Testing & Concrete Assessment
Moisture testing determines whether how to install hardwood flooring on concrete slab projects succeed or fail. Even concrete that looks dry can push moisture upward through its pores.
The Gold Standard: Relative Humidity Probes
The ASTM F2170 test using RH probes provides the most reliable readings. We drill holes at exactly 40% of the slab’s depth, insert probes, and wait several days for accurate readings.
Calcium Chloride Testing
Calcium chloride testing following ASTM F1869 standards measures moisture absorption over 72 hours. If emission rates exceed 3 pounds per 1,000 square feet per 24 hours, the concrete is too wet.
Simple Plastic Sheet Test
Tape plastic sheets to different concrete areas overnight. Condensation under plastic indicates high moisture levels.
Critical Numbers
For solid hardwood, concrete moisture must be below 4%. For engineered hardwood, below 12%. Wood moisture difference must be within 4% for boards under 3″ wide, within 2% for wider planks.
Safety: OSHA Silica Dust Rules
Concrete grinding creates silica dust requiring OSHA-approved dust collection systems and proper respiratory protection.
Latest research on concrete moisture shows that proper testing prevents thousands in repairs later.
2. Subfloor Options & Installation
Choosing the right subfloor system makes the difference between lasting success and early failure when learning how to install hardwood flooring on concrete slab.
The Plywood-on-Slab Approach
This method involves gluing 5/8″ or 3/4″ exterior-grade plywood directly to concrete using asphalt mastic. After priming (if required), spread mastic with a notched trowel. Position panels with 1/4″ gaps between panels and secure with power-actuated fasteners every 6-8″ along edges.
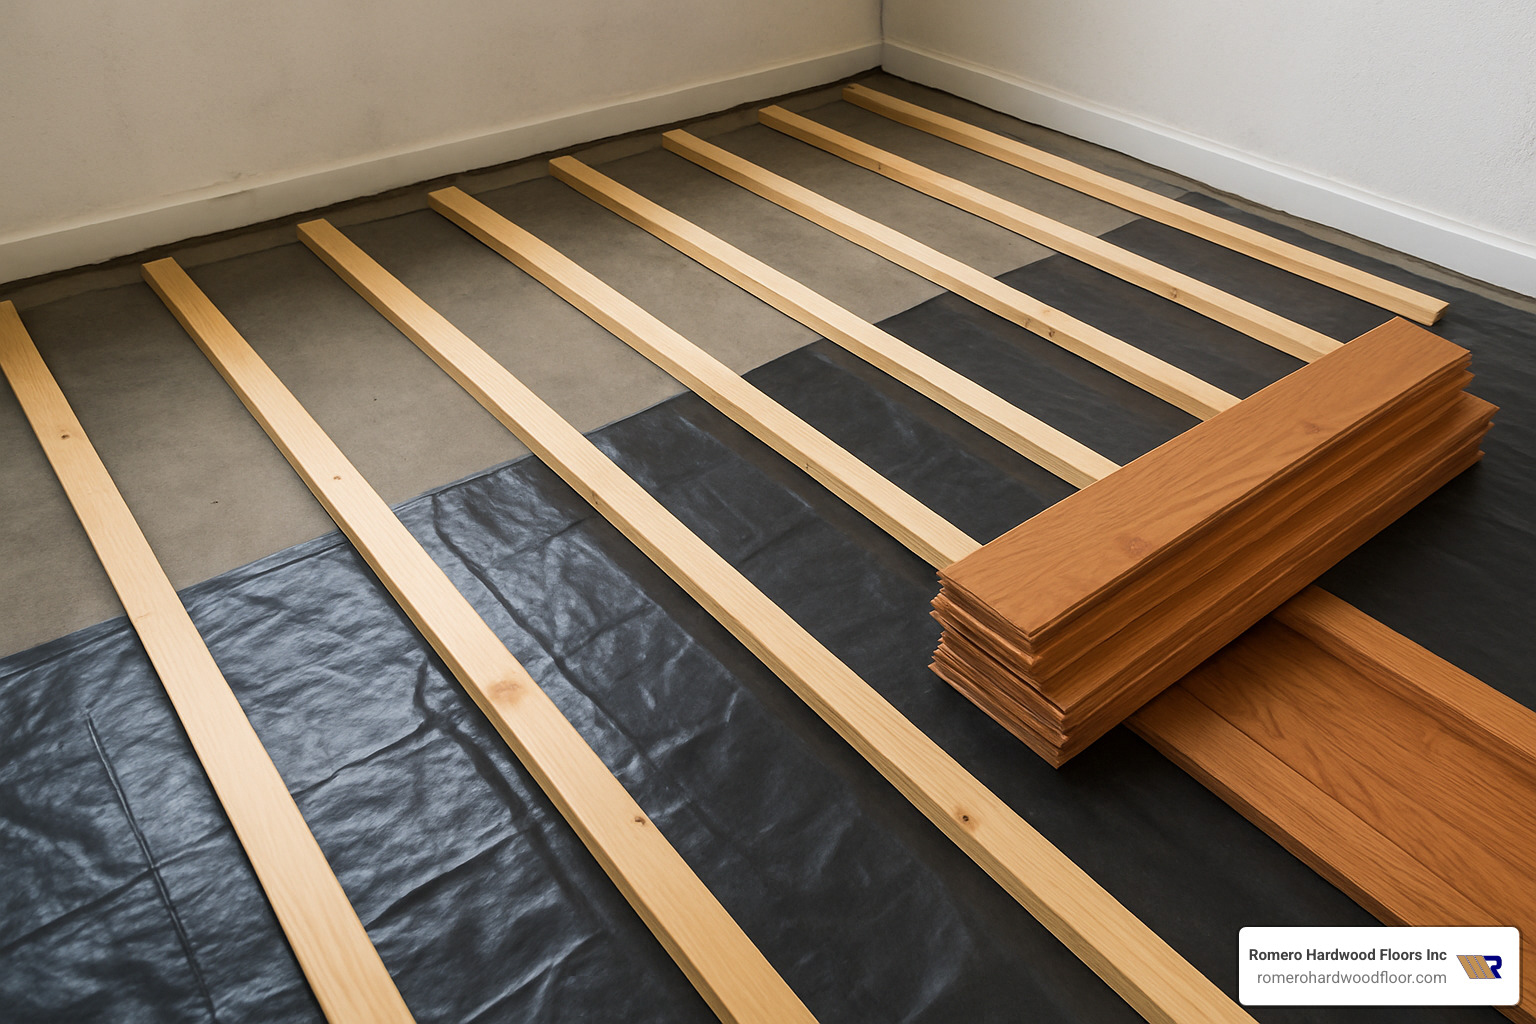
Sleeper Systems for Superior Protection
Sleepers create air space between concrete and hardwood, providing excellent moisture protection. Use kiln-dried lumber spaced 6-7″ on center in random lengths. Install vapor retarder first, then embed sleepers in asphalt mastic. Level carefully with shims.
Floating Subfloor Panels
Floating systems don’t attach to concrete, allowing natural movement while providing stability. These modular systems combine moisture protection with structural support.
Dealing with Uneven Concrete
Self-leveling compound corrects variations up to 1.5″ in single applications. Use polymer-modified compounds for strength and flexibility. Proper priming is essential for adhesion.
More info about Solid Hardwood on Concrete Slab
3. Vapor Retarders & Underlayments
Proper moisture barriers are essential for successful how to install hardwood flooring on concrete slab installations.
The Gold Standard: 6 Mil Polyethylene Film
This plastic sheeting provides excellent moisture protection when installed correctly. Overlap edges by 4-6 inches and seal every seam with moisture-proof tape. Film should extend 2-3 inches up walls and tuck under baseboards.
Heavy-Duty Protection: Asphalt Felt with Mastic
For challenging moisture conditions, use 15-pound asphalt felt embedded in mastic. Apply mastic at 50 square feet per gallon for standard conditions, 100 square feet per gallon for high-moisture situations.
Modern Solutions: Combination Products
Some newer adhesives serve as both flooring adhesive and vapor barrier. Apply with notched trowels using full-trowel coverage.
Critical Details: Seams and Overlaps
Every seam must be overlapped by at least 4 inches and sealed with moisture-resistant tape. Take extra care around penetrations like floor drains.
Added Comfort: Cork and Foam Underlayments
Cork and foam underlayments add insulation and sound dampening. Cork provides R-value around 1.0 compared to typical pads at 0.5.
More info about Engineered Hardwood Over Concrete
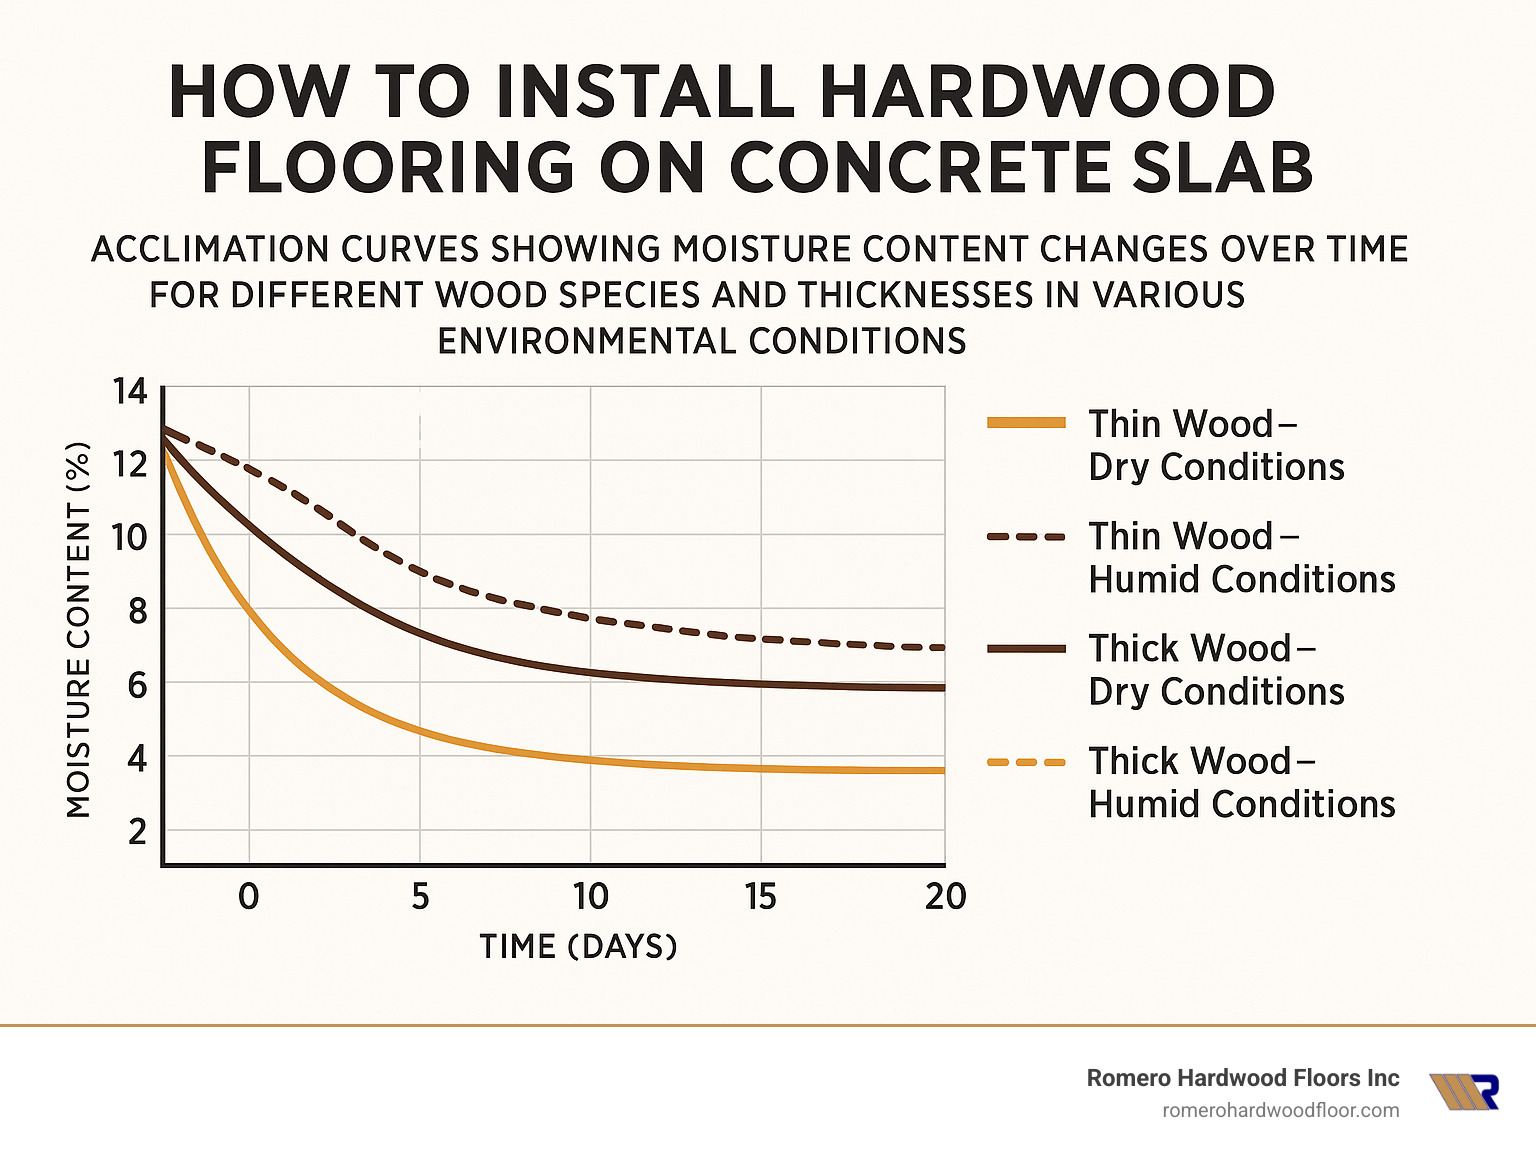
4. Acclimation & Layout
Proper acclimation is essential for successful how to install hardwood flooring on concrete slab installations.
Acclimation Requirements
Acclimate hardwood for 48-168 hours (2-7 days) depending on wood species, thickness, manufacturing moisture content, and installation environment.
Stacking Method
Stack flooring with spacers between layers using 1×2 furring strips to allow air circulation around all surfaces.
Moisture Content Requirements
Wood is properly acclimated when moisture differences meet these thresholds:
– Boards under 3″ wide: within 4% of subfloor moisture content
– Boards 3″ or wider: within 2% of subfloor moisture content
Expansion Gap Planning
- Standard gaps: 1/4″ to 1/2″ at walls
- Large rooms (over 25 feet): 3/4″ gaps may be required
- Transitions: follow manufacturer specifications
Room Layout
Establish center lines in both directions, then adjust for the most visually pleasing layout. Start with the longest, straightest walls.
Environmental Controls
Maintain temperatures between 60-80°F and relative humidity between 35-55%. The building must be completely closed-in with HVAC operational. Document daily readings for warranty protection.
5. Installation Methods: Glue-Down, Nail-Down, Floating
Choosing the right installation method determines long-term success when learning how to install hardwood flooring on concrete slab.
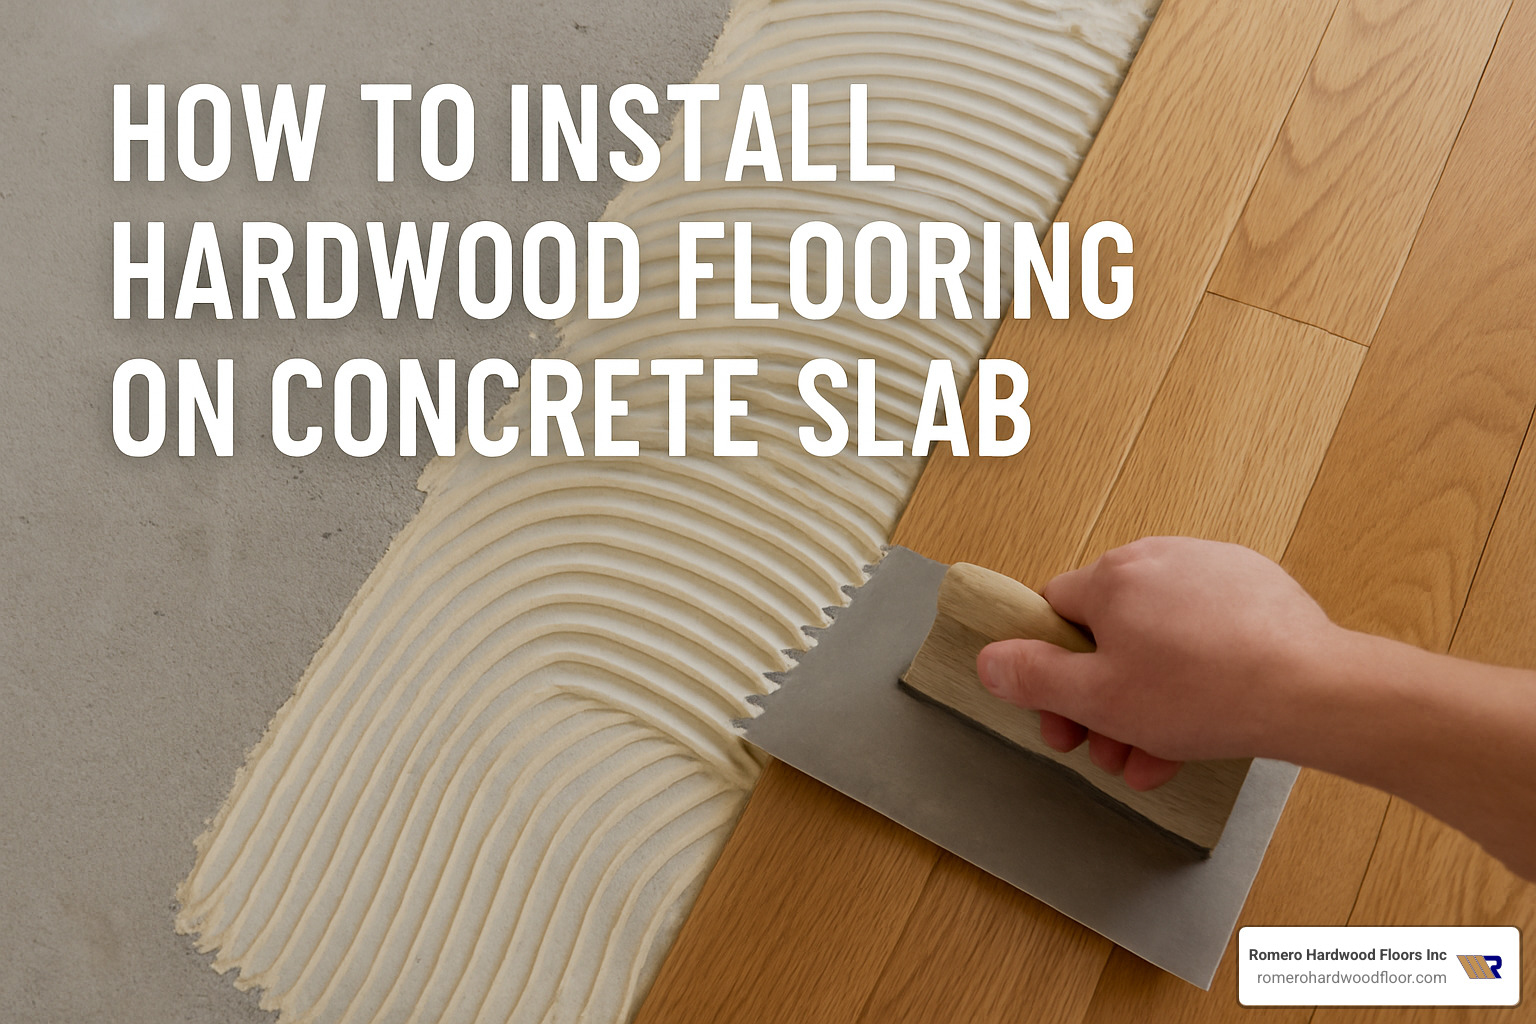
Glue-Down: The Direct Approach
Glue-down bonds hardwood directly to concrete using urethane-based adhesives. Apply adhesive with notched trowel in manageable sections. Use a 100-pound roller to ensure complete contact and eliminate hollow spots.
Nail-Down: The Traditional Champion
Nail-down requires a wood subfloor over concrete. Use pneumatic nailers with fasteners matched to subfloor thickness and wood species. Provides excellent stability and allows future refinishing.
Floating Systems: Modern Flexibility
Modern tongue-and-groove locking systems create stable floors without attaching to the subfloor. More forgiving of minor moisture variations and subfloor imperfections.
Special Considerations for Radiant Heat
Maximum surface temperature should never exceed 85°F. Use adhesives specifically rated for radiant applications with improved moisture control measures.
More info about Floating Wood Floor Over Concrete
Finishing & Cleanup
For glue-down installations, roll within the adhesive’s open time using overlapping passes in multiple directions. Baseboards and quarter-round molding conceal expansion gaps – never nail trim through the flooring.
Installing hardwood over concrete typically raises floor height by 1-3 inches. Plan for door casing undercuts, transition strips, and door height adjustments.
Most installations require 24-48 hours before normal foot traffic and 72 hours before heavy furniture placement.
Cost, Tools & Labor Considerations
Planning your budget for how to install hardwood flooring on concrete slab requires understanding both upfront costs and long-term value.
Material Costs
These are average costs based on internet data and not actual costs for Romero Hardwood Floors.
Basic engineered hardwood: $4-8 per square foot
Premium engineered products: $8-15 per square foot
Solid hardwood for concrete: $6-18 per square foot
High-end exotic species: $15-30+ per square foot
Labor Investment
These are average costs based on internet data and not actual costs for Romero Hardwood Floors.
Basic installation: $3-6 per square foot
Complex installations with subfloor systems: $6-12 per square foot
Premium installations: $12-25+ per square foot
Hidden Costs
Moisture testing: $200-500
Concrete grinding/leveling: $2-8 per square foot
Vapor barrier installation: $1-3 per square foot
Subfloor systems: $3-8 per square foot
Permits and inspections: $100-500
| Installation Method | Material Cost Range | Labor Complexity | Best For |
|---|---|---|---|
| Glue-Down | $8-20/sq ft | Moderate | Engineered wood, stable conditions |
| Sleeper System | $12-25/sq ft | High | Solid wood, moisture issues |
| Floating | $6-18/sq ft | Low-Moderate | DIY-friendly, rental properties |
DIY vs Professional Installation
While some homeowners tackle these projects themselves, the complexity often justifies professional installation. Moisture testing requires specialized equipment, and mistakes can cost thousands to correct.
Maintenance & Mistakes to Avoid
Proper care after mastering how to install hardwood flooring on concrete slab ensures lasting beauty.
The Golden Rule: Keep Water Away
Never wet-mop hardwood over concrete. Use barely damp microfiber mops and clean spills immediately. Wood floors over concrete already deal with potential moisture from below.
Humidity Control
Keep relative humidity between 35-55% year-round. Use dehumidifiers in summer and add moisture in winter. A $20 digital hygrometer can save thousands in floor repairs.
Smart Furniture Protection
Felt furniture pads prevent permanent dents and scratches. Replace pads when they get dirty or compressed.
The Big Mistakes That Cost Money
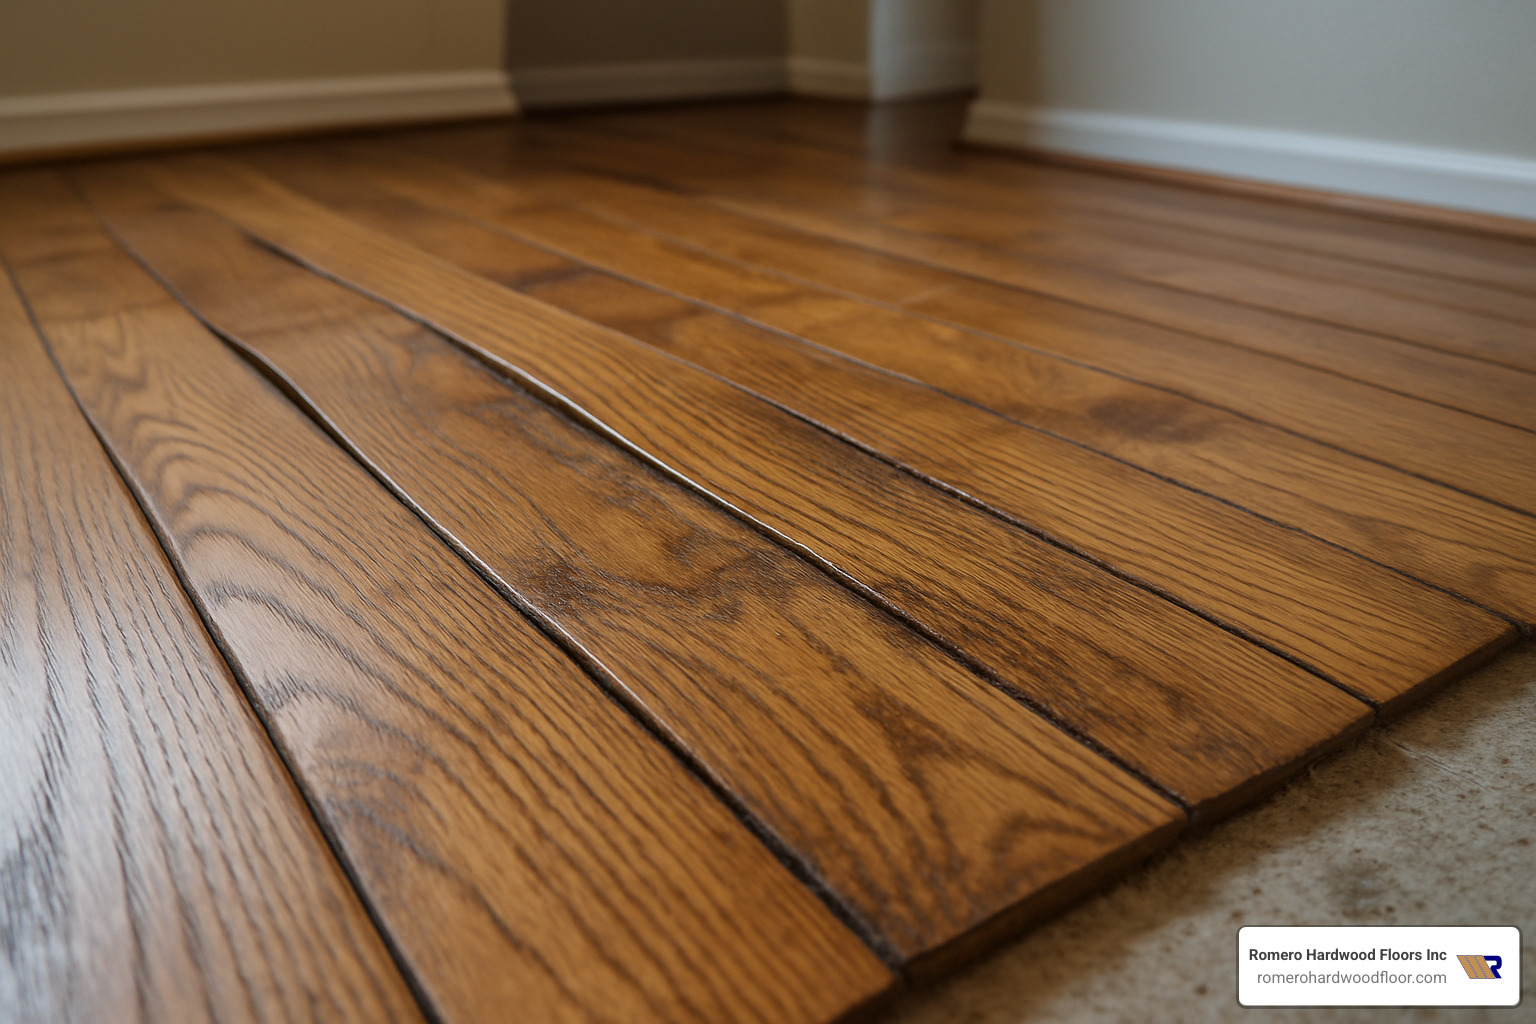
Skipping moisture testing, inadequate expansion gaps, wrong adhesive selection, and poor vapor barrier installation cause expensive failures. Cupping (board edges higher than centers) indicates moisture from below. Crowning (centers higher than edges) suggests surface moisture problems.
Warning Signs
Excessive gapping, squeaking, hollow sounds, or mold/mildew odors indicate problems needing immediate attention.
More info about Heated Hardwood Floors on Concrete
Frequently Asked Questions about Hardwood on Concrete
Can I install hardwood directly on a concrete slab?
The short answer is no – direct installation without moisture control causes problems. You need a vapor barrier as first defense against moisture damage. Engineered hardwood can sometimes be glued directly to properly prepared concrete, but solid hardwood typically requires a nail-base subfloor.
Which hardwood type works best over concrete?
Engineered hardwood is the champion for concrete installations. Its cross-grain construction provides dimensional stability and handles moisture fluctuations better than solid wood. For below-grade installations like basements, engineered is your only smart choice since most solid hardwood manufacturers void warranties below grade.
Thicker engineered planks (5/8″ or 3/4″) perform better than thin options, providing better long-term stability.
How do I test a slab for moisture at home?
The plastic sheet test is simplest: tape clear plastic (2 feet square) to different slab areas, seal edges, and wait 24 hours. Condensation under plastic indicates moisture issues.
Pin-type moisture meters ($50-200) give surface readings but aren’t as accurate as professional equipment. Calcium chloride test kits follow ASTM F1869 principles with less precision.
However, for warranty protection and accurate results, professional moisture testing using ASTM F2170 or F1869 methods is strongly recommended. Professional testing costs $200-500 versus thousands in potential floor damage.
Conclusion
Learning how to install hardwood flooring on concrete slab opens possibilities for changing cold spaces into warm, inviting rooms that add real value to your property. Success lies in understanding that concrete demands respect and proper preparation.
Moisture control is your best friend, proper acclimation is non-negotiable, and choosing the right installation method makes all the difference between lasting success and early failure.
At Romero Hardwood Floors Inc, we’ve been turning concrete slabs into hardwood masterpieces throughout the Greater Boston area since 2006. From historic Salem homes to modern Revere condos, from Peabody basement renovations to Chelsea commercial spaces, each project teaches us something new about the art and science of how to install hardwood flooring on concrete slab.
Every concrete slab tells a story. Some are perfectly level and dry, ready for straightforward installation. Others present challenges requiring creative solutions – extra moisture control in Malden basements or specialized subfloor systems for Woburn commercial spaces.
Whether you’re a DIY enthusiast or prefer professional installation, the principles remain the same: Test for moisture religiously, prepare your subfloor properly, control your environment, and never rush the process.
The investment in proper how to install hardwood flooring on concrete slab techniques pays dividends for years. We’ve seen basements transform from storage areas to favorite family rooms, and commercial spaces change from cold industrial environments to warm, welcoming areas.
Ready to turn your concrete slab into something spectacular? Our team at Romero Hardwood Floors Inc is here to help steer every step. From first moisture test to final trim piece, we’ll ensure your project exceeds expectations.
Contact us today for a professional consultation and estimate. Let our 15+ years of Greater Boston area experience work for you – because your floors deserve nothing less than perfection.
More info about flooring installation
