Prefinished Hardwood Flooring Refinishing: 7 Powerful Benefits 2025
Breathe New Life Into Your Factory-Finished Floors
Prefinished hardwood flooring refinishing is absolutely possible and often more cost-effective than replacing your entire floor. Here’s what you need to know:
| Quick Facts: Prefinished Hardwood Refinishing |
|---|
| ✅ Can be refinished: Yes, most solid prefinished hardwood can be refinished 4-5 times |
| ⚠️ Special considerations: Factory aluminum oxide finish requires more aggressive initial sanding |
| 💲 Cost savings: $3-8/sq ft for refinishing vs. $8-15/sq ft for replacement |
| ⏱️ Timeframe: 4-6 days including drying time |
| 🔄 Screen-and-recoat option: $1-3/sq ft for light wear (no deep sanding) |
Those beautiful prefinished hardwood floors that once gleamed with showroom perfection don’t have to be replaced when they lose their luster. Despite the factory-applied aluminum oxide finish and beveled edges that make them unique, prefinished floors can absolutely be restored to like-new condition with proper refinishing techniques.
Many homeowners are surprised to learn that those scratches, scuffs, and faded areas can be completely eliminated without the mess and expense of tearing out and replacing their floors. The key difference is understanding the special considerations required when tackling those factory-finished planks.
I’m Francisco Romero, owner of Romero Hardwood Floors Inc., and with over 15 years of experience in prefinished hardwood flooring refinishing, I’ve helped countless homeowners in Revere and the greater Boston area transform their worn floors into stunning centerpieces once again.
Prefinished hardwood flooring refinishing terms simplified:
– Hardwood Floor Repair
– fixing warped hardwood floors
– flooring restoration and refinishing
What Makes Prefinished Floors Different From Site-Finished?
When you’re walking through a home with gorgeous hardwood floors, you might not realize there’s a fundamental difference between prefinished and site-finished options. This distinction becomes crucial when refinishing time arrives.
Prefinished hardwood flooring comes to your home already sanded, stained, and sealed at the factory – ready to install and enjoy. The factory applies about five coats of finish with aluminum oxide crystals mixed in, creating a remarkably durable surface. Each coat undergoes UV-curing between applications, resulting in a finish that’s substantially harder than anything your local flooring professional can apply on-site.
One of the most distinctive features of prefinished boards are those micro-beveled edges – the slight grooves you see between planks. These bevels aren’t just decorative; they cleverly accommodate minor subfloor irregularities while creating that characteristic look many homeowners love. However, these same bevels require special attention during the prefinished hardwood flooring refinishing process.
As one flooring expert candidly puts it: “Pre-finished hardwood doesn’t last forever. In fact, they don’t stand up to heavy traffic like you were told in the big box store.” The good news? You don’t need replacement – refinishing can restore your floor’s original beauty.
Unlike site-finished floors, where final sanding and finishing happen after installation, prefinished floors let you walk on them immediately after installation. This makes initial installation faster and cleaner, but creates unique considerations years later when scratches, fading, and wear make refinishing necessary.
The installation method also matters – solid prefinished boards are typically nailed down, while engineered versions might be floating or glued. This affects both durability and refinishing options. Maintenance requirements differ too, with prefinished floors often needing special cleaners to maintain their factory finish.
Advantages & Drawbacks at a Glance
Advantages of Prefinished Hardwood:
Your prefinished floor offers exceptional scratch and wear resistance thanks to that factory-applied aluminum oxide finish. Many brands come with impressive warranties (sometimes up to 100 years!). You’ll also find a wider variety of species and stain colors available with prefinished options. Perhaps best of all, there are no on-site finishing odors during installation, and you can use your floors immediately after they’re installed.
On the flip side, those prefinished hardwood flooring refinishing challenges include visible seams between planks due to beveled edges, more difficult individual board repairs, and that factory finish being significantly harder to sand off when refinishing becomes necessary. You’ll also have fewer customization options during initial installation, and typically face a higher upfront cost than unfinished hardwood.
At Romero Hardwood Floors, we’ve worked with both types extensively since 2006, and can guide you through the refinishing process regardless of which type you have in your home.
Can Your Prefinished Hardwood Be Refinished?
The short answer is a resounding yes! But before you dive into your prefinished hardwood flooring refinishing project, there are some important factors to consider.
First, you need to determine if your floor is solid hardwood or engineered hardwood. Solid prefinished planks (typically 3/4″ thick) can be refinished multiple times over their lifetime. Engineered hardwood, with its real wood veneer over plywood or HDF core, might only be refinishable once or twice—it all depends on the thickness of that top veneer layer.
Industry standards tell us that you need at least 1/8″ of wood above the tongue and groove to safely refinish. This ensures you have enough material to sand without compromising your floor’s structural integrity. Think of it as your floor’s safety margin.
Your installation method matters too. Nailed-down floors are excellent candidates for refinishing since they’re securely fastened to the subfloor. Floating floors, on the other hand—those that feel like they move or “bounce” underfoot—generally can’t be sanded because they’re not secured in place.
If your floors show only light wear and tear, you might be a perfect candidate for a screen-and-recoat process. This gentler approach involves lightly abrading the surface without deep sanding, then applying a fresh topcoat. At just $1-3 per square foot, it’s a wallet-friendly way to extend your floor’s life without a full refinishing.
For deeper insights about refinishing engineered products specifically, check out our Engineered Hardwood Floor Refinishing page.
Quick Tests Before You Start
Before committing your time and money to a refinishing project, try these simple tests to determine if your floors are suitable:
1. The Water Drop Test
Place a few drops of water on your floor in an inconspicuous spot. If they soak in immediately, your finish has worn off and refinishing is definitely needed. If they bead up nicely, your finish is still doing its job, and you might only need a screen-and-recoat.
2. Lift a Heat Register
This is my favorite non-invasive inspection method. Simply remove a floor vent to examine the cross-section of your flooring. This clever peek allows you to measure thickness and determine if you have solid or engineered hardwood without damaging your beautiful floors.
3. Leftover Plank Measure
If you’re lucky enough to have spare planks from the original installation (or can pull one from a closet), measure their thickness. Solid hardwood should be about 3/4″ thick, while engineered typically ranges from 3/8″ to 1/2″ thick.
4. The Bounce Test
Take a stroll across your floor and pay attention to how it feels underfoot. If the floor “gives” or bounces, it’s likely a floating engineered floor that cannot be traditionally refinished. Solid floors feel, well, solid when you walk on them.
Prefinished Hardwood Flooring Refinishing Eligibility Checklist
Before you commit to prefinished hardwood flooring refinishing, make sure your floors meet these critical requirements:
Your floor should be solid hardwood or engineered with at least 2mm veneer thickness. The flooring must be nailed down, not floating, with at least 1/8″ of wood remaining above the tongue and groove. Check for structural issues too—severe warping, rotting, or water damage might make refinishing impractical.
Take a close look at those beveled edges—if they’re excessively deep, refinishing becomes more challenging. Factory aluminum oxide finish is tough stuff, designed to last for decades. It will require aggressive sanding to completely remove, so your floors need to be sturdy enough to handle this process.
Finally, keep track of your floor’s history. Solid hardwood can typically be refinished up to 5 times during its lifetime. If your floor is approaching that limit, replacement might be the better long-term investment.
At Romero Hardwood Floors, we’ve seen countless prefinished floors transformed from tired to terrific through proper refinishing. Don’t assume replacement is your only option until you’ve had an expert take a look!
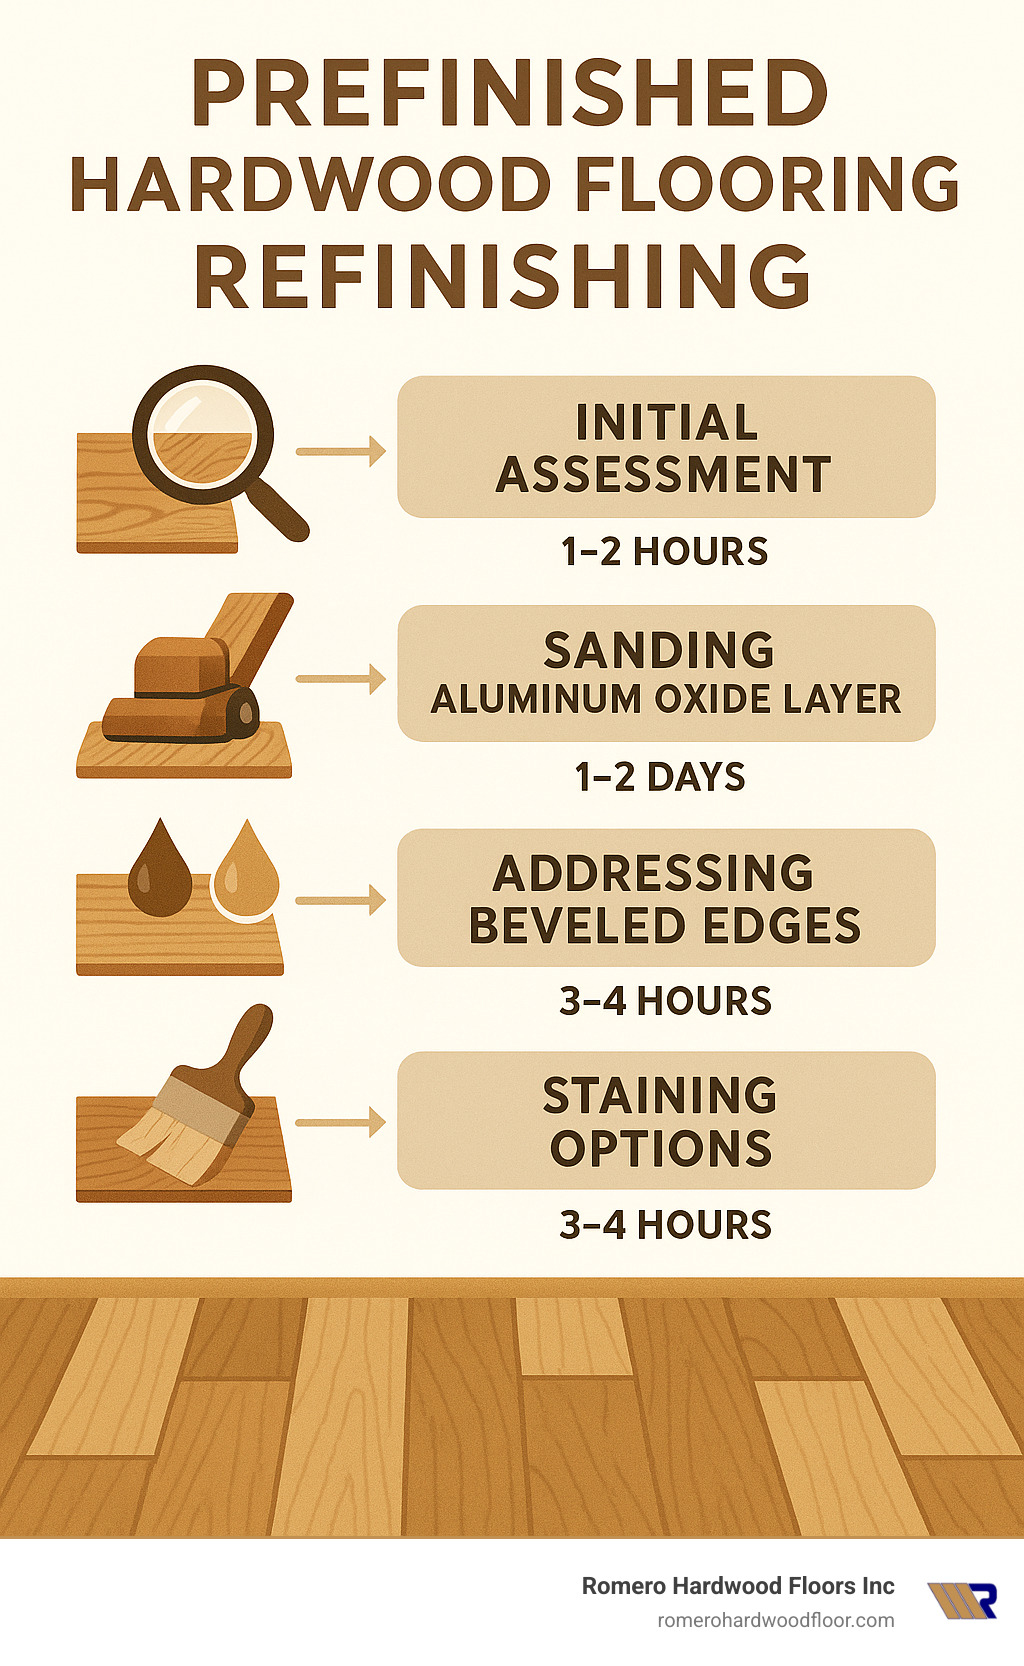
Step-by-Step Prefinished Hardwood Flooring Refinishing Process
Bringing your worn prefinished hardwood flooring back to life follows a specific process that differs from traditional site-finished floors. At Romero Hardwood Floors, we’ve refined this approach over our 15+ years of experience to ensure beautiful, lasting results.
1. Preparation and Safety
Before the sanders come out, we thoroughly prepare your space. This means removing all furniture and décor, then carefully sealing off adjacent areas with plastic sheeting and painter’s tape. We pay special attention to covering vents and doorways—you might be surprised to learn that hardwood floor sanding produces about 10 pounds of dust for every 100 square feet!
We also inspect for and secure any loose boards or make necessary repairs. This preparation stage might seem tedious, but it’s absolutely crucial for both protecting your home and ensuring quality results.
2. Initial Sanding
That factory-applied aluminum oxide finish that made your floors so durable? It’s also what makes refinishing them more challenging. We start with aggressive 36-40 grit sandpaper on a drum sander to cut through that tough factory coating.
“That first pass is where the magic happens,” Francisco often tells our clients. “It’s when we start to see the real wood beneath all those years of wear.”

3. Addressing Beveled Edges
This is where prefinished hardwood flooring refinishing truly differs from traditional refinishing. Those micro-bevels between boards require special attention and expertise.
The National Wood Flooring Association (NWFA) specifically warns against filling bevels with wood putty. Why? It might look good initially, but that putty will inevitably crack and peel within months, leaving your floors looking worse than before.
Instead, we use specialized edge sanding techniques to carefully flatten the bevels while maintaining the integrity of your boards. It’s a delicate balance that comes with experience.
4. Progressive Sanding
After that initial coarse sanding removes the factory finish and addresses the bevels, we don’t stop there. We progress through medium (60 grit) and fine (100 grit) sandpaper to achieve that baby-smooth surface that’s essential for a flawless finish.
This multi-step approach ensures we remove all scratches from previous sanding while preparing the perfect surface for staining.
5. Water-Popping
This optional but recommended technique involves lightly misting your floor with water after the final sanding. It might sound counterintuitive to add water to wood, but this controlled process raises the wood grain slightly, allowing for deeper stain penetration.
Water-popping also helps highlight any spots we might have missed during sanding, giving us a chance to perfect the surface before color application.
6. Stain Application
Now comes the change! Once thoroughly sanded, your floor is ready for its new color. We apply stain evenly, always following the wood grain, and wipe away excess after just the right amount of time to ensure consistent color absorption.
This is when your vision really starts coming to life—that moment when clients first see their “new” floors taking shape is one of our favorite parts of the job.
7. Sealing and Finishing
Protection is everything. We typically apply one coat of sealer followed by 2-3 coats of finish, with light sanding between coats for optimal adhesion. Proper drying time between coats is non-negotiable for a durable result.
Most polyurethane finishes require 24 hours of drying time between coats. Rush this step, and you’ll pay for it later with peeling or bubbling finish. Patience here truly pays off with years of beautiful floors.
8. Final Curing
Even when that final coat looks dry enough to walk on, the finish needs time to fully cure. We recommend light sock-only foot traffic for 24-48 hours and waiting at least 72 hours before replacing furniture (and always with protective felt pads!).
Full chemical curing can take up to 30 days, so treating your newly refinished floors gently during this period will maximize their longevity.
Special Attention: Sanding Those Beveled Edges
The distinctive beveled edges of prefinished floors require techniques you won’t find in traditional refinishing. Here’s our approach to this unique challenge:
We perform cross-cut sanding (going across boards rather than with the grain) to efficiently flatten the floor and remove that stubborn aluminum oxide coating. This technique helps create a uniform surface across the micro-bevels without damaging the wood.
Rather than trying to completely eliminate the bevels (which would significantly reduce the number of possible future refinishes), we sand them to a consistent depth while maintaining a slight groove. This preserves your floor’s integrity while creating a beautiful finished look.
“If you leave the bevel unfilled, you can refinish pre-finished hardwood floors up to five times,” notes a refinishing expert. That’s significant long-term value for your prefinished hardwood flooring refinishing investment.
Stain & Finish Options That Last
Refinishing gives you the opportunity to completely transform your floors with new colors and finishes. Here are options to consider:
Oil-Based Polyurethane offers superior durability and moisture resistance with a warm amber tone that deepens over time. It requires longer drying time (24+ hours between coats) and has a stronger odor during application, but many homeowners feel the extra wait is worth it for the added protection.
Water-Based Polyurethane provides a clearer finish that doesn’t yellow, with faster drying time (2-4 hours between coats) and lower odor and VOC emissions. While slightly less durable than oil-based, modern water-based finishes have improved dramatically and are an excellent eco-friendly option.
When it comes to sheen, matte finishes hide scratches better and offer a contemporary look, while satin finishes balance some shine with practical scratch-hiding properties, making them our most popular choice. Semi-gloss is more reflective and shows more imperfections, while high-gloss delivers dramatic shine but reveals every scratch and dust particle.
Current trends favor lighter, natural wood tones with matte or satin finishes, but your choice should reflect both your personal style and practical needs. We’re happy to provide samples on your actual floor to help you visualize the final result.
For more information about our detailed sanding process, visit our Hardwood Floor Sanding page.
Cost, Timeline & DIY vs. Pro Decision
Deciding whether to tackle prefinished hardwood flooring refinishing yourself or hire professionals comes down to budget, timeline, and your comfort with power tools. Let’s break down what you can expect either way.
The financial picture varies widely depending on your floor size and condition. DIY enthusiasts can expect to spend between $2-4 per square foot when factoring in equipment rentals ($300-1,000) and materials like sandpaper, stain, and finish ($200-500). That drum sander isn’t cheap to rent, but it’s still less than hiring professionals.
Professional refinishing typically runs $3-8 per square foot. For perspective, that means a 1,500 square foot home might cost anywhere from $4,500 to $12,000 to refinish professionally. These are average costs based on internet data and not actual costs for Romero Hardwood Floors.
“My clients often consider DIY until they understand the complexity of properly addressing those factory bevels,” says Francisco Romero. “That’s usually when they decide the professional route is worth every penny.”
For floors with only light wear, a screen-and-recoat might be sufficient. This less invasive process runs about $1-3 per square foot when done professionally and can add years to your floor’s life without the full sanding process.
When comparing refinishing to replacement, the numbers tell the story. New prefinished hardwood installation typically costs $8-15 per square foot, making that same 1,500 square foot home cost $12,000-22,500 to replace – often double or triple the refinishing cost.
| Option | Cost Range (per sq ft) | 1,500 sq ft Home | Dust | Timeline | Skill Level |
|---|---|---|---|---|---|
| DIY Refinish | $2-4 | $3,000-6,000 | High | 7-10 days | Advanced |
| Pro Refinish | $3-8 | $4,500-12,000 | Low with proper equipment | 4-6 days | N/A |
| Screen & Recoat | $1-3 | $1,500-4,500 | Minimal | 2-3 days | Moderate |
| Full Replacement | $8-15 | $12,000-22,500 | Moderate | 7-14 days | N/A |
The timeline for professional refinishing typically spans 4-6 days from start to finish. Day one involves prep work and initial sanding. Day two focuses on finish sanding and stain application. Days three and four are for applying multiple coats of finish with proper drying time between each. The final days are for curing – when you can walk on the floors but should avoid furniture and heavy traffic.
If you’re thinking about the DIY route, be honest about your skill level. Prefinished hardwood flooring refinishing presents unique challenges that standard hardwood doesn’t – particularly that rock-hard aluminum oxide finish that requires aggressive sanding and the delicate work around beveled edges. For most homeowners, these factors tip the scales toward hiring professionals.
“Nothing can compare to the years of knowledge and expertise that a professional contractor will have,” as one industry expert puts it – and this is especially true when dealing with prefinished floors.
For professional refinishing services, check out our Hardwood Floor Refinishing Contractors page or learn more about the general process at How to Refinish Hardwood Floors.
Health & Safety Considerations
Beyond budget and timeline, health and safety deserve serious consideration. Refinishing creates an astounding amount of dust – approximately 10 pounds for every 100 square feet of flooring. That fine wood dust gets everywhere without proper containment.
Professional refinishers use HEPA-filtered vacuum systems that capture 99.9% of dust particles, keeping your home dramatically cleaner. DIYers often underestimate just how invasive this dust can be, finding it in closed cabinets and adjacent rooms months later.
Respiratory protection is non-negotiable during this process. A proper respirator – not just a dust mask – protects against both wood dust and finish fumes. This is especially important when working with traditional oil-based finishes that emit volatile organic compounds (VOCs).
These VOCs can cause headaches, dizziness, and respiratory irritation. If you have children, pets, or anyone with respiratory conditions in your home, consider low-VOC or water-based alternatives, which have come a long way in durability in recent years.
Speaking of family, plan to have children and pets stay elsewhere during the refinishing process and for at least 24-48 hours after the final coat is applied. Even with water-based finishes, the curing process releases chemicals you don’t want your loved ones breathing. And those curious paw prints in fresh polyurethane? They’ll require resanding and refinishing to fix!
The bottom line: whether DIY or professional, prefinished hardwood flooring refinishing requires careful planning for both your wallet and your wellbeing.
Avoid These Common Refinishing Mistakes
Let’s talk about what not to do when tackling prefinished hardwood flooring refinishing. Even skilled DIYers can fall into these traps, so consider this your friendly warning from someone who’s seen it all!
Skipping Coarse Grit Sanding
That factory-applied aluminum oxide finish is tough stuff—like superhero-level tough. If you start with anything finer than 36-40 grit paper, you’ll be sanding until your grandchildren graduate. I’ve seen homeowners spend hours with 80-grit wondering why they’re barely making a dent. The aggressive initial sanding isn’t optional—it’s essential for removing that industrial-strength finish completely.
Over-Sanding Veneer
On the flip side, too much enthusiasm with the sander can spell disaster, especially with engineered floors. Think of that veneer layer as a precious resource—once it’s gone, it’s gone forever. Always measure your flooring thickness beforehand and check your progress frequently. When in doubt, ease up on the pressure.
Filling Bevels with Wood Putty
This might seem like a clever solution to those micro-bevels, but trust me—it’s a shortcut to disappointment. That putty will look perfect for a few weeks, maybe a couple of months if you’re lucky. Then the cracking begins, followed by peeling, and suddenly your beautiful floor looks worse than before. The National Wood Flooring Association recommends against this practice for good reason.
Uneven Stain Application
Staining is an art form that requires patience and technique. Working in manageable sections (about 3-4 boards wide) and maintaining a wet edge prevents those dreaded lap marks and color variations. Remember to wipe with consistent pressure—too light leaves excess stain that darkens unevenly, too aggressive removes too much. Practice really does make perfect here.
Poor Dust Control
Wood dust is sneaky—it finds its way into everything, including your fresh finish if you’re not careful. Nothing ruins the smooth glass-like surface of a newly finished floor faster than dust nibs. Thorough vacuuming and tack-clothing between sanding and finishing isn’t just good practice—it’s essential for professional results.
Rushing Drying Time
I get it—you’re excited to see the finished product and move back into your space. But those manufacturer drying recommendations aren’t suggestions—they’re science. As one of our veteran refinishers likes to say, “You can rush a bad job, but you can’t rush a good one.” Those 24 hours between polyurethane coats might feel like forever, but they’re nothing compared to the years of enjoyment from a properly cured finish.
Between full refinishing cycles, you might want to address minor scratches and wear. Our DIY Guide to Hardwood Floor Scratch Repair offers practical solutions for extending the life of your floors without sanding down to bare wood.
The difference between a DIY refinishing job and professional results often comes down to avoiding these common mistakes. When you consider the investment you’ve made in your prefinished hardwood flooring refinishing project, a little extra care and patience goes a long way toward ensuring results you’ll love for years to come.
Caring For Your Newly Refinished Prefinished Floors
Your floors look amazing after prefinished hardwood flooring refinishing! That gorgeous shine and renewed color deserve to be protected. Taking proper care of your newly refinished floors isn’t complicated, but it does require some attention, especially in those first crucial weeks.
First 48 Hours
Those first two days are absolutely critical. Your finish might look dry, but it’s still curing and extremely vulnerable. Keep shoes off the floor completely—even socks are better! Your pets (especially those clicking dog nails) need to stay away entirely. Don’t even think about moving furniture back yet, no matter how inconvenient living without it might be.
Good ventilation is your friend during this time. Keep air flowing through the space to help the finish cure properly, but avoid excessive dust that might settle into the still-soft finish.
First Two Weeks
After those initial 48 hours, your floor is ready for light use, but still needs gentle treatment. Before replacing any furniture, make sure to attach felt pads to all legs. This simple step prevents scratches and is honestly one of the best investments you can make in floor protection.
When moving furniture back, remember the golden rule: lift, don’t drag! Even with felt pads, dragging heavy pieces can damage your beautiful new finish. Get a friend to help with the heavy lifting—your floors will thank you.
Hold off on area rugs for at least 14 days. Placing rugs too soon can trap moisture in the finish and cause discoloration or adhesion problems. The same goes for wet cleaning—stick to dry methods only during these first couple of weeks.
Long-Term Care
Once your floors are fully cured, maintaining them becomes much simpler. Place protective mats at exterior doors to catch dirt and moisture before they reach your beautiful hardwood. When spills happen (and they will!), wipe them up immediately to prevent water damage or staining.
Regular sweeping or vacuuming with a soft brush attachment prevents tiny particles from scratching your floor’s surface. When deeper cleaning is needed, only use cleaners specifically designed for hardwood floors—harsh chemicals can damage the finish and void warranties.
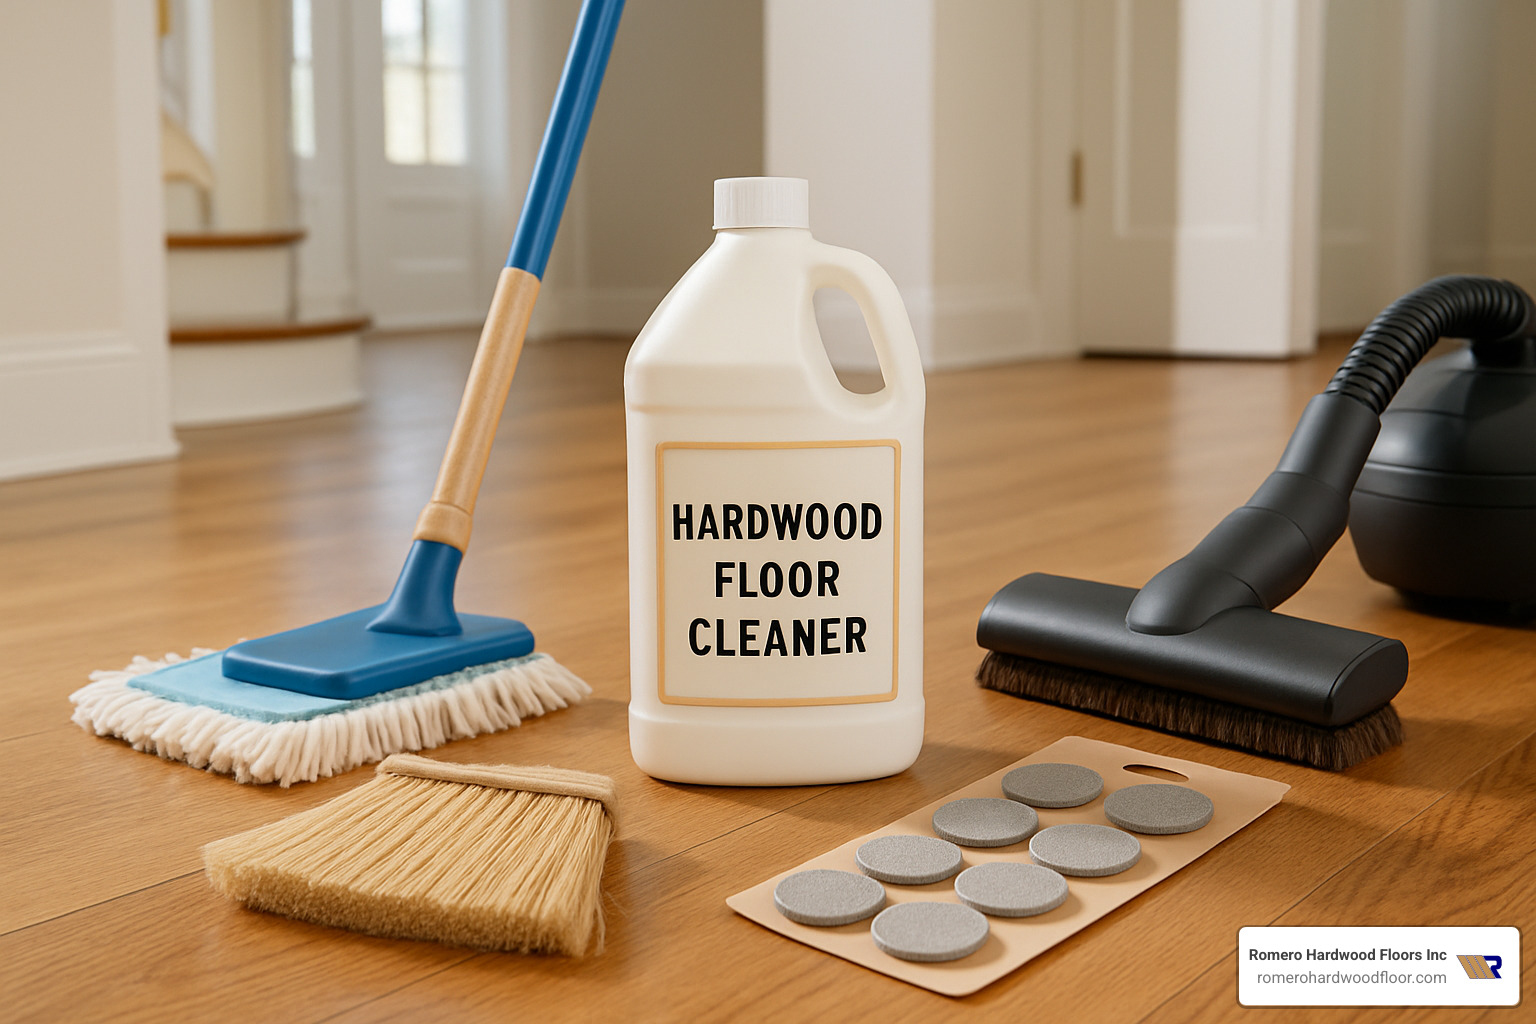
Those beautiful sunny windows can actually be your floor’s enemy. Consider blinds or curtains to protect from UV fading, especially in rooms with southern exposure. And here’s a pro tip that can save you thousands: schedule a screen-and-recoat every 3-5 years. This simple maintenance procedure refreshes the protective layer without the expense and disruption of full refinishing.
“Pre-finished hardwood floors can last up to 25 years before needing refinishing, depending on foot traffic and maintenance,” according to industry experts. With proper care, your refinished floors can remain the stunning centerpiece of your home for decades.
Solid hardwood floors can be refinished up to 5 times over their lifetime. That’s why they’re not just a floor—they’re a genuine long-term investment in your home’s value and beauty.
Want more detailed guidance on keeping your floors looking their best? Visit our comprehensive Hardwood Floor Care Guide for season-specific tips and product recommendations.
Frequently Asked Questions About Prefinished Hardwood Flooring Refinishing
How many times can I refinish my prefinished floors?
Good news for solid hardwood owners! Your prefinished floors can typically be refinished 4-5 times throughout their lifespan. Each time you refinish, we remove approximately 1/32″ of wood. Since most solid hardwood starts at 3/4″ thickness, you’ve got plenty of material to work with for multiple refinishing cycles.
The story is different for engineered floors. These can usually be refinished 0-2 times, with the deciding factor being the thickness of that top veneer layer. If your engineered product has less than 2mm of real wood veneer on top, we generally don’t recommend a full sanding. Instead, a gentle screen-and-recoat might be your best option to extend the life of these floors.
Can I match new boards to my existing factory finish?
This is one of the trickiest challenges in prefinished hardwood flooring refinishing. Your existing floor has been living with you for years – it’s seen sunlight, foot traffic, and natural oxidation. All of these factors change the wood’s color over time, creating noticeable differences between your aged boards and any brand-new replacements.
For small repairs, we typically recommend refinishing the entire floor to achieve a consistent look throughout. When that’s not practical or within budget, we have a few tricks up our sleeves. Sometimes we can source aged stock from warehouses, or our skilled technicians can custom-match stains to help new boards blend harmoniously with your existing floor. It’s not always perfect, but we can usually get remarkably close.
Is a dustless system really dust-free?
I’ll be straight with you – the term “dustless” is a bit misleading. Even the most advanced dust containment systems on the market capture about 99.9% of dust, not 100%. To put that in perspective, a 1,000 square foot refinishing job generates approximately 100 pounds of dust. Even with our high-quality HEPA filtration systems, that still leaves a few ounces that might escape into the air.
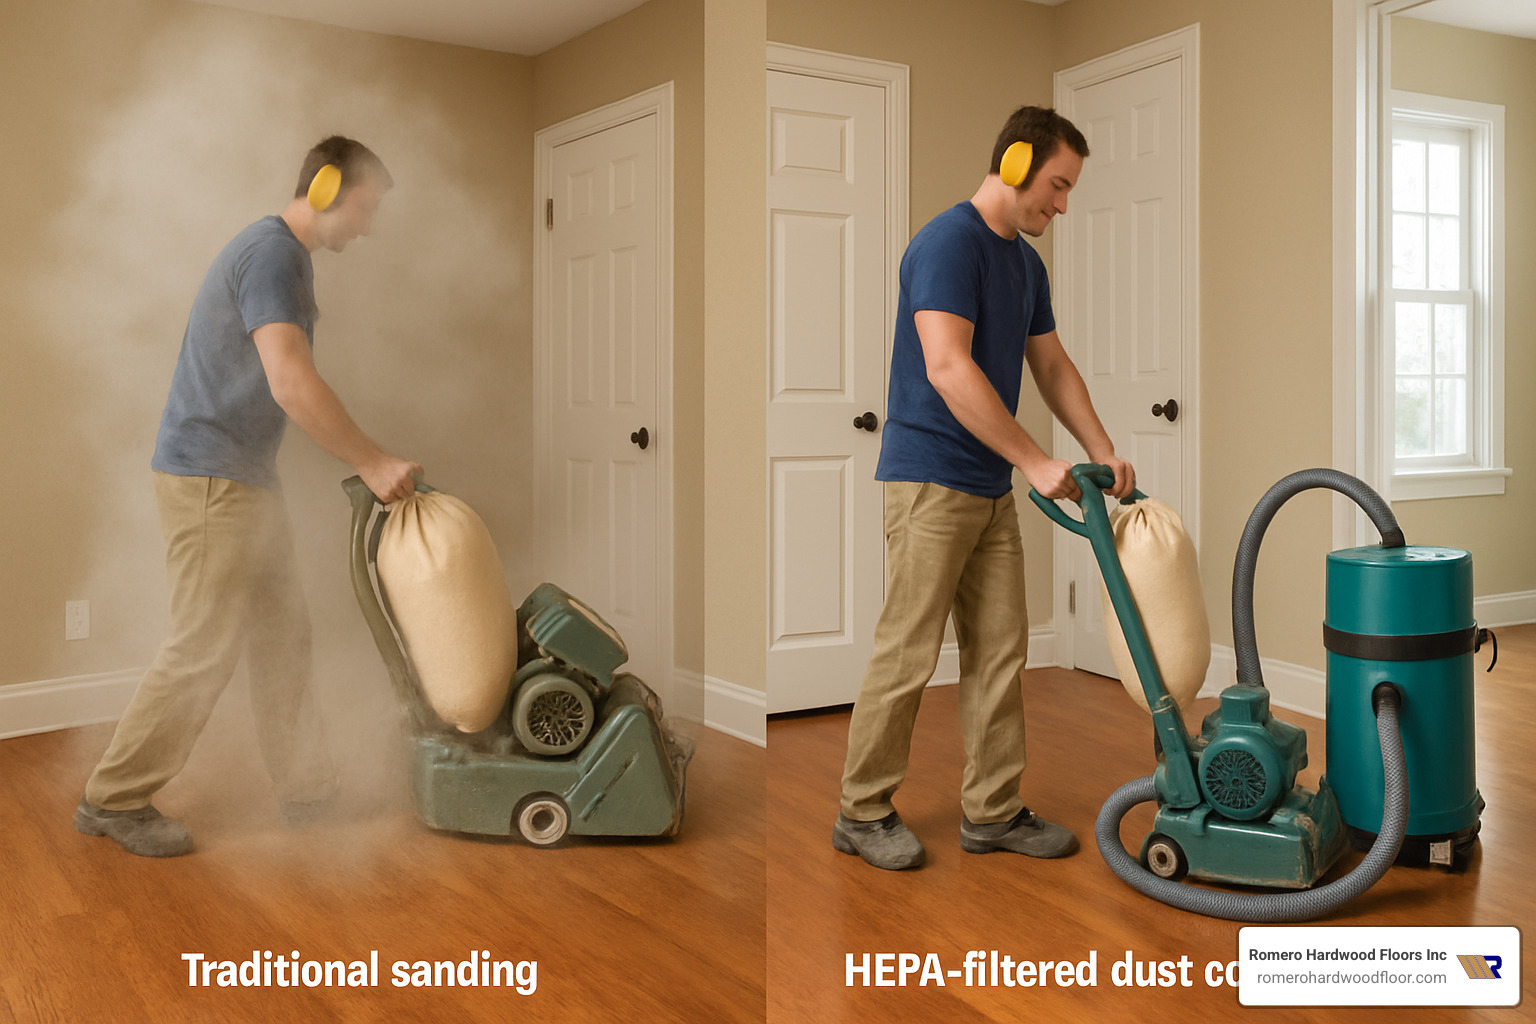
Truly 100% dust-free systems do exist, but they operate much more slowly and come with a significantly higher price tag. For most of our clients, a 99.9% dust-free system offers the best balance of cleanliness and efficiency. You’ll still want to wipe down horizontal surfaces afterward, but you won’t be finding dust in your cabinets months later like with traditional sanding methods.
At Romero Hardwood Floors, we take dust containment seriously because we know how important it is to protect your home and your family’s health during the prefinished hardwood flooring refinishing process.
Conclusion
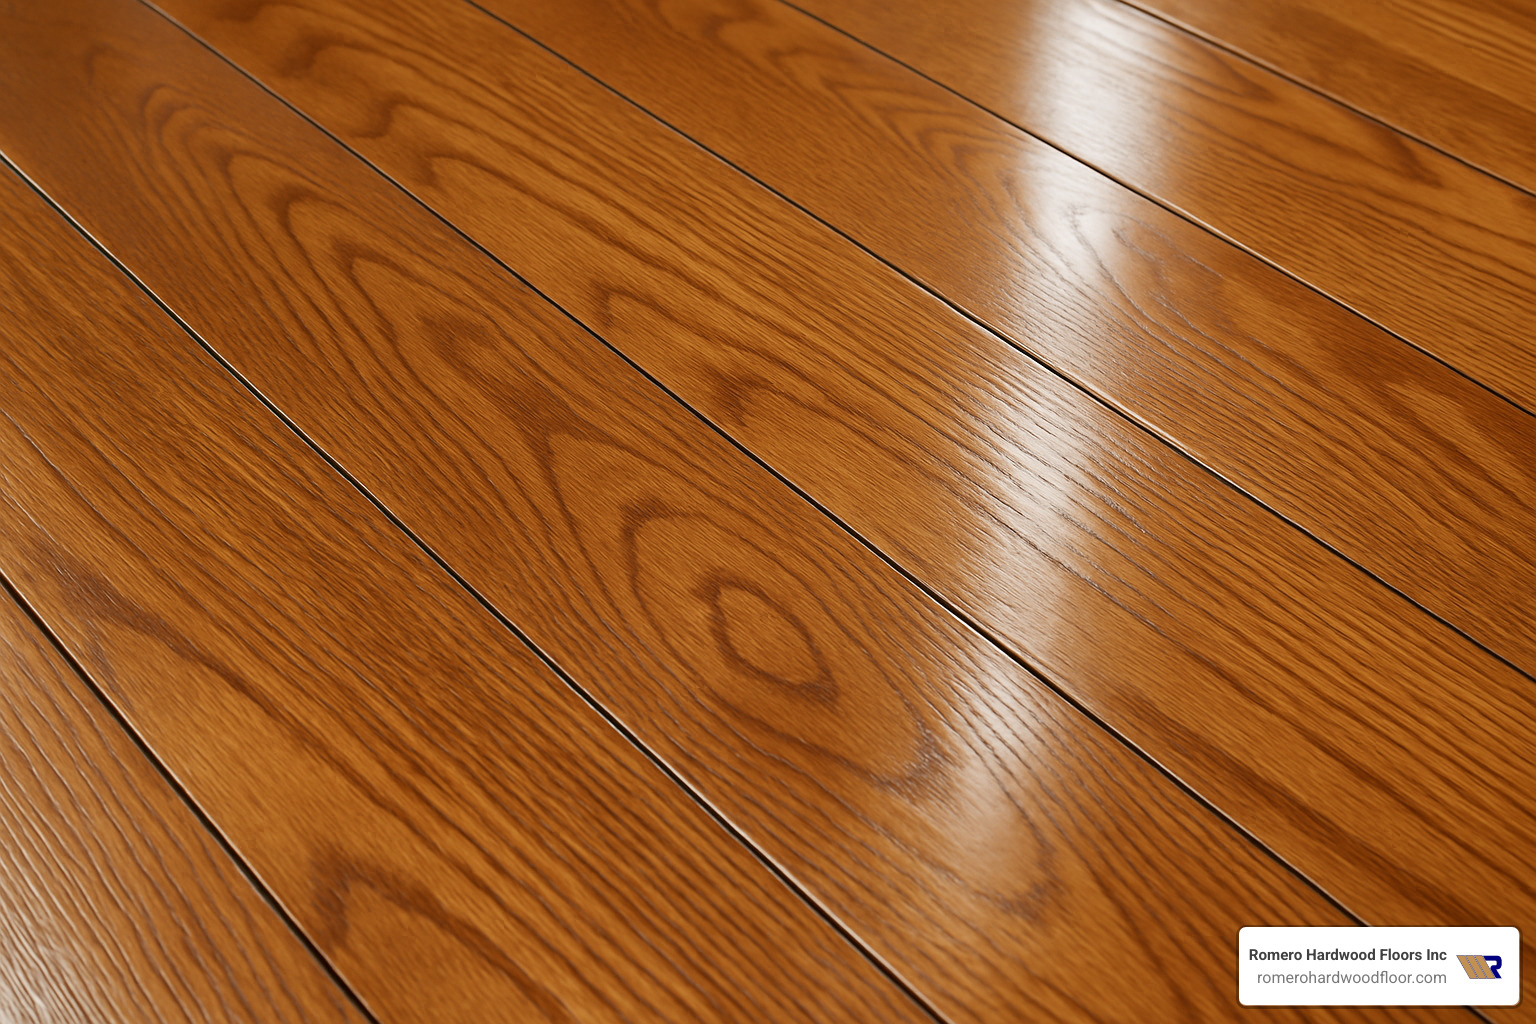
Prefinished hardwood flooring refinishing breathes new life into tired floors, changing worn surfaces into stunning showpieces without the hassle and expense of complete replacement. While the process requires specialized techniques to tackle that factory-applied aluminum oxide finish and those distinctive beveled edges, the results are truly worth it.
Remember those scratches and scuffs that made you wince every time you walked across your living room? They can become distant memories as your refinished floors reveal the natural beauty that first caught your eye when you installed them.
Perhaps you’re simply ready for a change – a darker, richer tone to complement your new furniture, or a lighter, more contemporary look to brighten your space. Refinishing gives you the freedom to reinvent your floors while preserving the investment you’ve already made in your home.
Here at Romero Hardwood Floors Inc., we’ve been helping homeowners throughout Revere, Beverly, Chelsea, and the Greater Boston area fall in love with their floors again since 2006. Our team brings specialized knowledge and equipment to every prefinished hardwood flooring refinishing project, ensuring beautiful, lasting results that honor the unique characteristics of your factory-finished floors.
We understand that every floor tells a story – of family gatherings, children growing up, pets racing through hallways, and quiet moments at home. Our refinishing services help you continue that story without starting a whole new chapter with replacement floors.
Ready to explore your options? We’d love to provide a free, no-obligation evaluation of your prefinished floors. Our experienced team can assess their condition, discuss your vision, and recommend the most appropriate refinishing approach for your specific situation.
For more information about our services or to schedule your consultation, please visit our Hardwood Floor Repair page or give us a call today. Let us help you refind the beauty hiding beneath those years of wear and tear – your floors (and your wallet) will thank you.
