Refinish Hardwood Floors: The Ultimate 2024 Guide!
Transform Your Floors: The Ultimate Guide to Refinishing Hardwood
If you’re looking to refinish hardwood floors, you’re making a wise investment. Refinishing breathes new life into your flooring, adding value to your home and enhancing its beauty.
Quick Takeaways:
- Improves Aesthetic: Gives your floors a fresh, polished look.
- Increases Value: Boosts your home’s market appeal.
- Cost-Effective: Cheaper than replacing your entire floor.
Refinishing is about more than just looks—it’s about practicality and long-term savings. Well-maintained hardwood floors are a top choice among homebuyers, fetching higher prices and quicker sales. Whether you’re dealing with minor scratches or wear and tear, refinishing can restore your floor to its former glory.
Hello, I’m Francisco Romero, the owner of Romero Hardwood Floors Inc. With over 15 years of experience in refinishing hardwood floors, my goal is to ensure every homeowner or property manager in Revere, MA, gets the best possible results. Transitioning into safety and preparation, let’s get into what you need to know before you start.

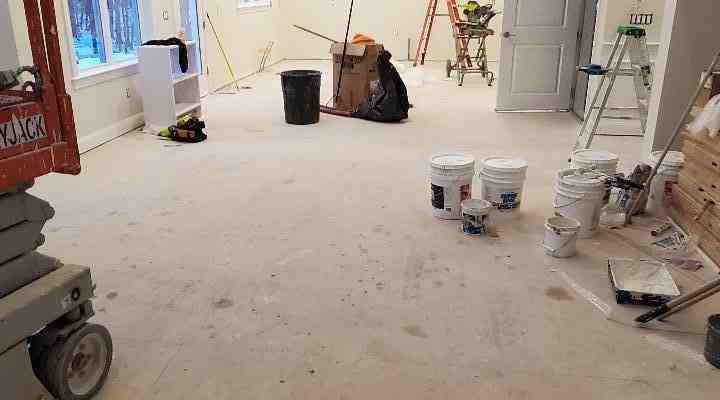
Preparing to Refinish Hardwood Floors
Assessing Your Hardwood Floors
Before diving into the refinishing process, it’s crucial to assess the condition of your hardwood floors. This will help you decide if refinishing is the best option or if more extensive repairs are needed.
Water Droplet Test
A quick and easy way to check your floor’s condition is the water droplet test. Sprinkle a few drops of water on your floor:
- If the water soaks in immediately, your floor needs refinishing.
- If the water beads up, a simple cleaning and polishing might suffice.
Visual Inspection
Look for visible signs of damage:
- Scratches and Gouges: Surface scratches can be sanded out, but deep gouges may need professional attention.
- Discoloration: Stains from pets or water may require deep sanding.
- Wear and Tear: Areas with heavy foot traffic often show more wear.
Scratch Assessment
Run your hand over the floor to feel for rough spots and scratches. Minor scratches can be handled with sanding, while deeper ones might need filling or replacement.
Necessary Tools and Materials
To refinish hardwood floors, you’ll need specific tools and materials to ensure a smooth and professional finish.
Safety Gear
Safety first! Make sure you have:
- Dust Mask or HEPA N95 Respirator: Protects against fine dust and VOCs.
- Ear Protection: Sanding machines can be loud.
- Safety Glasses: Shields your eyes from dust and debris.
Room Prep
Prepare the room to minimize dust and protect your belongings:
- Move Furniture: Clear the room of all furniture and rugs.
- Seal Vents and Doors: Use plastic sheeting to seal air vents and doorways to prevent dust from spreading.
- Remove Base Moulding: Carefully pry off the shoe base moulding for a clean sanding edge.
Tools Needed
Having the right tools is essential for a successful refinishing project:
- Drum or Belt Sander: For sanding the main floor area. Practice on plywood if you’re unfamiliar with its use.
- Edger: Used for sanding edges and corners.
- Sandpaper: Various grits (36-40 for coarse, 60 for medium, and 100 for fine).
- Vacuum Cleaner: To remove dust between sanding steps.
Materials
You’ll also need specific materials to complete the refinishing process:
- Stain: Choose an interior wood stain that matches your desired color.
- Finish: Options include water-based polyurethane, oil-based polyurethane, or wood oils like Danish or tung oil.
- Painter’s Tape and Plastic Sheeting: For protecting walls and vents.
- Tack Cloth: To remove fine dust particles before staining or finishing.
By carefully assessing your floors and gathering the necessary tools and materials, you’re well on your way to successfully refinishing your hardwood floors. Next, we’ll dive into the step-by-step process to achieve a flawless finish.
Step-by-Step Process to Refinish Hardwood Floors
Rough-Sanding the Floor
Rough-sanding is the first critical step to refinish hardwood floors. This process removes old finishes, scratches, and stains.
- Drum Sander Use: Start with a drum sander. This powerful tool can be tricky, so practice on a sheet of plywood first. Keep the sander moving to avoid gouges in the wood.
- Grit Progression: Begin with coarse sandpaper (36-40 grit) to strip away the old finish. Progress to medium (60 grit) and finish with fine (100 grit). This gradual progression ensures a smooth surface.
- Dust Management: Sanding creates a lot of dust. Use a vacuum and sweep between each sanding stage. Seal air vents and doorways with plastic sheeting to prevent dust from spreading.
Fine Detail Sanding
After rough-sanding, focus on the edges and corners of the room.
- Edger Use: Use a floor edger for areas the drum sander can’t reach. Start with the same grit sequence (coarse to fine).
- Corner Sanding: For tight corners, use a scraper and sandpaper by hand. This ensures every inch of your floor is perfectly smooth.
- Hand Sanding Techniques: Hand sanding is essential for small areas like closets or stairs. Use 80- and 100-grit sandpaper for best results.
Staining and Sealing the Hardwood
Once sanding is complete, it’s time to stain and seal the floor.
- Choosing Stain: Pick an oil-based stain in your desired color. Test a small area first to ensure you like the color.
- Application Method: Apply the stain with a lambswool applicator or staining sponge. Work in the direction of the grain in 3- to 4-foot sections. Wipe away any excess stain to avoid blotches.
- Sealing Tips: After staining, apply a sanding sealer before the finish. This helps the finish adhere better and provides a smoother final look.
Final Finishing Touches
The last steps are crucial for a durable and beautiful finish.
- Applying Finish: Choose between water-based or oil-based polyurethane. Apply with a lamb’s wool applicator in smooth, even lines. Avoid drips and puddles.
- Drying Times: Allow each coat to dry completely (usually 24 hours) before applying the next. Most projects require three coats of oil-based or four coats of water-based finish.
- Final Sanding: Lightly sand with 220-grit paper or #000 steel wool between coats. This ensures each layer bonds well and results in a smooth finish.

By following these steps, you can refinish hardwood floors to look like new. Next, we’ll discuss how to maintain your newly refinished floors to keep them looking pristine for years to come.
Maintaining Your Refinished Hardwood Floors
Once you’ve gone through the effort to refinish hardwood floors, keeping them in top shape is key. Proper maintenance can extend the life of your floors and keep them looking new. Here are some practical tips and strategies.
Routine Cleaning Tips
1. Sweep or Vacuum Regularly
Dust and dirt can scratch your floors. Use a soft-bristle broom or a vacuum with a hardwood setting to remove debris daily.
2. Mop with Care
Use a damp mop with a cleaner specifically designed for hardwood floors. Avoid soaking the mop; too much water can damage the wood. A mix of 10 parts water to 1 part white vinegar works well, but be sure to dry the floor immediately after mopping.
3. Tackle Spills Immediately
Wipe up spills right away to prevent water damage. Use a soft, absorbent cloth to blot the liquid.
Long-Term Maintenance Strategies
1. Scratch Prevention
Place felt pads under furniture legs to prevent scratches. Avoid walking on hardwood floors with high heels, which can cause dents.
2. Sunlight Protection
Sunlight can discolor your floors over time. Use curtains or blinds to block direct sunlight. You can also rearrange rugs and furniture periodically to ensure even exposure.
3. Humidity Control
Wood expands and contracts with humidity changes. Keep indoor humidity levels between 30% and 50% to prevent your floors from warping or cracking. A humidifier or dehumidifier can help maintain these levels.
4. Recoating Schedule
Depending on foot traffic and wear, you may need to recoat your floors every 3-5 years. Lightly sand the floor and apply a fresh coat of polyurethane to keep the finish strong and beautiful.
5. Deep Cleaning
For a deeper clean, consider using a professional hardwood floor cleaner once a year. This will remove any buildup that regular cleaning might miss.
By following these simple tips, you can maintain the beauty and durability of your refinished hardwood floors for years to come.
Next, we’ll explore when it’s time to call in the professionals and how Romero Hardwood Floors Inc can help.
When to Call the Professionals
Refinishing hardwood floors can be a rewarding DIY project, but it’s not for everyone. Understanding when to call in the professionals can save you time, money, and a lot of frustration.
DIY vs Professional
DIY refinishing gives you creative control and can save you some money. However, it comes with challenges like a steep learning curve and the need for specialized tools. Mistakes such as uneven sanding or incorrect staining can ruin your floors and shorten their lifespan.
Professional refinishing offers expertise and convenience. Trained technicians use industrial-grade equipment to achieve a flawless finish. Plus, their work often comes with guarantees and warranties, providing you peace of mind.
Signs for Professional Help
Here are some situations where calling a professional is the best choice:
- Extensive Damage: If over 30% of your floor is damaged, it’s better to replace rather than refinish.
- Complex Layouts: Intricate patterns or tight corners can be tricky. Professionals have the tools and skills to handle these areas.
- Health Concerns: Refinishing involves dust and chemicals. Lack of proper ventilation and protective gear can pose health risks.
- Time Constraints: Professionals can complete the job faster and more efficiently, freeing up your time for other tasks.
Romero Hardwood Floors Inc
When it comes to professional refinishing, Romero Hardwood Floors Inc stands out. With 15 years of experience, our team ensures top-quality work, using environmentally-friendly products to bring your floors back to life.
Why Choose Us?
- Expertise: We have the knowledge and experience to handle any hardwood floor refinishing project.
- Quality: Our attention to detail ensures a beautiful, durable finish.
- Customer Satisfaction: Our clients love our work. Check out our gallery to see some of our past projects.
Get a Quote
Ready to transform your floors? Contact us at 617-913-0155 or request an estimate online. Let Romero Hardwood Floors Inc make your floors look brand new.
Next, we’ll address some frequently asked questions about refinishing hardwood floors.
Frequently Asked Questions about Refinishing Hardwood Floors
Can I refinish hardwood floors myself?
Refinishing hardwood floors yourself is possible, but it’s not for everyone. It requires specific tools, materials, and a good amount of skill. If you’re handy and enjoy DIY projects, you might find it rewarding. However, it’s important to consider:
- Tools and Materials: You’ll need a drum sander, edger, sandpaper, stain, finish, and safety gear. Renting equipment and buying supplies can cost between $600 and $1,000 for a DIY project.
- Time Investment: Refinishing a small room can take several days. Larger areas will take longer, especially if you’re new to the process.
- Risk of Mistakes: Without proper technique, you could damage your floors, leading to costly repairs. Practicing with the sander in an inconspicuous area can help you get the hang of it.
If you’re unsure about tackling the project yourself, hiring a professional can save you time and ensure a high-quality finish. Professionals have the experience and tools to get the job done efficiently.
How much does it cost to refinish hardwood floors?
The cost of refinishing hardwood floors can vary:
- DIY Costs: Expect to pay around $600 to $1,000 for a DIY project covering 275 sq. feet. This includes renting equipment and purchasing sandpaper, stain, and finish.
- Professional Costs: Hiring a professional can cost between $1,150 and $2,500, depending on the size and condition of the floors. This price includes labor, materials, and cleanup.
Refinishing is generally more cost-effective than replacing hardwood floors. Replacing floors can cost upwards of $4,200, making refinishing a budget-friendly option.
When should you not refinish hardwood floors?
Sometimes, refinishing isn’t the best option. Consider replacing your floors if:
- Extensive Damage: If over 30% of your floor is damaged, refinishing might not be enough. Deep gouges, water damage, or severe warping often require replacement.
- Thin Flooring: Floors that have been sanded multiple times can become too thin to refinish. Check with a professional to assess the thickness of your hardwood.
- Structural Issues: If your subfloor has problems, such as rot or instability, refinishing won’t fix these underlying issues. Address structural problems before considering refinishing.
By understanding these factors, you can make an informed decision about whether to refinish or replace your hardwood floors.
Next, let’s explore how to maintain your newly refinished hardwood floors to keep them looking great for years to come.
Conclusion
Refinishing your hardwood floors is a fantastic way to bring back their original beauty and extend their lifespan. Whether you choose to take on the project yourself or hire a professional, the end result can dramatically improve the look and feel of your home.
Summary
In this guide, we covered everything you need to know about refinishing hardwood floors. From preparing your space and gathering necessary tools to the detailed steps of sanding, staining, and finishing, we aimed to provide a clear and comprehensive roadmap. We also discussed the importance of routine cleaning and long-term maintenance to keep your floors in top condition.
Final Thoughts
Refinishing hardwood floors can be a rewarding DIY project, but it requires careful planning, the right tools, and a lot of elbow grease. If you’re uncertain about any part of the process or simply want to ensure a flawless finish, hiring a professional is a wise choice. Professional flooring technicians bring expertise, high-quality materials, and specialized equipment to the table, guaranteeing a stunning and durable result.
Contact Romero Hardwood Floors Inc for Expert Services
When it comes to refinishing hardwood floors, Romero Hardwood Floors Inc is your go-to expert. With over 15 years of experience, our team is dedicated to delivering exceptional results that will transform your floors and enhance the beauty of your home. We offer a range of services, including sanding, staining, and varnishing, all tailored to meet your specific needs.
Ready to give your hardwood floors a new lease on life? Contact us today for a quote or to schedule an appointment. Let our experts handle the hard work while you enjoy the stunning transformation of your floors.
Thank you for reading our ultimate guide to refinishing hardwood floors. We look forward to helping you achieve the beautiful, long-lasting floors you deserve.
