Hardwood Floor Refinishing: Top 5 Proven Steps for 2024
Transform Your Home with Hardwood Floor Refinishing
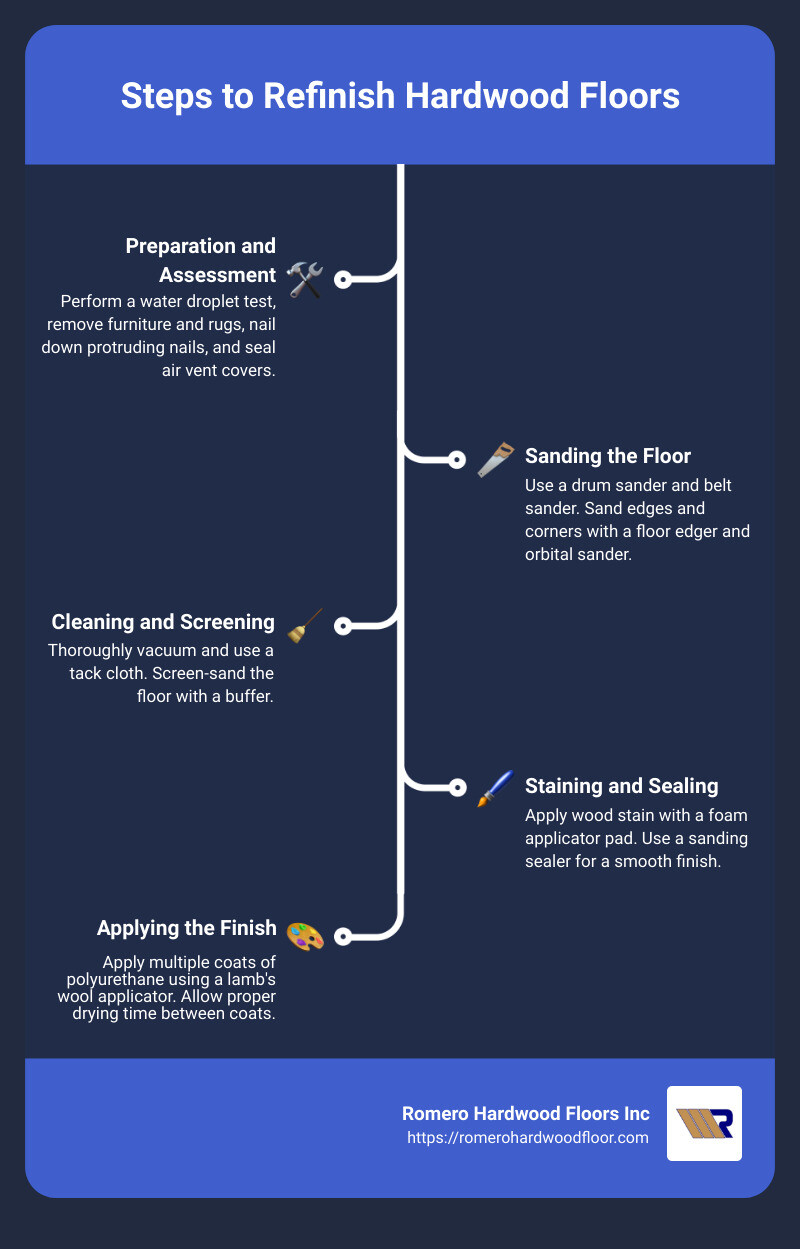
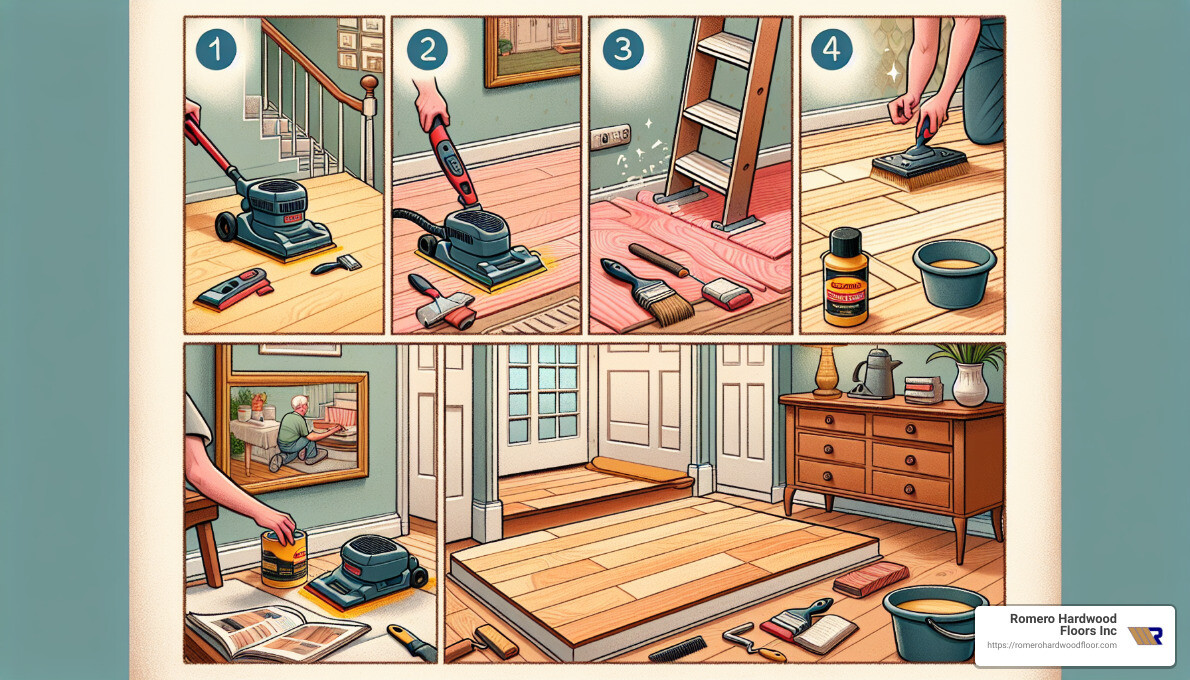
Hardwood Floor Refinishing is an excellent way to breathe new life into your home. It can restore the beauty of your floors, improve the overall aesthetic of your space, and increase the value of your property. If you’re short on time, here are the key steps to refinishing hardwood floors:
- Day 1: Preparation and Assessment
- Perform a water droplet test to determine floor condition.
- Remove furniture, rugs, and any debris.
- Nail down protruding nails and seal air vent covers.
- Day 2: Sanding the Floor
- Use a drum sander and belt sander.
- Sand edges and corners with a floor edger and orbital sander.
- Day 3: Cleaning and Screening
- Thoroughly vacuum and use a tack cloth.
- Screen-sand the floor with a buffer.
- Day 4: Staining and Sealing
- Apply wood stain with a foam applicator pad.
- Use a sanding sealer for a smooth finish.
- Day 5: Applying the Finish
- Apply multiple coats of polyurethane using a lamb’s wool applicator.
- Allow proper drying time between coats.
I’m Francisco Romero, owner of Romero Hardwood Floors Inc. With over 15 years of experience in Hardwood Floor Refinishing, my team and I are dedicated to providing high-quality, durable floor solutions. Let’s dive into the process and see how you can achieve beautiful, long-lasting floors in just five days.
Day 1: Preparation and Assessment
Assessing Floor Condition
Before starting the refinishing process, it’s crucial to assess the condition of your hardwood floor. A simple water droplet test can help determine if your floor needs refinishing.
- Water Droplet Test: Drop a few droplets of water on your floor. If the water absorbs immediately, it’s time to refinish. If the droplets bead up, a deep cleaning and polish might suffice.
- Inspect for Damage: Look for signs of wear such as minor scratches, deep gouges, or discoloration. Minor scratches can often be handled during the sanding process, but deep gouges may require more intensive repair.
Preparing the Room
Once you’ve assessed the floor condition, it’s time to prepare the room for refinishing. Proper preparation ensures a smooth and efficient process.
- Furniture Removal: Move all furniture, carpets, and rugs out of the room. This will give you clear access to the entire floor area.
- Nail Hammering: Slide a putty knife across the floor to find any protruding nails. Hammer them down to ensure the floor is flat and safe for sanding.
- Debris Removal: Sweep and vacuum the floor to remove any dust and debris. This helps in achieving a clean surface for sanding.
- Air Vent Sealing: Seal air vent covers with plastic sheeting to prevent dust from entering your HVAC system. Use painter’s tape to secure the plastic.
- Seal Off the Room: Use plastic sheeting to seal doors and windows. This will keep dust contained within the room and prevent it from spreading to other areas of your home.
By taking these steps on Day 1, you set the stage for a successful Hardwood Floor Refinishing project. Next, we will move on to the sanding process.
Day 2: Sanding the Floor
Now that your room is prepped, it’s time to start sanding. Sanding is a crucial step in Hardwood Floor Refinishing. It removes the old finish and smooths the wood, preparing it for staining and sealing.
Rough-Sanding the Floor
1. Drum Sander:
A drum sander is your main tool for sanding large areas. Start with coarse sandpaper (36-40 grit) to remove the old finish and level the floor. This will also help eliminate deep scratches and stains.
2. Belt Sander:
If a drum sander isn’t available, a belt sander can be used. It’s also effective for large areas but requires more control.
3. Overlapping Strokes:
When sanding, work in 3-4 foot sections. Move the sander back and forth in overlapping strokes. Aim to overlap by at least one-third of the belt width. This ensures you cover the entire surface evenly.
4. Sandpaper Grit Progression:
Start with coarse grit (36-40), move to medium grit (60), and finish with fine grit (100). Do not skip grits. Each step smooths the floor more, prepping it for the next stage.
Tip: Practice using the drum sander on a piece of scrap wood to get a feel for it. This avoids mistakes on your actual floor.
Sanding Edges and Corners
1. Floor Edger:
A floor edger is perfect for sanding areas the drum sander can’t reach, like edges and corners. Use the same grit progression as the drum sander: start with coarse and move to finer grits.
2. Small Orbital Sander:
For even smaller areas, like closets or bathrooms, a small orbital sander works well. It’s easier to control in tight spaces.
3. Scraper:
For corners and edges that even the edger can’t reach, use a hand scraper. Follow up with 80-100 grit sandpaper to ensure these areas are as smooth as the rest of the floor.
Tip: Practice using the floor edger on scrap wood first. It can be tricky to control, and you don’t want to gouge your floor.
By the end of Day 2, your floor should be evenly sanded and smooth. This sets the stage for the next steps: cleaning and screening.
Day 3: Cleaning and Screening
Cleaning the Floor
With the sanding complete, it’s time to clean the floor thoroughly. This step is crucial for removing dust and debris that could mar the final finish.
Vacuuming: Start by vacuuming the entire floor. Use a vacuum with a soft brush attachment to avoid scratching the wood. Make sure to get into corners and along baseboards where dust tends to accumulate.
Tack Cloth: After vacuuming, use a tack cloth to pick up the fine dust particles left behind. A tack cloth is a sticky, cheesecloth-like material that grabs dust and debris. Wipe the floor gently to ensure you don’t miss any spots.

Screening the Floor
Now that the floor is clean, the next step is screening. Screening smooths out minor unevenness and buffs away sanding scratches, making the floor look professionally done.
Floor Buffer: Use a floor buffer fitted with a fine-grit screening pad. This machine helps to level out the surface and remove any remaining scratches from the sanding process.
Fine-Grit Screening Pad: Attach a fine-grit screening pad to the buffer. These pads are designed to smooth out the floor without removing too much material. Make broad arcs across the floor to ensure an even finish.
Minor Unevenness: The buffer will help level out minor unevenness left by the drum sander and edger. Move slowly and steadily to avoid creating new scratches or gouges.
Dust Removal: After screening, vacuum the floor again to remove all dust. Follow up with a tack cloth to ensure the surface is completely clean. Any remaining dust can affect the adhesion of the finish and leave imperfections.
By the end of Day 3, your floor should be clean, smooth, and ready for staining and sealing. This meticulous preparation ensures that the final finish will be flawless and durable.
Day 4: Staining and Sealing
Applying Wood Stain
Wood Stain: If you want to change or improve the color of your hardwood floors, applying a wood stain is the way to go. Choose an interior wood stain that matches your desired color and is suitable for your type of hardwood.
Foam Applicator Pad: To apply the stain, use a foam applicator pad. This tool helps you apply the stain evenly and smoothly. Always work in the direction of the wood grain to maintain a uniform look.
Excess Stain Removal: After applying the stain, wait a few minutes (as recommended by the manufacturer) and then remove any excess stain. Use clean cotton cloths or paper towels for this step. Some professionals prefer wrapping a cotton cloth around a dry applicator pad for more control.
Drying Time: Let the stain dry according to the manufacturer’s instructions before moving on to the next step. Proper drying ensures that the finish adheres well and lasts longer.
Applying Sanding Sealer
Sanding Sealer: If you decide not to stain, applying a sanding sealer is crucial before the polyurethane finish. A sanding sealer helps to smooth the wood surface and prepares it for the final finish.
Polyurethane Finish: Whether you’ve applied a stain or not, the next step is sealing the floor with a polyurethane finish. You have two main options: oil-based and water-based finishes.
- Oil-Based Finish: This type dries slowly, providing a smooth and durable coat. However, the fumes can be strong, so wearing a respirator is recommended. Oil-based finishes also tend to give the wood a warm, amber hue.
- Water-Based Finish: These dry quickly and have a milder odor. They are clear and won’t change the wood’s color, making them ideal if you want to keep the natural look of your hardwood. However, the fast drying time can make application a bit more challenging.
Application: Use a lamb’s wool applicator to apply the finish in smooth, even lines. Avoid drips and ensure each coat is evenly spread.
Multiple Coats: For the best results, consider applying three coats of oil-based finish or four coats of water-based finish. Allow each coat to dry completely (usually 24 hours) before applying the next one.
Sanding Between Coats: Lightly sand the floor with 220-grit paper or #000 steel wool between coats. This step helps the next coat adhere better and ensures a smooth finish. Don’t forget to vacuum up the dust and wipe the floor with a tack cloth before applying the next coat.
By the end of Day 4, your floor will be well on its way to looking brand new. The careful application of stain and sealer sets the stage for a beautiful, durable finish.
Day 5: Applying the Finish
Choosing the Right Finish
Choosing the right finish is crucial for achieving the desired look and durability of your hardwood floor. You have several options:
- Oil-Based Polyurethane: This finish dries slowly but provides a smooth, durable coat. It has a moderate odor and gives the wood an amber tint. Perfect for high-traffic areas.
- Water-Based Polyurethane: This finish dries quickly and has a mild odor. It remains clear and doesn’t yellow over time. Ideal for those who prefer a natural look.
- Wood Oils: Options like Danish oil, teak oil, and tung oil penetrate deep into the wood, enhancing its grain and offering moderate protection. They are easy to apply but may require more frequent maintenance.
- Finish Sheen: Choose from matte, satin, semi-gloss, or glossy. Matte finishes hide scratches well, while glossy finishes offer a high shine but show imperfections more easily.
Applying the Finish
Applying the finish correctly is the final step to ensure your hardwood floor looks stunning and lasts long.
- Preparation: Make sure the floor is clean and free of dust. Use a vacuum and a tack cloth to remove any particles.
- First Coat:
- Use a lamb’s wool applicator to apply the finish in smooth, even lines. Go with the grain of the wood to avoid streaks.
- Avoid drips and puddles. Work in manageable sections, about 4 square feet at a time.
- Allow the first coat to dry. Drying times vary: oil-based finishes take about 24 hours, while water-based finishes dry faster, usually within 4-6 hours.
- Between Coats:
- Lightly sand the floor with 220-grit paper or #000 steel wool between coats. This step helps the next coat adhere better and ensures a smooth finish.
- Vacuum up the dust and wipe the floor with a tack cloth before applying the next coat.
- Subsequent Coats:
- Apply at least three coats of oil-based finish or four coats of water-based finish. Each coat adds durability and depth to the floor.
- Follow the same process: apply with a lamb’s wool applicator, allow to dry, sand lightly, and clean before the next coat.
- Final Steps:
- Once the final coat is applied, allow the floor to dry completely. This can take up to 72 hours for oil-based finishes and 48 hours for water-based finishes.
- Avoid walking on the floor during this time. If necessary, wear socks to prevent any marks.
By the end of Day 5, your hardwood floor will have a beautiful, durable finish that improves the natural beauty of the wood. This careful process ensures long-lasting protection and a stunning appearance.
Frequently Asked Questions about Hardwood Floor Refinishing
Is it worth it to refinish hardwood floors yourself?
DIY refinishing can be a rewarding experience if you enjoy hands-on projects and have the time to learn the process. Cost savings are a major benefit, as doing it yourself can save you the labor costs charged by professionals. However, it’s important to weigh these savings against the potential for mistakes.
Mistakes like uneven sanding or improper staining can negatively impact the final look and durability of your flooring. Refinishing hardwood floors requires specialized tools such as a belt sander and varnish applicators. Without experience, you might find the learning curve steep.
Health risks are another consideration. Working with dust and chemicals without proper ventilation and protective gear can pose risks. If you’re confident in your skills and prepared to take necessary precautions, DIY refinishing can be a fulfilling project that saves money.
Is it cheaper to refinish or replace hardwood floors?
Refinishing hardwood floors is generally more cost-effective than replacing them. According to reports from Fixr and HomeAdvisor, the typical cost for refinishing hardwood floors ranges from $800 to $1,600 for a 200-square-foot area, while replacing the same area can cost significantly more.
Cost comparison shows that even if your floors have some damage, refinishing is usually cheaper. For instance, removing and replacing a few severely damaged planks is still less expensive than tearing out and installing new flooring.
However, if more than 30% of your floor is damaged, replacement might be the better option. Refinishing can extend the life span of your floors and restore their beauty, making it a more economical choice in most cases.
Can you refinish hardwood floors without sanding?
Yes, there are non-sanding methods to refinish hardwood floors, but they come with limitations. These methods typically involve using a chemical abrasion kit to roughen the existing finish and then applying a new coat of finish.
Benefits of non-sanding methods include:
– Less mess: No need to deal with the dust and debris created by sanding.
– Time-saving: The process is faster since you skip the sanding steps.
– Cost-effective: It can be cheaper as it requires fewer tools and materials.
However, these methods are only suitable if your floors are in relatively good condition. Limitations include:
– Surface damage: They won’t fix deep scratches, gouges, or significant wear.
– Durability: The new finish may not last as long as a finish applied after thorough sanding.
If your floors have minor wear and you want a quick refresh, non-sanding methods can be effective. For floors with more significant damage, traditional sanding and refinishing will provide better results and longevity.
Conclusion
At Romero Hardwood Floors Inc, we take pride in offering professional hardwood floor refinishing services that can transform the look and feel of your home. Our expert team is dedicated to delivering high-quality results that not only improve the beauty of your floors but also add value to your property.
Professional Refinishing
When you choose Romero Hardwood Floors Inc, you’re opting for a level of expertise that ensures your floors are treated with the utmost care. Our team is well-versed in the latest techniques and uses state-of-the-art equipment to achieve the best possible finish. We follow a comprehensive process that includes preparation, sanding, cleaning, staining, and sealing to bring out the natural beauty of your hardwood floors.
Enhancing Property Value
Refinishing your hardwood floors is a smart investment. Beautifully finished floors can significantly boost the aesthetic appeal of your home, making it more attractive to potential buyers. According to experts, well-maintained hardwood floors can increase a home’s resale value, providing a return on your investment that goes beyond just visual appeal.
Expert Solutions
At Romero Hardwood Floors Inc, we understand that every home is unique. That’s why we offer customized solutions custom to your specific needs. Whether you need a simple refinish or a complete overhaul of your hardwood floors, our team is equipped to handle it all. We use environmentally-friendly products and techniques to ensure a safe and efficient refinishing process.
In summary, refinishing your hardwood floors with Romero Hardwood Floors Inc not only revitalizes your living space but also adds long-term value to your home. Contact us today to learn more about our expert refinishing services and how we can help you achieve the perfect look for your floors.
