How to Install Hardwood Flooring: Top 5 Expert Tips
How to install hardwood flooring is a skill that can transform your space, adding warmth and elegance. It’s more than just a home project; it’s about bringing beauty and durability into your home. Here’s a quick outline to get you started:
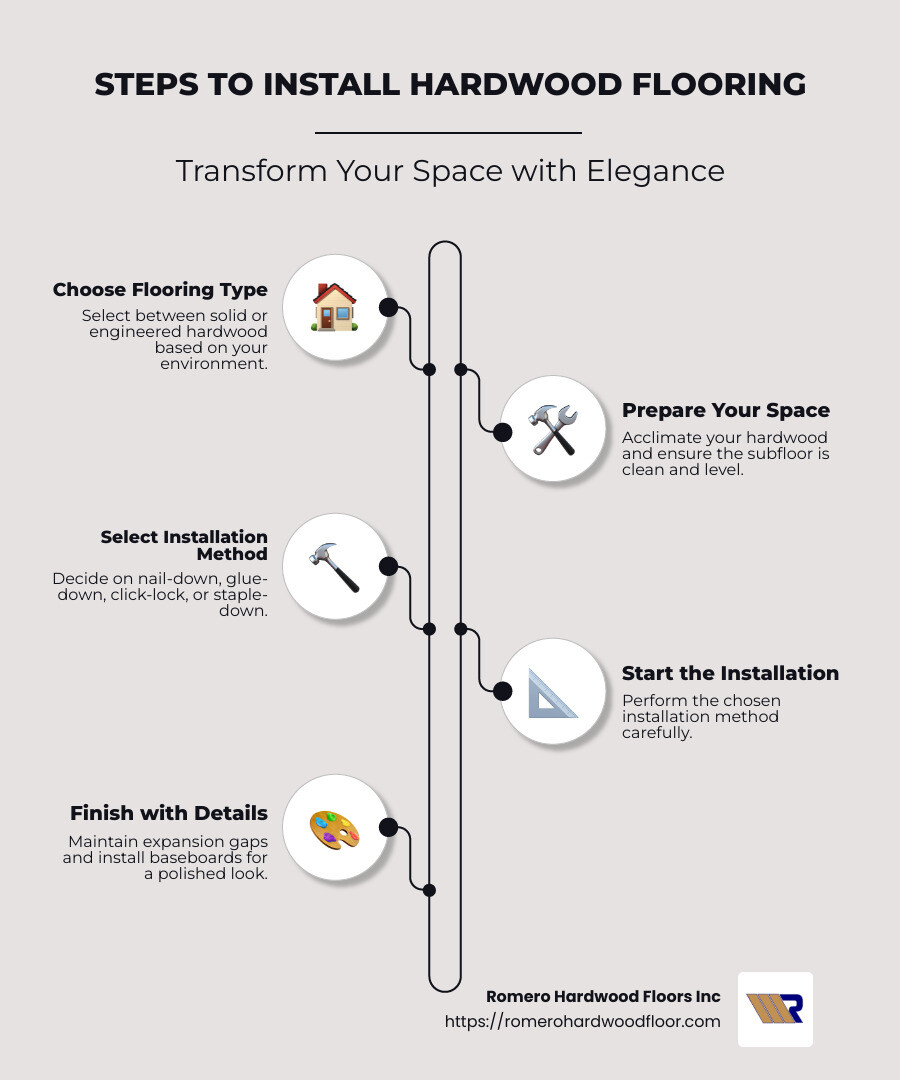
- Choose Your Flooring Type: Decide between solid or engineered hardwood based on your home’s humidity levels and subfloor type.
- Prepare Your Space: Acclimate your hardwood, remove baseboards, and ensure your subfloor is level and clean.
- Start the Installation: Depending on the type of flooring, select a method: nail-down, glue-down, click-lock, or staple-down.
- Ensure Finishing Touches: Maintain a 3/4-inch expansion gap, stagger joints, and install baseboards.
Installing hardwood flooring requires not only careful planning but also the right tools and know-how for a professional-looking result. The benefits are many: from a timeless aesthetic and increased home value to superior durability and low maintenance costs.
I’m Francisco Romero, owner of Romero Hardwood Floors Inc., with over 15 years of experience in the craft of hardwood flooring installation. I’ve seen how how to install hardwood flooring can truly lift a space.
Easy how to install hardwood flooring glossary:
– diy hardwood floor installation
– hardwood floor installation patterns
– how to install hardwood floors on concrete
Types of Hardwood Flooring
When it comes to choosing the perfect hardwood flooring for your home, understanding the different types and species is crucial. Each type offers unique benefits and aesthetics, so let’s dive into the options.
Solid Hardwood
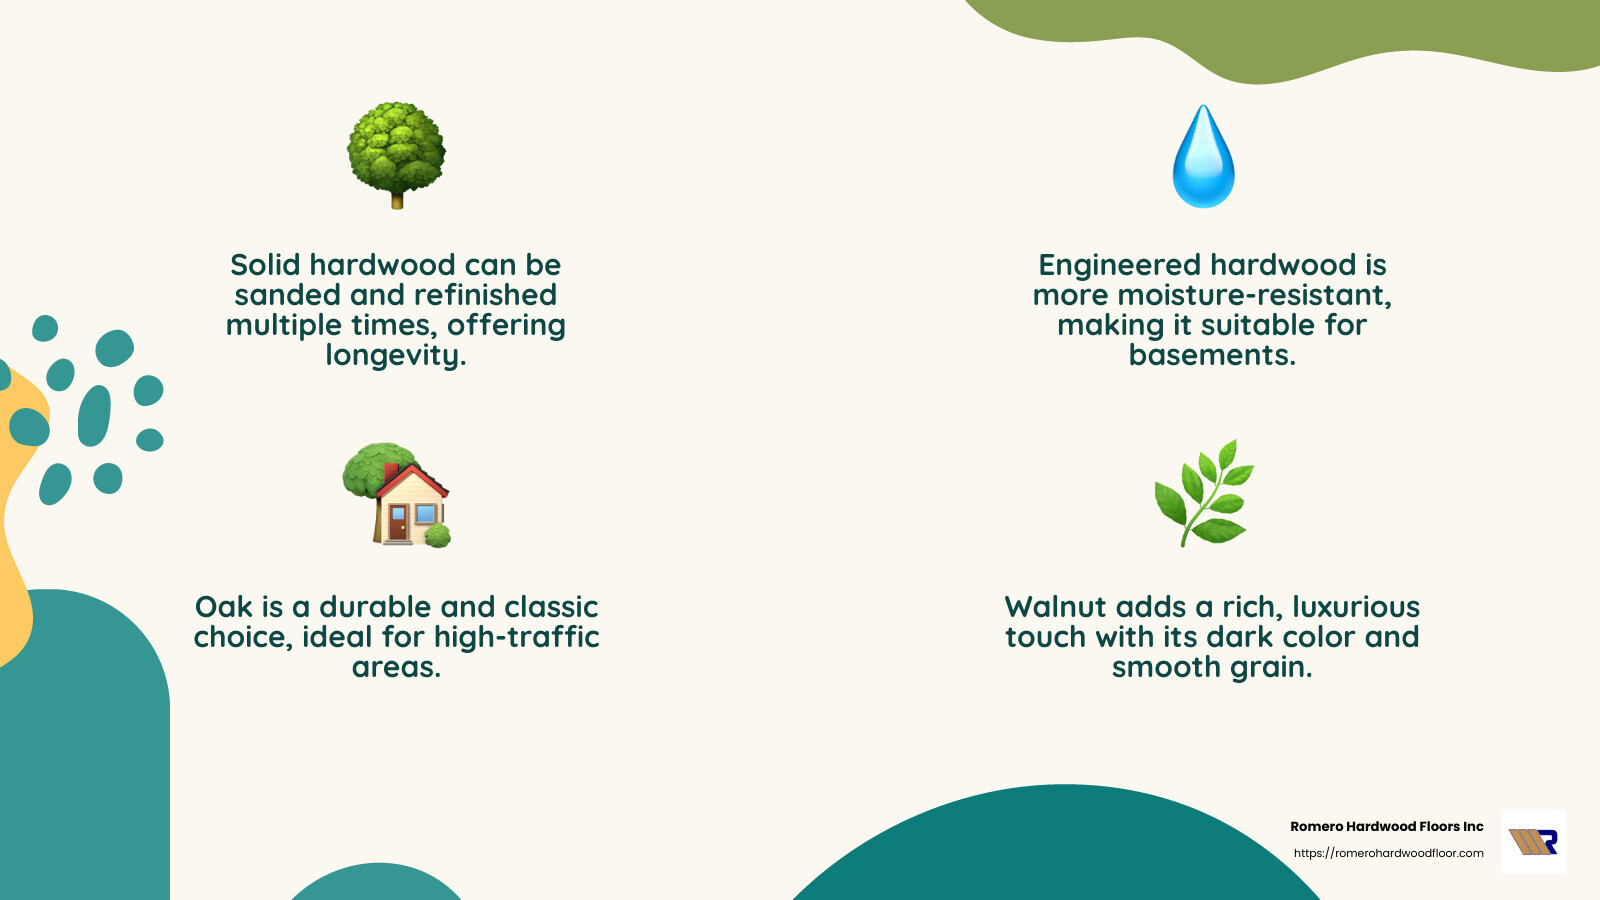
Solid hardwood is the classic choice for many homeowners. It’s crafted from a single piece of wood and offers the ability to be sanded and refinished multiple times. This makes it an excellent long-term investment. Solid hardwood is best suited for areas with stable humidity levels, as it can expand and contract with moisture changes.
Engineered Hardwood
Engineered hardwood provides a more moisture-resistant option. It’s made of a top layer of hardwood veneer bonded to layers of plywood or high-density fiberboard. This construction makes it ideal for basements or areas with fluctuating humidity. It’s also easier to install over concrete subfloors.
Popular Wood Species
Oak
Oak is a favorite among homeowners due to its durability and classic look. It comes in two main types: red and white oak. Red oak offers a warm tone, while white oak has a more neutral appearance. Oak’s grain pattern hides scratches well, making it perfect for high-traffic areas.
Walnut
For those looking for a rich, dark color, walnut is an excellent choice. It adds a touch of luxury and sophistication to any room. Walnut’s smooth grain and deep hues are perfect for creating a statement floor.
Hickory
Hickory is known for its hardness and unique grain patterns. It’s one of the most durable options, making it suitable for busy households. The distinctive look of hickory can add character and warmth to your space.
Maple
Maple offers a light, natural finish with a smooth grain. It’s slightly harder than oak and is often chosen for its clean, modern look. However, it can be challenging to stain, so it’s typically left in its natural color.
Cherry
Cherry hardwood is cherished for its rich, deep colors that darken with age. While it’s softer than oak or maple, its luxurious appearance makes it a popular choice for formal areas. Cherry adds warmth and elegance to any setting.
Choosing the right type of hardwood flooring involves considering both the practical and aesthetic aspects of each option. Whether you prefer the classic appeal of oak or the dramatic look of walnut, there’s a hardwood floor that will perfectly suit your home’s style and needs.
Preparing for Installation
Before you start the actual installation, it’s crucial to prepare your space properly. This ensures your hardwood floor will look great and last for years.
Acclimate Your Flooring
Hardwood is a natural material that expands and contracts with changes in temperature and humidity. To prevent issues like gaps or buckling, you need to acclimate your flooring.
Here’s how:
- Place the hardwood planks in the room where they’ll be installed.
- Remove any plastic packaging and stack the boards with spacers to allow air circulation.
- Let the flooring sit for three to seven days, maintaining normal living conditions in the room.
- Use a moisture meter to check that the flooring’s moisture content is within 2% of the subfloor’s moisture content.
This step is especially important if there’s a significant difference between where your flooring was stored and your home environment.
Remove Baseboards
Next, you’ll need to remove the baseboards carefully. Use a pry bar, but place a thin block of wood between the pry bar and the wall to prevent damage. This will give you the necessary space to install the flooring and cover expansion gaps later.
Level the Subfloor
A level subfloor is essential for a smooth installation. Inspect it for any damage, moisture, or unevenness.
- Repair any damaged areas and ensure the subfloor is completely dry.
- Use a long level to check for high or low spots, sanding down high spots or filling low areas with a leveling compound as needed.
For concrete subfloors, applying a moisture barrier is often necessary. This prevents moisture from seeping through and damaging the hardwood.
Install Moisture Barrier and Underlayment
Moisture barriers are crucial, especially when installing over concrete. They help protect your flooring from potential water damage.
- Roll out the vapor barrier, overlapping the edges by 6 inches. Follow the manufacturer’s instructions carefully.
- Next, lay down the underlayment. This provides sound dampening and additional moisture protection.
Once these steps are complete, you’re ready to move on to the actual installation. Preparing your space thoroughly helps ensure a successful and long-lasting hardwood floor installation.
How to Install Hardwood Flooring
When it comes to installing hardwood flooring, there are several methods to consider. Each method has its own benefits and requirements, so it’s important to choose the one that best fits your needs and skill level. Let’s dive into the four main methods: nail-down, glue-down, click-lock, and staple-down.
Nail-Down Installation Method
The nail-down method is a popular choice for solid hardwood floors, especially when you have a wood subfloor.
Here’s a quick guide:
- Prepare the Subfloor: Ensure it’s clean, dry, and level.
- Layout and Planning: Start by aligning the first board with the layout line, with the tongue facing into the room.
- Pilot Holes and Nails: Drill pilot holes into the face of the first board, spaced 6 inches apart, and drive flooring nails through them. Use a nail punch to countersink the nails slightly below the surface.
- Tongue and Groove: Fit the tongue of one board into the groove of the next, securing them with nails driven at a 45-degree angle.
- Continue the Process: Work your way across the room, row by row, leaving a 3/4-inch expansion gap between the end board and the wall.
This method provides a stable and permanent floor that’s ideal for high-traffic areas.
Glue-Down Installation Method
Perfect for concrete floors, the glue-down method involves adhering the hardwood directly to the subfloor using a strong adhesive.
Steps to follow:
- Spread Adhesive: Use a trowel to spread flooring adhesive over a small section of the floor.
- Lay the First Row: Carefully place the first row of planks along the starting line.
- Fit and Tap: Fit the groove of the second row onto the tongue of the first and tap it into place with a rubber mallet for a snug fit.
- Expansion Gaps: Use spacers to maintain a 3/4-inch expansion gap along the walls.
This method is great for areas where noise reduction is a priority, as the adhesive provides a firm and stable floor.
Click-Lock Installation Method
Also known as the floating floor method, click-lock installation is ideal for DIY enthusiasts and works well on various subfloors.
Installation process:
- Start with the First Row: Lay the first row of planks, clicking them together along the longest wall.
- Use a Tapping Block: Gently tap the planks with a plastic mallet to ensure a tight fit.
- Maintain Expansion Gaps: Keep a 1/2-inch gap between the flooring and the wall to allow for expansion.
This method is quick and easy, making it a favorite for many homeowners looking to update their flooring without professional help.
Staple-Down Installation Method
Similar to the nail-down method, the staple-down approach uses staples to secure the boards to a wood subfloor.
How to do it:
- Prepare the Subfloor: As with other methods, ensure the subfloor is clean and level.
- Staple the Boards: Use a staple gun to fasten the boards, starting from the first row. Staples offer a strong initial hold due to their two-pronged design.
- Continue the Installation: Work your way across the room, ensuring each board is snugly fitted.
Staple-down installation is known for its strong initial hold, making it a reliable choice for a stable hardwood floor.
By understanding these methods, you can choose the best approach for your hardwood floor installation project. Whether you’re looking for a DIY-friendly option or a method that offers long-term stability, there’s a solution that fits your needs.
Tips for a Successful Installation
When learning how to install hardwood flooring, a few tips can make a world of difference in achieving a flawless finish. These practical insights will help you avoid common pitfalls and ensure your flooring looks professional and lasts for years.
Stagger Joints
One of the key elements to a strong and visually appealing hardwood floor is staggering the joints. Aim for at least 6 inches of separation between the joints of adjacent rows. This not only improves the floor’s structural integrity but also creates a more natural and random pattern.
Expansion Gap
Always remember to leave an expansion gap around the perimeter of the room. Wood expands and contracts with changes in humidity, so a gap of 3/4-inch is crucial to prevent buckling. Use spacers along the walls to maintain this gap throughout the installation process.
Racking Boards
Before you start installing, lay out the boards from different boxes. This process, known as racking, allows you to mix shades and lengths to achieve a more natural look. It also helps you plan for the placement of boards, so you don’t end up with short pieces at the end of a row.
Safety Gear
Safety should always come first. When cutting boards, wear safety goggles and a dust mask to protect yourself from sawdust and debris. Ear protection is also recommended if you’re using loud tools like a nail gun or saw.
Mixing Boards
Mixing boards from various boxes is essential to avoid noticeable color variations in your floor. Hardwood is a natural product, and slight differences in color and grain are normal. By mixing boards, you ensure a consistent look across your floor, enhancing its visual appeal.
By keeping these tips in mind, you can ensure a smooth and successful hardwood floor installation. Next, we’ll tackle some frequently asked questions about hardwood floor installation to help you steer any uncertainties you may have.
Frequently Asked Questions about Hardwood Floor Installation
Can I install hardwood floors myself?
Yes, you can! Installing hardwood floors yourself can save you money and give you a sense of accomplishment. However, it requires careful preparation and the right tools. Essential tools include a tape measure, chalk line, pry bar, claw hammer, and a pneumatic flooring nailer if you’re using the nail-down method. Power tools like a saw and drill can also make the job easier.
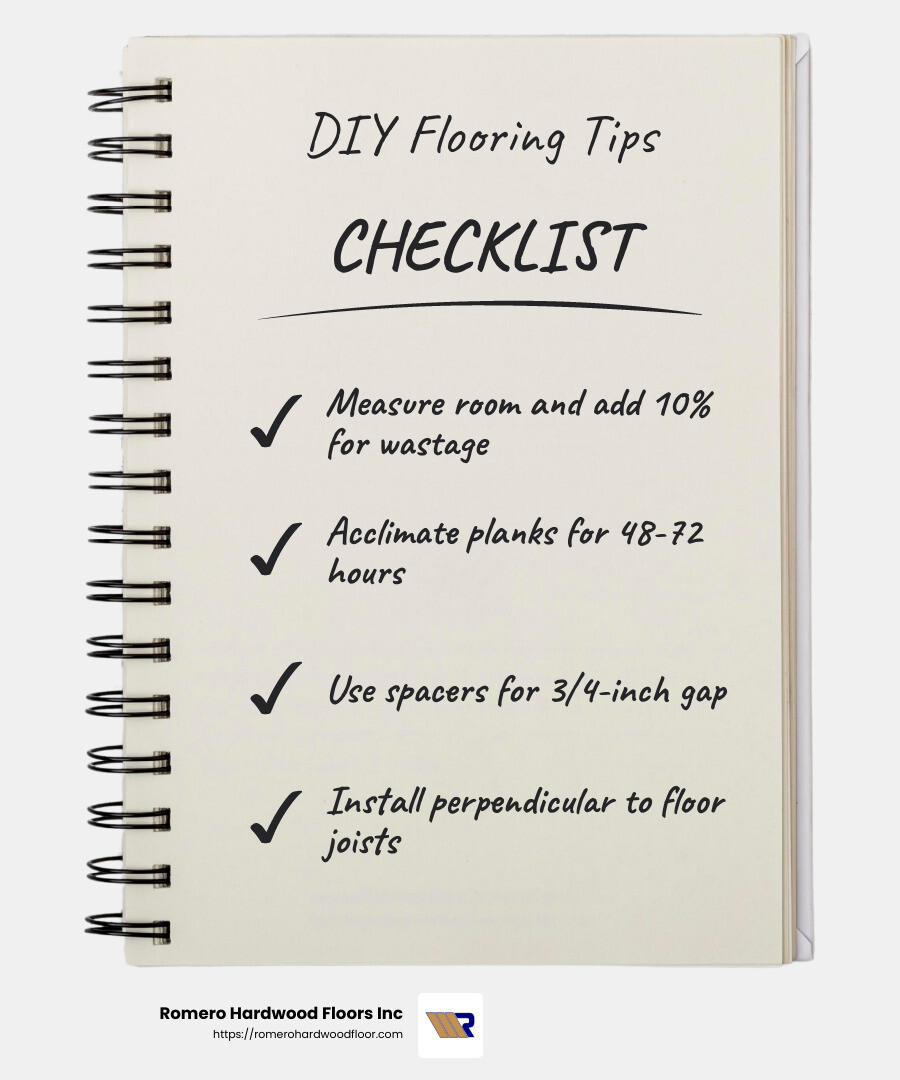
Before you start, make sure to measure your room and add 10% for wastage. Acclimate your hardwood planks in the installation room for 48-72 hours to adjust to the room’s humidity. This step is crucial to prevent warping after installation.
Where do you start when installing hardwood floors?
Begin by laying the first row of planks along the longest, straightest wall in the room. This helps create a solid foundation and ensures that any slight misalignments are less noticeable. If possible, install the flooring perpendicular to the floor joists for added stability.
Use spacers to maintain an expansion gap of about 3/4-inch between the planks and the wall. This gap allows the wood to expand and contract with changes in humidity without causing buckling.
What should I put down before installing hardwood floors?
Before laying down your hardwood floors, it’s important to prepare the subfloor properly. Start by cleaning the subfloor to remove any debris or dust. Ensure it is level and dry, as irregularities can affect the final appearance and durability of the flooring.
Next, install a moisture barrier, especially if you’re working over a concrete subfloor. This barrier prevents moisture from seeping into the wood, which can cause damage over time. For added sound dampening and insulation, consider adding an underlayment. This layer also provides a smoother surface for the hardwood planks to rest on.
By addressing these common questions, you’re now better equipped to tackle your hardwood flooring project with confidence. Up next, we’ll wrap up with a summary of the key benefits of choosing hardwood floors and how Romero Hardwood Floors Inc can help you achieve the perfect installation.
Conclusion
Installing hardwood floors is a rewarding endeavor that not only improves the beauty of your home but also adds value and durability. From choosing the right type of wood to understanding the various installation methods, there’s a lot to consider. We’ve covered essential steps and tips to help you achieve a successful installation, whether you’re a DIY enthusiast or prefer professional help.
Hardwood floors are known for their low maintenance and longevity. They provide a timeless elegance that suits any room while being resilient to daily wear and tear. With proper care, these floors can last for generations, making them a wise investment for your home.
At Romero Hardwood Floors Inc, we understand the intricacies of hardwood floor installation. Our team in Revere, MA, specializes in both residential and commercial projects, ensuring that every installation meets our high standards of quality and craftsmanship. Since 2006, we’ve been helping homeowners and businesses improve their spaces with beautiful, durable flooring solutions.
Choosing professional installation with us means you can avoid common pitfalls and ensure that your floors are installed correctly the first time. Our expertise and commitment to excellence guarantee a seamless process from start to finish, allowing you to enjoy your new floors without worry.
For those considering a flooring upgrade, we invite you to explore our services further. Let Romero Hardwood Floors Inc help you master the art of hardwood floor installation and transform your space with confidence.
Find how we can assist with your hardwood flooring needs.
