Wooden Floor Maintenance Tips: 10 Proven Ways for Gleaming Results
The Beauty and Value of Well-Maintained Wood Floors
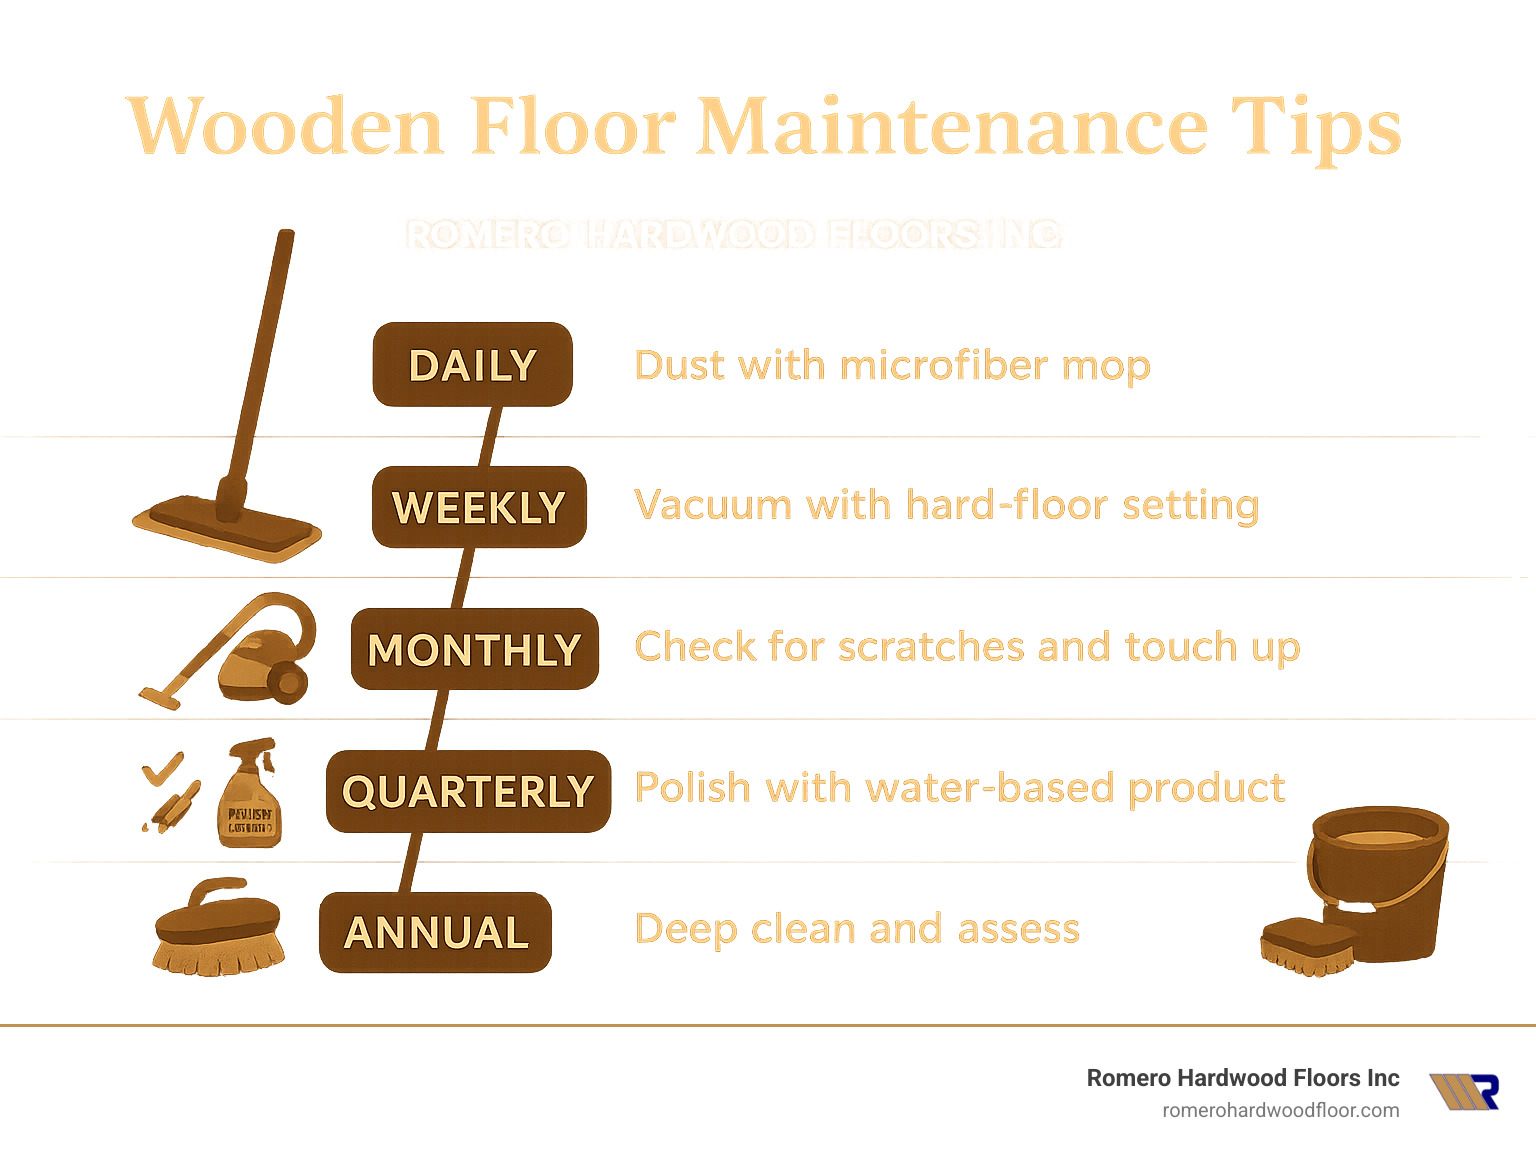
Wooden floor maintenance tips are essential for anyone who wants to preserve the natural beauty and extend the lifespan of their hardwood flooring investment. Here’s a quick reference guide for proper care:
| Timeframe | Maintenance Action |
|---|---|
| Daily | Dust with microfiber mop; wipe spills immediately |
| Weekly | Vacuum with hard-floor setting; damp mop with pH-neutral cleaner |
| Monthly | Check for scratches and scuffs; touch up as needed |
| Quarterly | Polish with water-based product (for finished floors) |
| Annually | Deep clean; consider professional assessment |
| 3-5 Years | Recoat finish (before wear-through occurs) |
| 7-10 Years | Full refinishing (depending on wear and floor thickness) |
Hardwood floors are more than just a surface to walk on—they’re an investment that can last for generations with proper care. Unlike carpet or vinyl, quality hardwood flooring can significantly increase your home’s value while providing a timeless aesthetic appeal. But this beauty comes with responsibility: wooden floor maintenance tips must be followed consistently to prevent damage and preserve that warm, natural glow.
The good news? Maintaining wood floors doesn’t require complicated techniques or expensive equipment. With the right knowledge and routine, you can keep your floors looking stunning for decades. The key lies in understanding the enemies of wood flooring—excessive moisture, abrasive grit, harsh chemicals, and UV exposure—and taking simple steps to protect against them.
I’m Francisco Romero, owner of Romero Hardwood Floors Inc., and with over 15 years of experience installing and maintaining hardwood floors, I’ve developed a comprehensive set of wooden floor maintenance tips that have helped countless homeowners keep their floors in pristine condition year after year.
Wooden floor maintenance tips terms simplified:
– Cost of wood floor repair
– Floor sanding and varnishing
– Hardwood Floor Repair Techniques
1. Start With a No-Shoes, No-Grit Zone
The moment you walk through your front door is when your hardwood floor protection truly begins. Think about it – those tiny particles of sand, dirt, and grit that hitch a ride on your shoes are like thousands of tiny sandpaper sheets just waiting to scratch your beautiful floors.
“Grit and dirt act like sandpaper under your shoes, gradually wearing away at your floor’s finish,” explains Brett Miller from the National Wood Flooring Association. This invisible enemy silently damages your investment with every step.
One of the most powerful wooden floor maintenance tips is surprisingly simple: create a no-shoes policy in your home. Just ask Maria, our client from Revere who installed gorgeous oak floors last year. “After six months of enforcing our shoes-off rule, the difference is night and day compared to our previous home. My floors still look brand new!”
Doormat Defense System
Your entryways need a strategic approach:
First, place a tough, textured doormat outside to capture mud and large debris. Then, add a soft, absorbent mat inside to trap remaining moisture and finer particles. This two-step system dramatically reduces what makes it to your hardwood.
“I recommend a three-step system,” shares Maria from Swampscott, who’s maintained her floors beautifully for years. “An outdoor scraper mat, an indoor absorbent mat, and a small bench where family and guests can easily remove their shoes. It’s made a world of difference.”
Furniture Protection
Your furniture can be just as damaging as shoes. Those heavy pieces can leave permanent dents, while chairs that slide around create fine scratches over time.
Attach high-quality felt pads to all furniture legs – and remember to replace them every few months as they collect grit and wear down. For heavier furniture like sofas and china cabinets, consider using specially designed furniture coasters that distribute weight more evenly across your floors.
“Many homeowners forget that furniture pads need regular inspection,” I often tell my clients. “A worn-down pad with embedded grit actually becomes the problem rather than the solution.”
For more detailed information about keeping your hardwood floors pristine, visit our comprehensive Hardwood Floors Cleaning Tips guide.
2. Daily Dust Defense: Microfiber Over Broom
When it comes to daily maintenance, not all cleaning tools are created equal. Traditional brooms might seem like the obvious choice, but they often just redistribute dust and can even scratch your floors with their bristles.

The Microfiber Advantage
Microfiber mops have revolutionized hardwood floor care. These clever tools use static electricity to attract and trap dust, allergens, and fine particles rather than just pushing them around like traditional brooms do. It’s like having a magnet for dirt!
“I was skeptical at first,” admits John, a homeowner from Melrose whose floors we refinished last year. “But after switching to a microfiber dust mop, I noticed my floors stayed cleaner longer, and I was sneezing less. The static charge really does make a difference.”
One of the most compelling wooden floor maintenance tips I share with my Revere clients is about water usage. Microfiber technology uses about 20 times less liquid than traditional mops, making them significantly safer for your precious hardwood. Less moisture means less risk of water damage—it’s that simple.
Vacuum with Caution
For a deeper clean, vacuums can be your friend—but only if used correctly. I’ve seen too many beautiful floors scratched by aggressive vacuum cleaners. Always use the “hard floor” setting to turn off the beater bar, and choose a vacuum with rubber wheels since plastic can leave tiny scratches. Before you start, take a quick glance at the wheels to make sure there’s no debris stuck in them that could scratch your floor.
Don’t forget those corners and edges where dust loves to hide! The vacuum attachments are perfect for these spots, and they help reduce allergens that can accumulate along baseboards.
My clients are often surprised when I tell them that regular microfiber cleaning not only keeps their floors looking gorgeous but actually improves their indoor air quality. Research from Bona shows that consistent microfiber maintenance significantly reduces household allergens while extending the life of your floor’s finish—a win-win for your health and your investment. For more scientific details on this, check out Scientific research on microfiber efficiency.
When it comes to wooden floor maintenance tips, consistency is key. A quick daily dust with a microfiber mop takes just minutes but adds years to your floor’s beauty and lifespan.
3. Weekly Deep Dive: Safe Vacuum & Damp-Mop Method
While your daily dust-mopping keeps the surface looking good, your hardwood floors need a bit more attention once a week. This deeper clean helps remove the dirt that settles into grain and crevices, preserving your floor’s natural beauty.
“The most damaging myth I hear is that wood floors need a good ‘soaking’ to get clean,” laughs Carlos, our senior floor technician. “Nothing could be further from the truth! Excess moisture is actually your floor’s worst enemy.”
Wooden floor maintenance tips for weekly cleaning
The secret to effective weekly cleaning is finding that perfect balance – enough moisture to clean thoroughly without risking damage to your beautiful wood. Here’s how the pros do it:
First, always vacuum before mopping. Use your vacuum’s hard-floor setting to capture dust and debris hiding in seams and corners. Those particles can become abrasive mud when mixed with cleaning solution.
“I learned this the hard way,” admits Jason from Malden. “I used to mop first, and my floors never looked quite right. Now I always vacuum first, and the difference is remarkable.”
When it comes to mopping, remember that damp doesn’t mean wet. Your mop should feel barely moist to the touch – never dripping or soggy. Use only pH-neutral cleaners specifically formulated for hardwood to protect your floor’s finish.
Always mop with the grain of your wood for the most effective cleaning. This helps the cleaner reach into the natural texture of the wood without leaving streaks. After mopping, create good airflow with ceiling fans or open windows to speed drying time. This simple step prevents moisture from lingering and potentially seeping between boards.
“Sunday mornings are my floor cleaning time,” shares Melissa from Revere. “The kids are still asleep, and I can make sure everything’s completely dry before the house gets busy again. I’ve found that following the grain really does make my floors look cleaner and more natural.”
Be strategic about your cleaning schedule. High-traffic zones like entryways and kitchens benefit from weekly attention, while guest bedrooms might only need monthly care. Let your eyes be your guide – when an area starts looking dull or dirty, it’s time for a cleaning session.
For more information about the best cleaning products for your specific type of hardwood floor, visit our Hardwood Floor Cleaning Products page where we break down exactly what works (and what doesn’t) for different finishes.
4. Act Fast on Spills & Stains
Nobody plans to spill red wine on their beautiful hardwood floors, but life happens. In my years working with homeowners across Revere and beyond, I’ve learned that the most critical factor in preventing permanent damage isn’t luck—it’s speed.
“The worst damage I see isn’t from the spill itself,” shares Miguel, our veteran refinishing specialist. “It’s from waiting too long to address it. Water can begin damaging wood in as little as 20 minutes.”
The Immediate Response Protocol
When disaster strikes, remember: blot, don’t wipe. Wiping spreads the liquid and drives it deeper into seams and grain. Instead, grab a clean, absorbent cloth and press firmly, working from the outside edges toward the center to prevent spreading. Continue blotting until your cloth comes away completely dry, then allow the area to fully air dry before walking on it again.
Martha from Saugus learned this lesson the hard way: “I spilled coffee and immediately started scrubbing with a wet towel. Big mistake! When I called Francisco in a panic, he explained I was actually pushing the stain deeper into the wood. Now I keep absorbent cloths in every room and know exactly what to do.”
For sticky substances like gum or candle wax, try the ice cube trick that amazes every client I teach it to. Simply place ice cubes in a plastic bag on top of the substance until it hardens completely, then gently scrape with a plastic card or scraper. The frozen material pops right off without damaging your finish.
Specific Stain Solutions
Different enemies require different weapons in your wooden floor maintenance tips arsenal:
For pet accidents, quick action is absolutely essential. Blot thoroughly, then follow up with an enzymatic cleaner specifically formulated for hardwood floors. These specialized cleaners break down the proteins in pet waste without harming your floor’s finish.
Red wine spills make everyone panic, but they don’t have to be permanent. After thorough blotting, a small amount of hydrogen peroxide on a cloth can work wonders—but always test in an inconspicuous area first, like inside a closet.
For ink stains, a cloth with a small amount of isopropyl alcohol often does the trick (again, test first in a hidden area). And for oil-based stains like salad dressing or makeup, try sprinkling baking soda to absorb the oil before attempting to clean the surface.
“During a dinner party, I knocked over a full glass of red wine on my maple floors,” Linda from Revere told me recently. “I remembered Francisco’s advice about immediate blotting. After quick action and using the proper cleaner, my guests couldn’t even find where it happened!”
Remember this golden rule: never reach for ammonia, vinegar, or all-purpose cleaners when dealing with hardwood floor spills. These harsh chemicals can permanently damage your floor’s finish and even discolor the beautiful wood beneath. When in doubt about a stubborn stain, it’s always safer to consult a professional than risk permanent damage with DIY solutions.
5. Choose Products Wisely—What to Use & What to Avoid
Walking down the cleaning products aisle can feel like navigating a minefield. With so many bottles claiming to be “perfect for wood floors,” how do you separate the helpful from the harmful? After seeing hundreds of floors damaged by the wrong products, I can tell you that what you clean with matters just as much as how you clean.
“Last year, a client called me in a panic because her beautiful oak floors were turning cloudy and dull,” recalls Francisco from our restoration team. “When I arrived, I could smell the problem immediately—she’d been using a vinegar solution she found on a DIY blog. We had to completely refinish those floors.”
Safe vs. Unsafe Cleaners
The truth is simple: hardwood floors need gentle, specialized care. Here’s what works—and what doesn’t:
| Safe for Hardwood | Avoid on Hardwood |
|---|---|
| pH-neutral hardwood cleaners | Vinegar or acidic solutions |
| Water-based wood polishes | Oil-based polishes (on finished floors) |
| Manufacturer-recommended products | Steam mops or steam cleaners |
| Microfiber spray mops | Traditional string mops |
| Diluted dish soap (occasionally) | Ammonia or chlorine bleach |
| Specialized wood cleaners | All-purpose cleaners |
| Water-based wax (for waxed floors only) | Furniture polish or spray |
One of our clients in Winthrop learned this lesson the hard way. “I thought my steam mop was a miracle worker,” she told me. “It cleaned everything so well. But after a few months, I noticed my floors starting to warp at the seams. Now I know—steam and wood don’t mix.”
The pH Factor
The science behind hardwood floor care is actually quite simple. Your floor’s finish performs best with pH-neutral cleaners (pH of 7). Products that are too acidic (like vinegar) or too alkaline (like ammonia) will gradually break down the protective finish, leaving your wood vulnerable to moisture, stains, and scratches.
Wooden floor maintenance tips for product selection:
- Always check the label for “safe for hardwood floors” and “pH-neutral”
- Stick with reputable brands specifically formulated for hardwood
- When in doubt, check with your floor’s manufacturer for recommended products
- Less is more – even with the right products, over-wetting can cause damage
Cotton mops might seem traditional, but they tend to hold too much water. Modern microfiber spray mops give you better control over moisture—critical for wood floor longevity.
“I tell all my customers to throw away their old mop bucket,” says Maria, our senior technician. “Once you switch to a good spray mop with a microfiber pad and the right cleaner, you’ll never go back. Your floors will thank you.”
For a complete breakdown of recommended products for different wood floor types and finishes, check out our detailed guide on What is Best to Clean Hardwood Floors?
Remember: the best cleaning product is the one recommended by your floor’s manufacturer. When those instructions are long gone, that’s where our expertise comes in—we can help identify your floor type and recommend the perfect cleaning regimen.
6. Scratch & Scuff Survival Kit
Despite your best preventative efforts, scratches and scuffs can happen. The good news is that minor damage doesn’t necessarily mean you need a complete refinishing.
DIY Repair Options
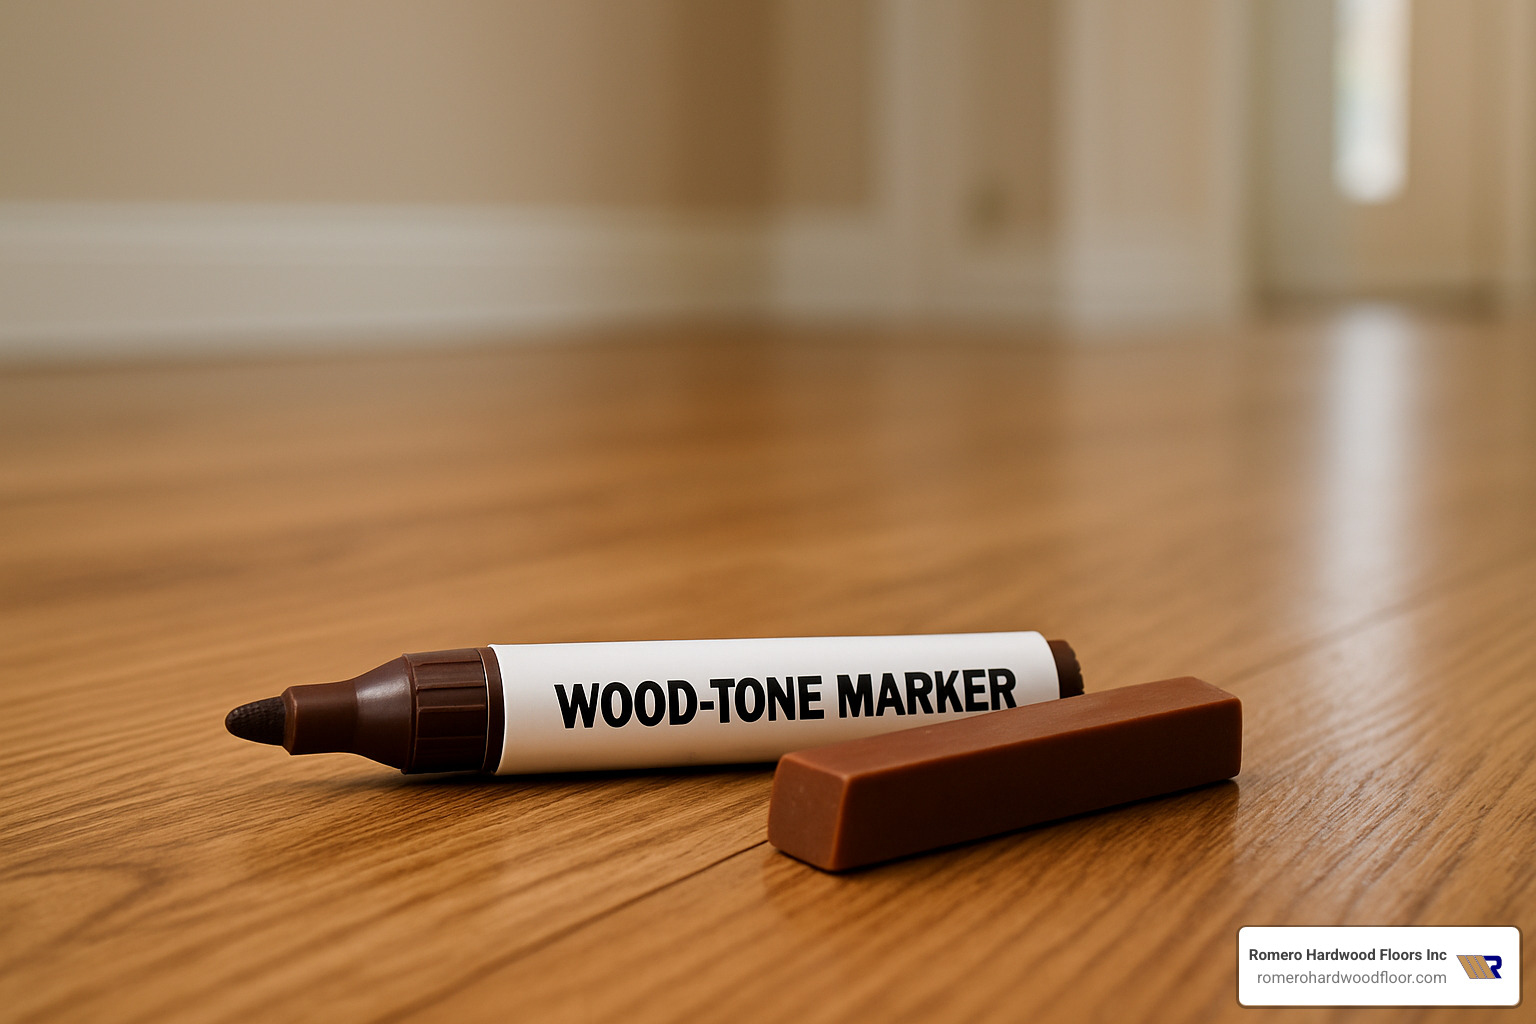
Every hardwood floor owner should have a small repair kit ready for those inevitable moments when life happens. Stain markers have become my go-to recommendation for shallow scratches that haven’t penetrated the finish. Available in various wood tones, they can work miracles on minor blemishes that catch your eye but haven’t damaged the wood itself.
For slightly deeper scratches, wax sticks are worth their weight in gold. “I dropped a pot in my kitchen and thought I’d ruined my beautiful cherry floors,” shares Michael from Malden. “Francisco recommended a wax stick in the right shade, and after a five-minute repair, even I can’t find where the scratch was!”
Many homeowners don’t realize that touch-up kits are often available directly from flooring manufacturers. These kits are specifically color-matched to your floor and include everything needed for small repairs. I always suggest checking with your floor’s manufacturer first before purchasing generic repair products.
When scratches are more widespread but still superficial, a buff and recoat might be your best option. This process—sometimes called a “screen and recoat”—applies a new layer of finish without the dust and disruption of full sanding. It’s like giving your floor a refreshing facial rather than major surgery.
“Tennis balls are my secret weapon for scuff marks,” says Maria from Saugus. “Just cut a small X in the ball and put it on the end of a broom handle. The felt-like surface of the tennis ball buffs away black scuff marks like magic.”
When to Call Professionals
While DIY repairs can address minor issues, knowing when to call in experts is one of the most important wooden floor maintenance tips I can offer. Professional intervention is recommended when you’re facing:
Deep gouges that penetrate to the raw wood require professional attention. These deeper wounds expose the wood to moisture and can lead to warping or staining if not properly addressed. Our technician Jose explains, “The line between DIY and professional repair often comes down to depth. If you can feel the scratch with your fingernail, it’s likely too deep for a simple DIY fix.”
Widespread scratching across multiple boards often indicates it’s time for professional refinishing. What looks like many individual scratches might actually be wear-through of the finish across a larger area.
Water damage causing boards to cup or crown needs immediate professional attention. Unlike simple scratches, moisture problems can spread and cause structural issues if not properly remediated.
Discoloration that won’t buff out might indicate deeper issues with the wood or finish. Sometimes what appears to be a surface scratch is actually damage to the wood itself, requiring professional techniques to restore.
I’ve seen too many DIY attempts go wrong when homeowners tackle problems beyond their skill level. When in doubt, it’s always more cost-effective to have a professional assessment before attempting complex repairs yourself.
For more detailed guidance on scratch repair options and techniques, visit our comprehensive guide on How to Repair Scratches on Hardwood Floors.
7. Guard Against Furniture, Pets & High Heels
Preventative measures are always more effective than repairs. Three common culprits of hardwood floor damage are furniture movement, pet nails, and high-heeled shoes.
Furniture Protection Strategies
- Felt pads: Apply to all furniture legs and replace every 3-6 months as they collect grit
- Furniture sliders: Use when rearranging heavy pieces
- Rubber caster cups: Place under rolling chairs and furniture
- Area rugs: Place under dining tables and high-traffic furniture areas
- Lift, don’t drag: Always lift furniture when moving it
“I recommend keeping a supply of extra felt pads in a drawer,” suggests our customer service representative Elena. “That way, when you notice one is missing or worn out, you can replace it immediately before damage occurs.”
Pet-Friendly Floors
Our furry friends can be hard on hardwood, but with some simple strategies, you can have both pets and beautiful floors:
- Regular nail trims: Keep pet nails trimmed and filed to prevent scratching
- Designated play areas: Use rugs in areas where pets play most actively
- Quick cleanup: Address accidents immediately to prevent staining and moisture damage
- Training: Train pets to use specific pathways through the house when possible
The High Heel Hazard
High heels can exert thousands of pounds of pressure per square inch on floors, causing dents and divots. Consider:
- Having a shoe rack by the door for heel removal
- Wearing house slippers or socks instead
- Using runner rugs in hallways where shoes are commonly worn
“One of our clients in Malden had significant damage from her shoe collection,” recalls our assessment specialist Roberto. “After we refinished her floors, she created a stylish ‘shoe off’ area by her front door with a bench and decorative storage. Her floors have remained pristine since.”
8. Control Humidity & Sunlight Year-Round
Wood is a natural material that breathes and responds to its environment long after installation. Even the most beautiful hardwood floors can develop problems if humidity and sunlight aren’t properly managed throughout the changing seasons.
The Humidity Sweet Spot
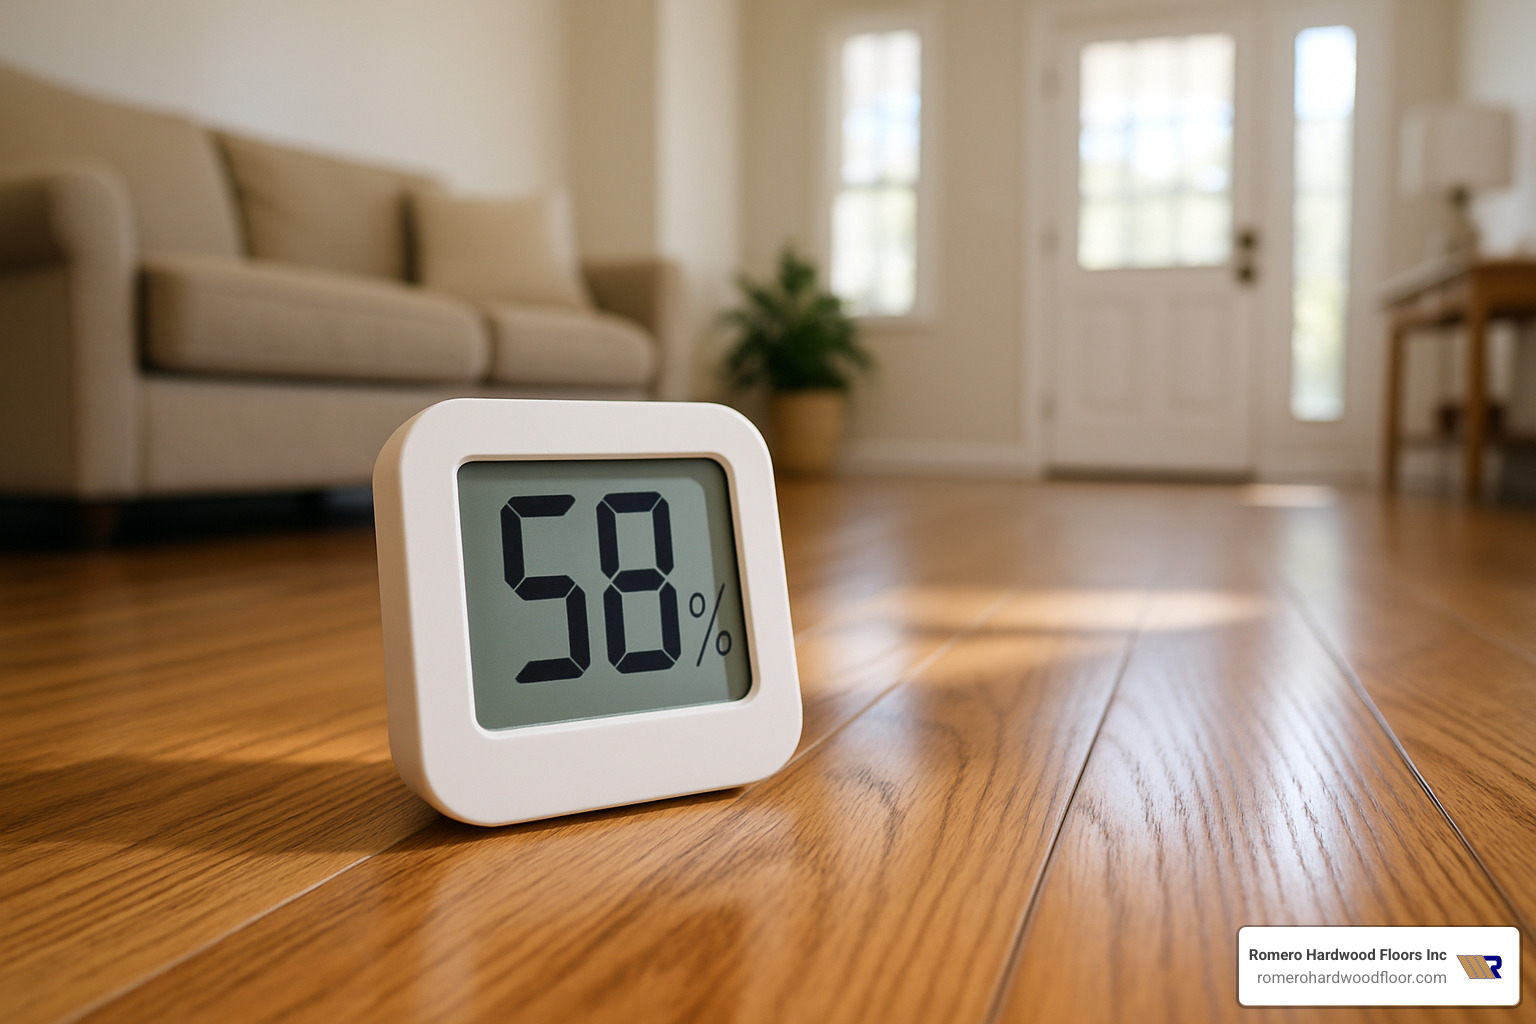
“I tell all my clients that maintaining proper humidity is like giving your floors a long, healthy life,” says our installation manager Javier. “Wood floors are happiest when indoor relative humidity stays between 35% and 45%, with temperatures between 60-80°F.”
When conditions fall outside this range, your floors will let you know:
Too humid (above 55%): Floors may cup or crown as boards absorb moisture and expand. You might notice edges lifting slightly or an overall wavy appearance.
Too dry (below 30%): Boards shrink, creating those frustrating gaps between planks that collect dirt and debris.
“Here in New England, we battle both extremes,” Javier explains with a smile. “Winter heating systems can drop indoor humidity to desert-like levels, while summer brings that famous East Coast humidity indoors. A consistent environment is your floor’s best friend.”
Seasonal Strategies
One of the most valuable wooden floor maintenance tips we share with homeowners involves adapting to each season’s challenges.
During winter months, when heating systems run constantly, use humidifiers to prevent excessive drying. Many of our Revere clients invest in whole-home humidifiers attached to their HVAC systems, but even portable units placed strategically can make a significant difference.
For summer humidity, air conditioning naturally helps dehumidify, but in particularly damp periods, a dehumidifier might be necessary—especially in basements or first floors with hardwood.
During spring and fall transitions, be extra vigilant about monitoring humidity as your home switches between heating and cooling systems.
“I recommend keeping an inexpensive hygrometer in rooms with hardwood floors,” says Maria, a long-time client from Saugus. “I was shocked to find my living room dropped to 22% humidity last January! My small humidifier fixed the problem, and those mysterious floor gaps disappeared within days.”
The National Wood Flooring Association considers humidity control so crucial that many manufacturers’ warranties become void if damage occurs due to improper humidity conditions. For deeper insights, visit the Scientific research on indoor humidity and wood stability page.
Sun Protection
The sun’s UV rays can be just as damaging to your floors as they are to your skin, causing uneven fading and color changes over time.
“I had a client in Swampscott with gorgeous cherry floors that had dramatically faded under their large windows,” shares our color specialist Diana. “After refinishing, they added UV-filtering curtains and now close them during peak sun hours. The difference in color retention has been remarkable.”
To protect your floors from sun damage, consider these wooden floor maintenance tips:
Use UV-filtering window treatments on south-facing windows where sun exposure is strongest. These can include special curtains, blinds, or window films that block harmful rays while still allowing natural light.
Rearrange furniture periodically to allow for more even sun exposure across your floors. This prevents dramatic color differences when you eventually move that sofa or bookcase.
Consider UV-protective finishes when it’s time to refinish. Modern polyurethanes with UV inhibitors can significantly reduce fading.
“Think of your floors like a fine painting,” suggests Diana. “You wouldn’t hang a valuable artwork in direct sunlight, and your hardwood floors deserve the same consideration.”
By maintaining proper humidity levels and protecting against harsh sunlight, you’ll preserve both the beauty and structural integrity of your hardwood floors for many years to come.
9. Polish, Re-Oil or Refinish on Schedule
Even with meticulous daily care, your hardwood floors will eventually need some rejuvenation. Think of it like skincare – daily cleansing is essential, but occasionally you need deeper treatments to maintain that healthy glow.
“The biggest mistake I see homeowners make is waiting until their floors look terrible before taking action,” shares Antonio, our refinishing specialist. “By then, what could have been a simple refresh becomes a costly full restoration.”
Maintenance Schedule by Finish Type
Understanding your floor’s specific needs based on its finish type can save you thousands of dollars over its lifetime:
| Floor Type | Regular Maintenance | Periodic Refreshing | Full Restoration |
|---|---|---|---|
| Surface-sealed (polyurethane) | Dust daily, damp mop weekly | Polish every 2-3 months | Recoat every 3-5 years; Refinish every 7-10 years |
| Oil-finished | Dust daily, clean with oil-soap weekly | Re-oil dry areas every 6-12 months | Deep clean and re-oil every 2-3 years |
| Waxed | Dust daily, buff weekly | Apply new wax every 6-12 months | Strip and re-wax every 3-5 years |
| Engineered | Same as finish type above | Same as finish type above | Limited refinishing (1-2 times maximum) |
Polish vs. Recoat vs. Refinish
Think of these three processes as increasingly intensive treatments for your floors:
Polishing (every 2-3 months) is like applying moisturizer to your skin. It adds a protective layer and fills those tiny micro-scratches without changing the existing finish. It’s quick, affordable, and something many homeowners can handle themselves.
“I keep a reminder in my phone to polish my floors quarterly,” says Maria from Malden. “It takes me about an hour for my whole first floor, and the shine afterward makes the house feel so fresh and clean.”
Re-oiling is specifically for oil-finished floors and works like conditioning dry hair. When certain areas start looking dull or dry (often in high-traffic zones), a fresh application of oil replenishes what’s been worn away through use.
Recoating (every 3-5 years) is more like a facial peel – it lightly abrades the existing finish before adding a fresh protective layer. No sanding to bare wood means less mess, less expense, and less disruption to your household.
Refinishing (every 7-10 years) is the complete makeover. This process sands down to bare wood and applies a completely new finish. It’s the most intensive and expensive option, but it can make old, damaged floors look brand new.
“Many homeowners skip the recoating step and wait until their floors need full refinishing,” Antonio points out. “This costly mistake means they’re refinishing every 5-7 years instead of every 10-15. Regular recoating can extend the time between full refinishings by years, saving significant money.”
Cost Considerations*
*Average costs based on public internet data; actual costs vary widely by region, floor condition, and specific requirements.
Polishing costs between $0.50-$1.50 per square foot if you do it yourself, or $1-$3 per square foot for professional service. It’s the most affordable maintenance option by far.
Recoating typically runs $1.50-$5 per square foot when done professionally. This middle-ground option provides significant renewal without the disruption of full refinishing.
Full refinishing averages $3-$15 per square foot professionally, with high-end custom refinishing potentially reaching up to $25 per square foot. The wide range reflects differences in wood type, condition, size of the space, and regional labor costs.
“I always tell my clients that maintenance is an investment, not an expense,” says Francisco Romero. “A well-maintained hardwood floor can last 100+ years, while neglected floors might need replacement after just 20.”
For more detailed information on care schedules and restoration options, visit our Hardwood Floor Care Guide. If you’re wondering whether your floors need professional attention, our team at Romero Hardwood Floors can provide an honest assessment of your floor’s condition and recommend the most cost-effective solution.
10. Wooden Floor Maintenance Tips Master Plan & When to Call Pros
Creating a personalized maintenance plan for your hardwood floors doesn’t have to be complicated. Think of it as a simple roadmap that adapts to your home’s unique traffic patterns and your lifestyle. After all, the entryway that welcomes muddy boots and pet paws needs different attention than your rarely-used guest bedroom.
Customized Care Schedule
I’ve found that my clients who develop a simple care schedule have floors that stay beautiful years longer than those who take a reactive approach. Your plan should reflect how each area of your home is used:
| Area Type | Daily | Weekly | Monthly | Quarterly | Annually |
|---|---|---|---|---|---|
| High Traffic (entryways, kitchens) | Dust mop | Vacuum & damp mop | Check for damage | Polish/refresh | Deep clean |
| Medium Traffic (living rooms) | Dust as needed | Vacuum | Damp mop | Polish/refresh | Assess condition |
| Low Traffic (bedrooms, offices) | — | Dust mop | Vacuum | — | Damp clean & assess |
“I keep a simple note in my phone with floor care reminders,” shares Maria, a homeowner from Saugus whose oak floors we installed five years ago. “Sunday is vacuum day, the first Saturday of each month is damp-mop day for bedrooms, and I have quarterly reminders to check if it’s time for polishing. It takes the guesswork out of maintenance.”
For families with young children or pets, you might need to dust high-traffic areas daily, while empty-nesters might find weekly attention sufficient. The key is consistency rather than intensity.
Professional Intervention Indicators
Even with perfect maintenance, there comes a time when professional help makes sense. Here are clear signals that it’s time to call in the experts:
Persistent dullness despite regular cleaning often means your floor’s protective finish has worn thin. When Elena from Melrose noticed her once-gleaming maple floors looked perpetually cloudy despite meticulous care, our assessment revealed it was time for a screen-and-recoat—a service that cost far less than the full refinishing she feared she needed.
Water damage requires prompt professional attention. When Michael from Revere finded his refrigerator had been slowly leaking, the resulting dark stains and slight warping required selective board replacement and refinishing—a job that would have been much more extensive had he waited longer.
Deep scratches that reveal raw wood beneath need expert repair. These can’t be fixed with polish or touch-up kits and may allow moisture to penetrate if left untreated.
Widespread wear patterns in high-traffic areas indicate it’s time for professional refreshing. These usually appear first as “traffic lanes” where the finish looks significantly duller than surrounding areas.
Squeaking or movement between boards often signals underlying structural issues that require professional assessment before they worsen.
Cupping or crowning (where board edges rise above or sink below the centers) indicates moisture problems that need professional diagnosis and correction.
“Many homeowners wait too long to call us,” notes our assessment specialist Jorge. “What might have been a simple recoating becomes a more expensive full refinishing job because the wear has penetrated through the finish into the wood itself.”
The good news? A professional deep cleaning and maintenance service once a year can often prevent these more serious issues from developing. Many of our clients schedule this service around the same time each year—often during spring cleaning—as a way to protect their investment and keep their floors looking their best.
For more information about when to bring in professional help and what to expect, visit our Hardwood Floor Repair Contractors page. You’ll find detailed information about our assessment process and the wooden floor maintenance tips that indicate when professional intervention makes sense.
Preventative maintenance is always more cost-effective than reactive repairs. A small investment in professional care at the right time can save thousands in more extensive restoration down the road.
Frequently Asked Questions about Hardwood Floor Upkeep
Can I use eco-friendly DIY cleaners safely?
The shift toward natural cleaning products has many homeowners wondering if they can ditch commercial cleaners for DIY solutions. While the eco-friendly instinct is commendable, when it comes to wooden floor maintenance tips, caution is definitely needed.
Commercial hardwood cleaners undergo rigorous testing to ensure they won’t damage your floor’s finish. If you’re determined to go the DIY route, your safest bet is a simple mixture of warm water with just a few drops of dish soap (not dish detergent). Apply it with a barely damp microfiber mop and dry immediately.
What about those popular natural cleaners you see online? Unfortunately, many can cause serious problems:
“I had a client who religiously used a vinegar solution she found on a cleaning blog,” shares Maria, our service coordinator. “She was heartbroken when we explained that the dull, cloudy appearance developing on her once-gleaming floors was from the vinegar slowly degrading the finish.”
The truth is that vinegar’s acidity can break down protective coatings over time. Similarly, essential oils might smell wonderful but can compromise certain finishes, and lemon juice’s acidity is a definite no-go for hardwood.
For the environmentally conscious homeowner, look for commercial hardwood cleaners with Green Seal or similar environmental certifications. These products balance effective cleaning with eco-friendly formulations that won’t harm your investment.
Are steam mops ever okay on sealed wood?
Despite what some product packaging might claim, the professional consensus on steam mops for hardwood is clear and consistent: no, they’re not safe—not even on “sealed” hardwood floors.
“I understand the appeal,” says Roberto, our technical specialist. “Steam cleaning feels thorough and sanitizing. But I’ve seen too many beautiful floors ruined because steam found its way through microscopic gaps in the finish.”
The combination of heat and moisture from steam mops creates the perfect storm for damaging wood floors. The steam can penetrate even the smallest gaps in your floor’s finish, causing the wood underneath to warp, cup, or crown. Over time, the heat can also break down the finish itself, leaving your floor vulnerable to further damage.
This isn’t just our opinion—the National Wood Flooring Association and virtually all major flooring manufacturers explicitly warn against steam mops in their care guidelines. With so many safe and effective cleaning alternatives available, the potential damage simply isn’t worth the risk.
How deep can scratches be before refinishing is required?
Not all scratches are created equal, and knowing which ones you can fix yourself versus which ones need professional attention is an important part of wooden floor maintenance tips.
Think of scratches in three categories:
Surface scratches just affect the finish and don’t reach the wood itself. These are often fixable with polish or touch-up kits available at most hardware stores. They might look alarming at first, but they’re usually the easiest to address.
Medium scratches have broken through the finish and just barely reached the wood. For these, wax sticks or wood filler followed by touch-up stain can often do the trick. These repairs might not be perfect, but they can significantly improve appearance without major intervention.
Deep scratches have penetrated well into the wood itself. Unfortunately, these usually require either board replacement or professional refinishing, depending on how widespread the damage is.
“Here’s a simple test anyone can do,” suggests Carlos, our repair specialist. “Run your fingernail across the scratch. If your nail catches in the groove, the scratch has penetrated the finish and reached the wood. The deeper it catches, the more serious the issue.”
For isolated deep scratches, spot refinishing might be possible, though color matching can be tricky. When you’re seeing widespread deep scratching, a full refinishing is typically the most cost-effective long-term solution, giving your floors a fresh start and renewed protection.
Solid hardwood can typically be refinished 5-7 times over its lifetime, while engineered hardwood usually allows for 1-2 refinishings depending on the thickness of the veneer layer.
Conclusion
There’s something truly special about hardwood floors that maintain their warmth and character decade after decade. The good news? Creating this lasting beauty doesn’t require complicated techniques or expensive gadgets—just consistent care and a few smart habits.
By following these wooden floor maintenance tips and creating a simple care routine, you’re not just cleaning floors—you’re preserving a valuable investment that improves your entire home.
Think about the key principles we’ve explored together:
First, prevention truly is easier than cure. Those simple felt pads under furniture legs, a no-shoes policy, and strategic rugs in high-traffic areas can prevent most damage before it ever happens.
Second, regular gentle cleaning with the right tools keeps your floors looking their best day-to-day. Microfiber is your friend, while excess water is definitely not!
Third, quick action on spills and scratches prevents minor issues from becoming major problems. That lightning-fast response to a tipped wine glass or pet accident can save you significant headaches down the road.
Fourth, maintaining stable environmental conditions protects your floors from their invisible enemies—fluctuating humidity and harsh UV rays that can silently damage wood over time.
Finally, following the right maintenance schedule for your specific floor type ensures you’re providing exactly what your floors need, when they need it—whether that’s regular polishing, occasional recoating, or eventual refinishing.
At Romero Hardwood Floors Inc., we’ve been partnering with homeowners throughout Revere, MA and nearby communities since 2006, helping them enjoy beautiful hardwood floors that stand the test of time. We understand that every floor tells a story—and with proper care, your floor’s story can continue for generations.
Whether you need personalized advice for daily care, professional deep cleaning that revitalizes tired-looking floors, or complete restoration services that bring damaged wood back to life, our team of specialists is ready to help.
For more information about our comprehensive repair and maintenance services, visit our Hardwood Floor Repair Contractors page or reach out for a personalized assessment of your hardwood floors.
Beautiful hardwood floors aren’t just surfaces to walk on—they’re the foundation of your home’s character and value. With these wooden floor maintenance tips and a little regular attention, your floors will continue to bring warmth and beauty to your home for decades to come.
