Floating Wood Floor Over Concrete: Top 5 Master Tips
Floating wood floor over concrete is a popular choice for those seeking to use the neat look of wood without the headaches of traditional installations. For those searching for an efficient and effective solution, here are the key steps:
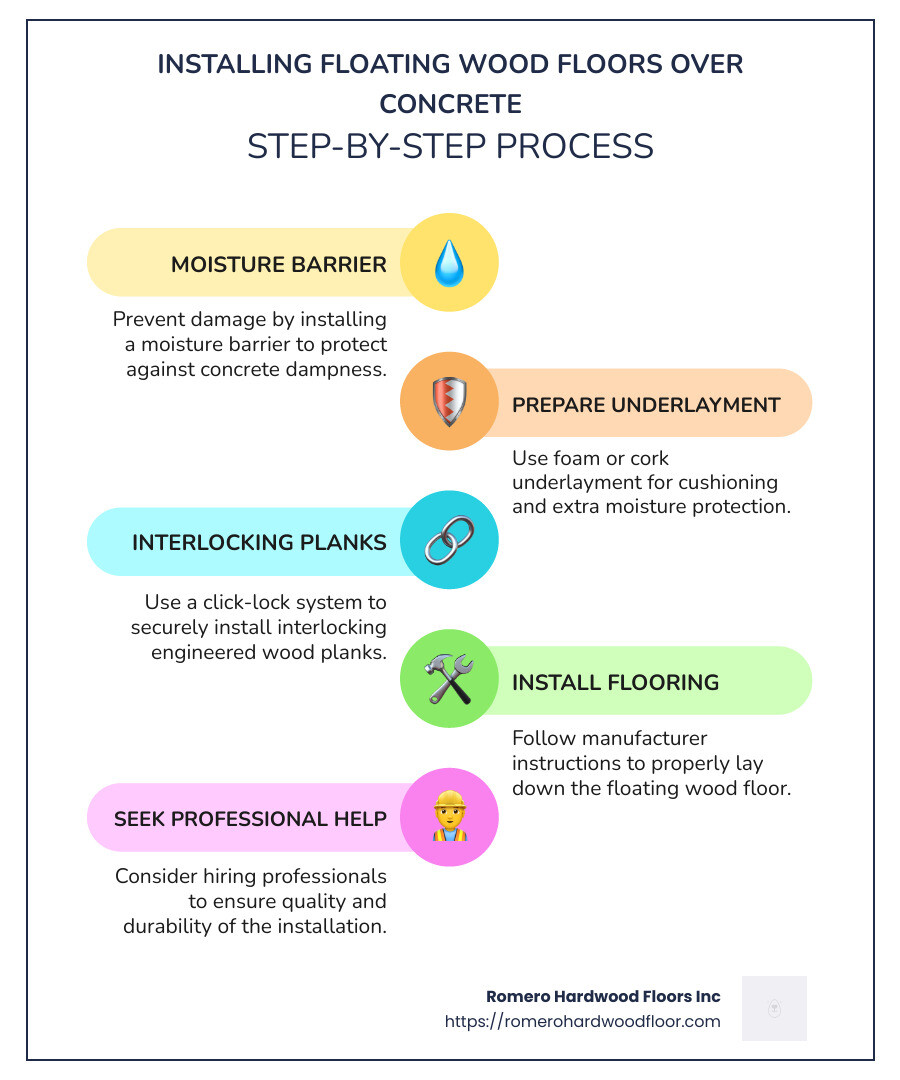
- Moisture Barrier: Essential to prevent damage from concrete’s inherent moisture.
- Underlayment: Foam or cork underlayment provides cushioning and moisture protection.
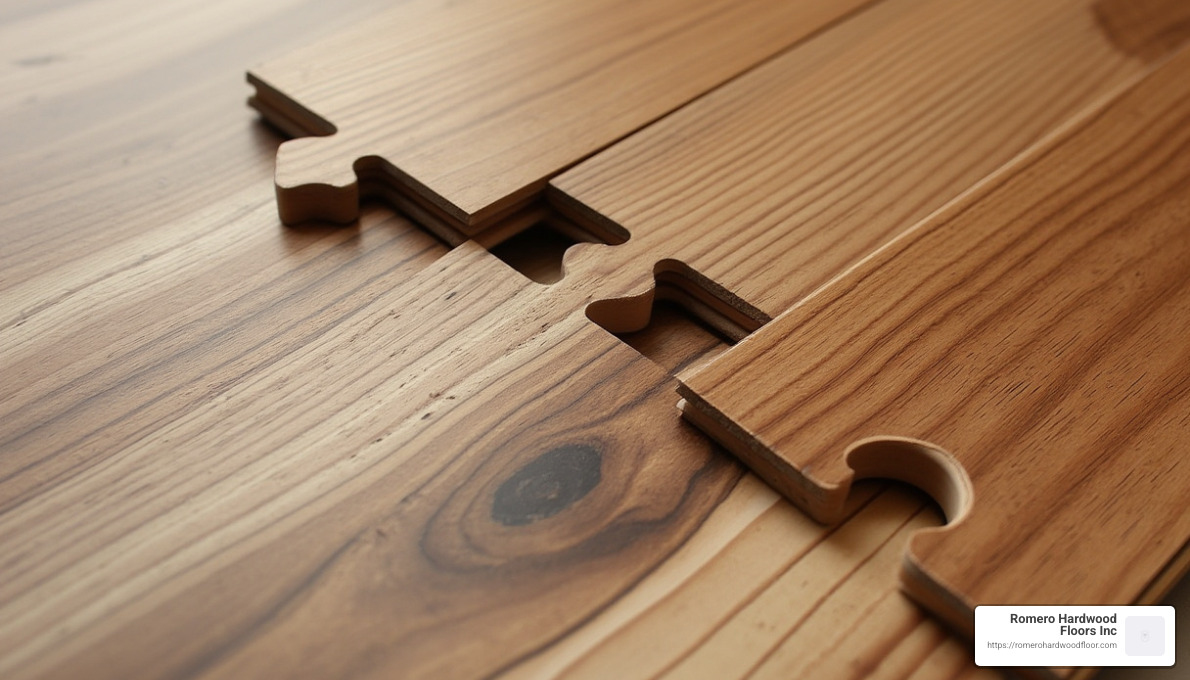
- Click-Lock System: Engineered hardwood with interlocking planks for easy installation.
- Professional Help: Often recommended to ensure quality results and long-term durability.
Floating wood floors offer an appealing blend of beauty and practicality, especially when dealing with concrete slabs. This method involves laying engineered wood that “floats” above the subfloor, held together by a click-lock system, making it a cost-effective and labor-efficient alternative to more traditional installations. Installing a moisture barrier is a must to shield against concrete’s natural dampness, ensuring that your new floors remain pristine.
I’m Francisco Romero, owner of Romero Hardwood Floors Inc. With over 15 years of experience helping homeowners and property managers achieve stunning and durable flooring solutions, I’m here to guide you through mastering the art of installing floating wood floor over concrete. Let’s explore the process in more depth.
Understanding Floating Wood Floors
Floating wood floors are a modern marvel in flooring technology, offering a seamless blend of beauty and functionality. Unlike traditional hardwood floors that are nailed or glued down, floating floors “float” above the subfloor. This is achieved through an ingenious system of interlocking pieces.
The Magic of Interlocking Pieces
At the heart of floating wood floors is the click-lock system. This system involves engineered wood planks that snap together like puzzle pieces, creating a stable surface without the need for adhesives or nails. This design makes the installation process straightforward and accessible, even for DIY enthusiasts.
Simplified Installation Process
Installing a floating wood floor over concrete is a step-by-step process that prioritizes ease and efficiency:
- Preparation: Start by ensuring your concrete subfloor is clean, dry, and level. Any bumps or debris can disrupt the installation.
- Moisture Barrier: Lay a moisture barrier, such as a polyethylene sheet, over the concrete. This is crucial to prevent moisture from seeping into the wood, which can cause warping or mold.
- Underlayment: Place a foam or cork underlayment over the moisture barrier. This layer provides cushioning, sound absorption, and additional protection against moisture.
- Installation: Begin laying the planks, starting from one corner of the room. Use the click-lock system to connect the planks, ensuring a snug fit. Continue across the room, cutting planks as needed to fit the space.
- Finishing Touches: Install baseboards or quarter rounds to cover any gaps at the edges and give the floor a polished look.
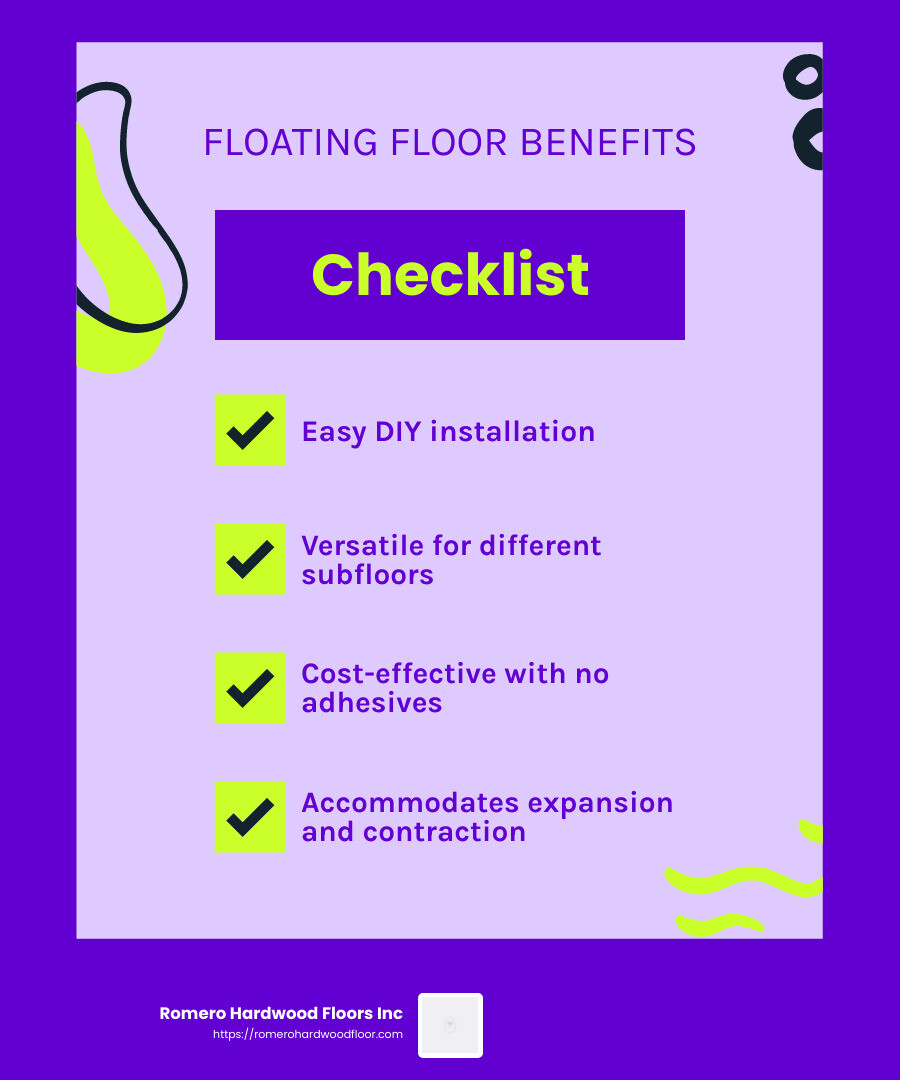
This process not only simplifies the installation but also allows for some flexibility. The floating nature of the floor can accommodate slight shifts and expansions due to temperature and humidity changes, reducing the risk of buckling.
Why Choose Floating Floors?
The benefits of floating wood floors are numerous. They are:
- Easy to Install: The interlocking system makes them ideal for quick and efficient DIY projects.
- Versatile: Suitable for various subfloor types, including concrete, making them a great choice for basements and other below-grade installations.
- Cost-Effective: Without the need for adhesives or nails, labor costs are reduced.
However, it’s important to note that while floating floors are convenient, they may not be as stable as fully adhered floors. Thus, consulting with a professional can ensure the best results for your specific situation.
In the next section, we’ll dive into the crucial steps of preparing your concrete subfloor to ensure your floating wood floor achieves its full potential.
Preparing Your Concrete Subfloor
When it comes to installing a floating wood floor over concrete, preparation is key. A well-prepared subfloor ensures a smooth installation and helps prevent future issues.
Leveling the Concrete
First, check your concrete subfloor for levelness. Uneven surfaces can cause your floating floor to wobble or make noise. Use a long straightedge or a level to spot any high or low areas. If you find low spots, fill them with a self-leveling compound. High spots can be sanded down.
A perfectly level surface is crucial for the click-lock system to function properly and for the floor to look its best.
Moisture Barrier
Concrete can be notorious for moisture issues, which is why laying a moisture barrier is non-negotiable. A polyethylene sheet, at least 6 mil thick, is recommended. This barrier prevents moisture from seeping into the wood, which can lead to warping or mold.
Make sure to overlap the seams of the barrier and tape them securely. This step is especially important in areas prone to high humidity or water exposure, like basements.
Subfloor Sleepers: Yay or Nay?
Some might consider installing subfloor sleepers—wooden strips placed over the concrete to create a gap between the wood floor and the concrete. However, sleepers can add complexity and height to your floor, which might not be desirable for all projects.
For most floating wood floor installations, sleepers aren’t necessary. The underlayment and moisture barrier provide sufficient separation and cushioning. If you do choose to use sleepers, ensure they are pressure-treated to resist moisture and are installed level and securely.
Final Check
Once your concrete subfloor is level and protected with a moisture barrier, you’re ready for the underlayment. This layer, typically made of foam or cork, adds cushioning and soundproofing. It also provides an additional layer of moisture protection.
In the next section, we’ll guide you through the step-by-step process of installing your floating wood floor over this well-prepared subfloor.
Floating Wood Floor Over Concrete: Step-by-Step Guide
Installing a floating wood floor over concrete can be a rewarding DIY project. With the right preparation and materials, you can achieve professional results. Let’s walk through the process step by step.
Step 1: Install the Moisture Barrier
After preparing your concrete subfloor, it’s time to lay down the moisture barrier. This is crucial for protecting your wood floor from moisture-related issues.
- Material: Use a polyethylene sheet that is at least 6 mil thick.
- Installation: Overlap the edges by about 6 inches and secure them with waterproof tape. This ensures no gaps where moisture can sneak through.
Step 2: Choose the Right Underlayment
Your underlayment is an important layer that adds comfort and soundproofing.
- Material Options: Foam or cork are popular choices. Foam is lightweight and easy to install, while cork offers better sound absorption.
- Installation: Roll out the underlayment over the moisture barrier. Make sure it fits snugly against the walls without any gaps or overlaps.
Step 3: Lay Down the Floating Wood Floor
Now, it’s time for the main event: installing your floating wood floor.
- Start with the First Row: Begin along the longest wall. Use spacers to maintain an expansion gap of about 1/4 inch between the planks and the wall.
- Use a Click-Lock System: Most floating floors use a click-lock system, making installation straightforward. Simply click the planks together, ensuring a tight fit.
- Continue Across the Room: Work your way across the room, row by row. Stagger the seams for a more natural look and added stability.
Step 4: Consider Steller Hardwood Floors
For those looking for an easier installation, Steller Hardwood Floors offers a unique solution. Their patented assembly clip system allows for quick and simple installation without the need for nails or glue.
- Advantages: This system is great for DIYers, as it doesn’t require specialized tools or skills. Plus, it’s easy to remove and replace individual planks if needed.
Step 5: Finishing Touches
Once your floor is installed:
- Remove Spacers: Take out the spacers and install baseboards or quarter-rounds to cover the expansion gaps.
- Inspect Your Work: Walk across the floor to check for any loose planks or uneven areas. Make any necessary adjustments.
With these steps, you’ll have a beautiful new floor that improves your space. Ready to tackle the next part of your flooring project? Let’s explore the benefits and drawbacks of floating wood floors in the following section.
Benefits and Drawbacks of Floating Wood Floors
Benefits
Easy Installation
One of the biggest advantages of floating wood floors is the ease of installation. Thanks to the interlocking pieces and click-lock systems, even a DIY enthusiast can achieve a professional look without needing specialized tools. This method is also less messy since it doesn’t require glue or nails.
- Time-Saving: Because the planks simply click together, you can cover large areas quickly. This is perfect for those who want to transform their space over a weekend.
- Flexibility: Floating floors can be installed over most existing surfaces, including concrete, without major prep work.
Drawbacks
Potential Issues
While floating wood floors offer many benefits, they are not without potential drawbacks.
- Moisture Concerns: Even with a moisture barrier, concrete can still pose a threat. If moisture seeps in, it can cause the wood to warp or buckle over time. Ensuring a proper moisture barrier is essential to prevent these issues.
- Expansion and Contraction: Wood naturally expands and contracts with changes in humidity and temperature. Floating floors are designed to accommodate this movement, but if not installed correctly, you may encounter gaps or buckling.
Maintenance
Floating wood floors are generally easy to maintain, but they do require some care to keep them looking their best.
- Regular Cleaning: Sweeping and vacuuming will help keep dust and dirt from scratching the surface. Use a damp mop with a wood-safe cleaner for deeper cleaning.
- Avoid Excessive Water: Since moisture is a concern, avoid using excessive water when cleaning. Always dry spills immediately to prevent damage.
- Inspect Regularly: Check the edges and seams periodically for signs of wear or gaps. Address any issues quickly to maintain the floor’s integrity.
Overall, floating wood floors offer a convenient and stylish option for many homeowners. However, understanding the potential issues and maintenance needs will help ensure your floor remains beautiful for years to come.
Ready to learn more? Let’s tackle some frequently asked questions about floating wood floors in the next section.
Frequently Asked Questions about Floating Wood Floors
What is a floating wood floor?
A floating wood floor is a type of flooring installation where the planks are not glued or nailed to the subfloor. Instead, the pieces interlock with one another, creating a stable surface that “floats” above the subfloor. This technique is popular because it allows for easy installation and can be laid over various types of existing flooring, including concrete.
The interlocking mechanism, often referred to as a click-lock system, makes it simple for even DIY enthusiasts to achieve a professional look without specialized tools. This approach not only saves time but also reduces the mess typically associated with traditional flooring installations.
Can you install floating wood floors over concrete?
Yes, you can install floating wood floors over concrete, but there are some essential steps to follow to ensure success. The most critical step is to prepare the concrete subfloor properly. This includes ensuring the concrete is level and clean.
A moisture barrier is crucial when installing over concrete. Concrete is porous and can hold moisture, which can seep into the wood and cause warping or buckling. A moisture barrier acts as a protective layer to prevent this kind of damage.
Subfloor preparation also involves checking the concrete’s moisture levels. Use a moisture meter to confirm the levels are within the recommended range for your flooring product. This will help avoid potential issues down the line.
What are the common problems with floating wood floors?
While floating wood floors offer numerous benefits, they do come with potential challenges. Here are some common issues:
- Moisture Issues: Even with a moisture barrier, moisture can still pose a threat. If moisture penetrates the barrier, it can lead to warping or buckling of the wood. Regular inspection and maintenance can help catch any moisture problems early.
- Expansion and Contraction: Wood naturally expands and contracts with changes in temperature and humidity. Floating floors are designed to accommodate this movement, but improper installation can lead to gaps or buckling. Ensuring a proper expansion gap around the room’s perimeter is essential to allow for these natural changes.
Understanding these potential issues and taking steps to mitigate them can help ensure your floating wood floors remain beautiful and functional for years to come.
Next, we’ll explore more about the installation process and how to get the best results with floating wood floors over concrete.
Conclusion
At Romero Hardwood Floors Inc, we pride ourselves on being experts in flooring solutions. Our team is dedicated to providing high-quality installations that improve the beauty and value of your home or commercial space. Whether you’re in Revere, MA, or any of the surrounding areas like Beverly, Chelsea, or Salem, we’re here to help you achieve your flooring dreams.
Why Choose Us?
- Expert Flooring Solutions: With over a decade of experience, our team is skilled in handling a variety of flooring projects. From traditional hardwood to innovative floating wood floors over concrete, we ensure each installation is executed with precision and care.
- Competitive Pricing: We understand that budget is a crucial factor for our clients. That’s why we offer competitive pricing without compromising on quality. Our transparent pricing ensures you know exactly what you’re paying for, with no hidden fees.
- Customer Satisfaction: Our commitment to customer satisfaction is at the heart of everything we do. We work closely with you to understand your needs and provide personalized service from start to finish. Our reputation for reliability and excellent craftsmanship speaks for itself.
Ready to transform your space with beautiful, durable flooring? Contact us today to learn more about our services and how we can help you achieve the perfect look for your home. Visit our flooring installation service page to schedule a consultation or to get more information.
Let Romero Hardwood Floors Inc be your trusted partner in creating stunning flooring solutions that stand the test of time.
