How to Refinish Original Hardwood Floors Without Losing Your Mind
Refinishing Original Hardwood Floors: 10 Pro Tips!
Breathe New Life into Your Home’s History
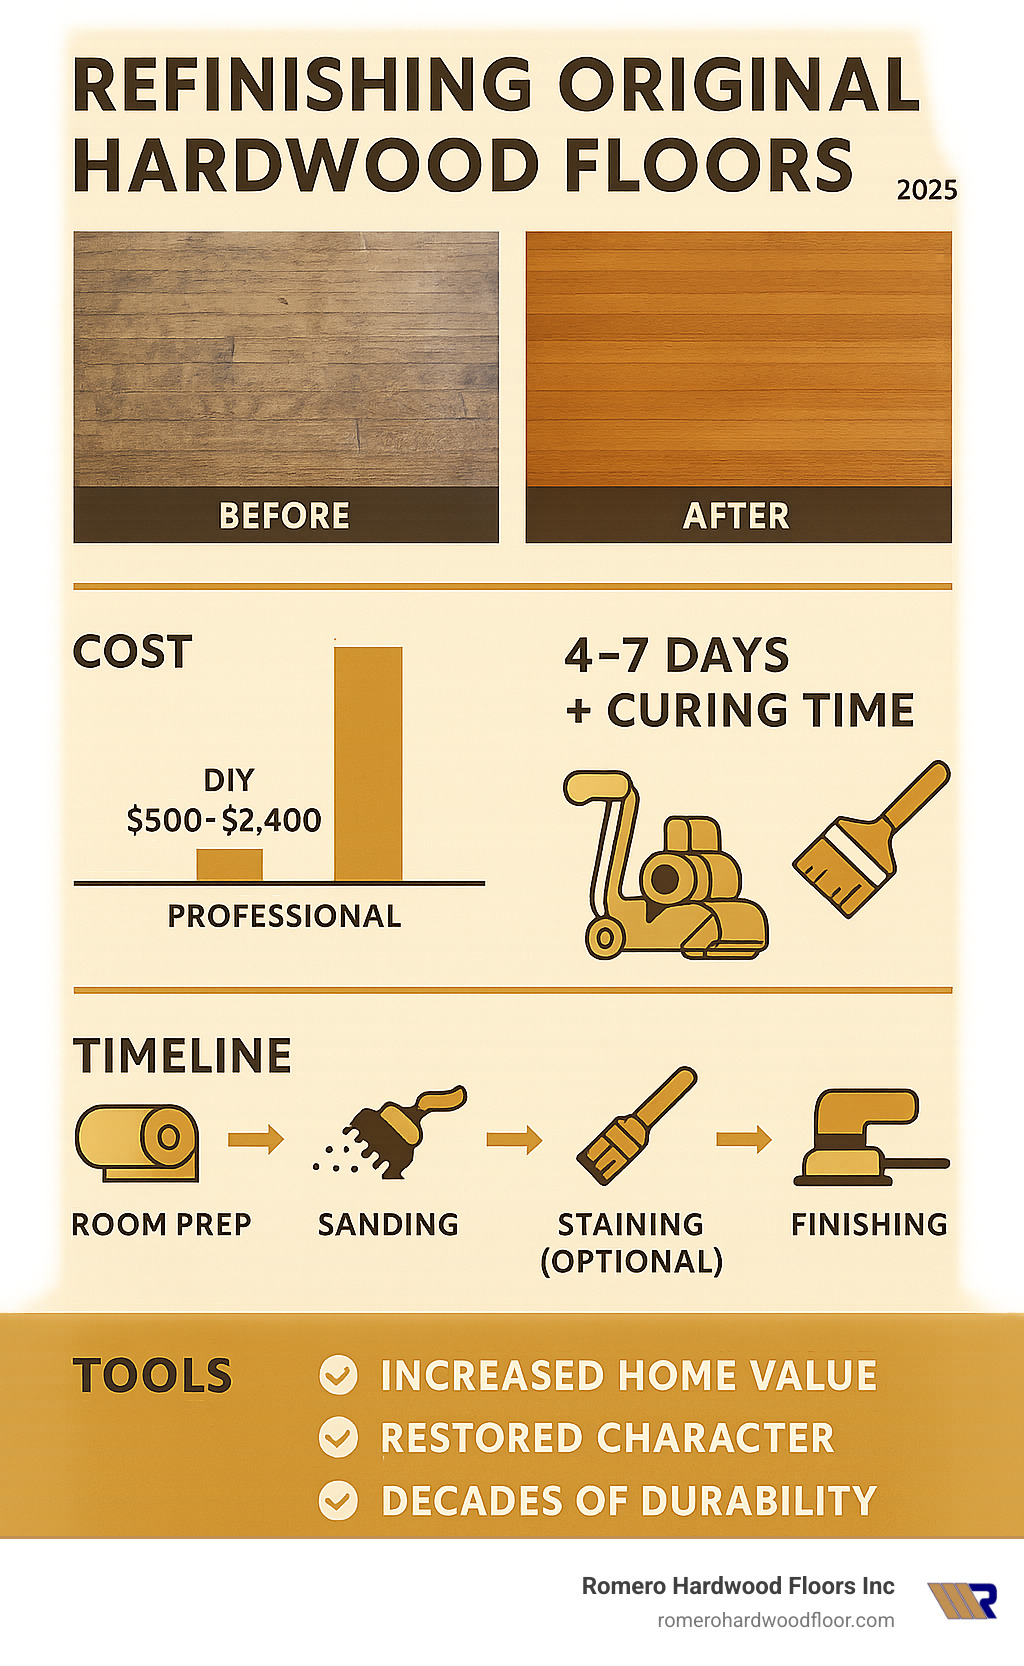
A worn hardwood floor can date a room faster than old wallpaper, yet those same boards can look brand-new after a well-planned refinish. Refinishing original hardwood floors restores natural beauty, protects the lumber you already own and, according to national real-estate studies, returns roughly two dollars in home value for every dollar spent.
Quick Overview: Refinishing Original Hardwood Floors
- Cost: DIY $500–$2,400; professional $3–$8 per sq ft (average internet data, not Romero pricing)
- Time: 4–7 DIY workdays + one-week cure
- Major steps: Prep → Sand → (Optional) Stain → 3–4 finish coats
- Tools: Drum or orbital sander, edger, shop-vac, finish applicators, safety gear
- Floor must have: Minimum 1/8 in. wood above the tongue-and-groove
With the right technique a 3/4-in. solid floor can survive four–six complete sandings—decades of service. The key is patience, dust control and knowing when to call a pro. After 15 years at Romero Hardwood Floors Inc. in Revere, MA, I’ve watched first-time DIYers achieve showroom results—and I’ve also seen thin, historic boards ruined by rushed sanding. Use the guide below to land in the first group!
Common terms you’ll see in this guide:
Before You Begin: Is Refinishing Right for Your Floors?
Refinishing only works when there’s enough wood left to sand. Pull a floor register or baseboard and confirm at least 1/8 inch above the tongue-and-groove. Anything thinner risks sanding through to the subfloor.
Do the water-drop test: If water beads, the finish still protects; if it soaks in, it’s time to refinish. Skip sanding if boards are black from deep water stains, badly warped, or riddled with movement—those usually need replacement.
For detailed numbers, see our Cost To Sand And Restain Hardwood Floors article.
Refinish vs. Replace—The Math
Refinishing DIY often runs $500–$2,400, while professional work averages $3–$12 per sq ft (internet data, not Romero prices). New floor installs can exceed $7–$26 per sq ft once removal, materials and labor are added. Because solid hardwood can be refinished up to ten times, keeping what you have is almost always the budget winner.
DIY or Hire a Pro?
DIY makes sense when:
- Scratches are mostly surface-level
- Area is under 600 sq ft and you have 4-7 free days
- You’re comfortable with loud power tools and dust control
Bring in professionals when:
- Boards show deep damage or pet stains
- Project covers multiple rooms or exotic species
- Your schedule can’t spare a full week
Find qualified help at our Hardwood Floor Refinishing Contractors page.
Essential Tools & Materials (Condensed List)
- Drum or orbital sander + edger (rental)
- Sandpaper: 40, 60, 100, 120 grit; 120-grit screen
- Shop vacuum, tack cloths, 6-mil plastic, painter’s tape
- Wood filler, putty knife, pry bar, nail set
- Respirator, eye/ear protection, knee pads, gloves
- Optional stain, polyurethane (oil or water-based), applicators
Each sandpaper sheet covers roughly 20 sq ft—plan ahead so you don’t burn precious weekend hours on hardware-store runs.
The Step-by-Step Guide to Refinishing Original Hardwood Floors
Step 1: Preparation (The 80 % Rule)
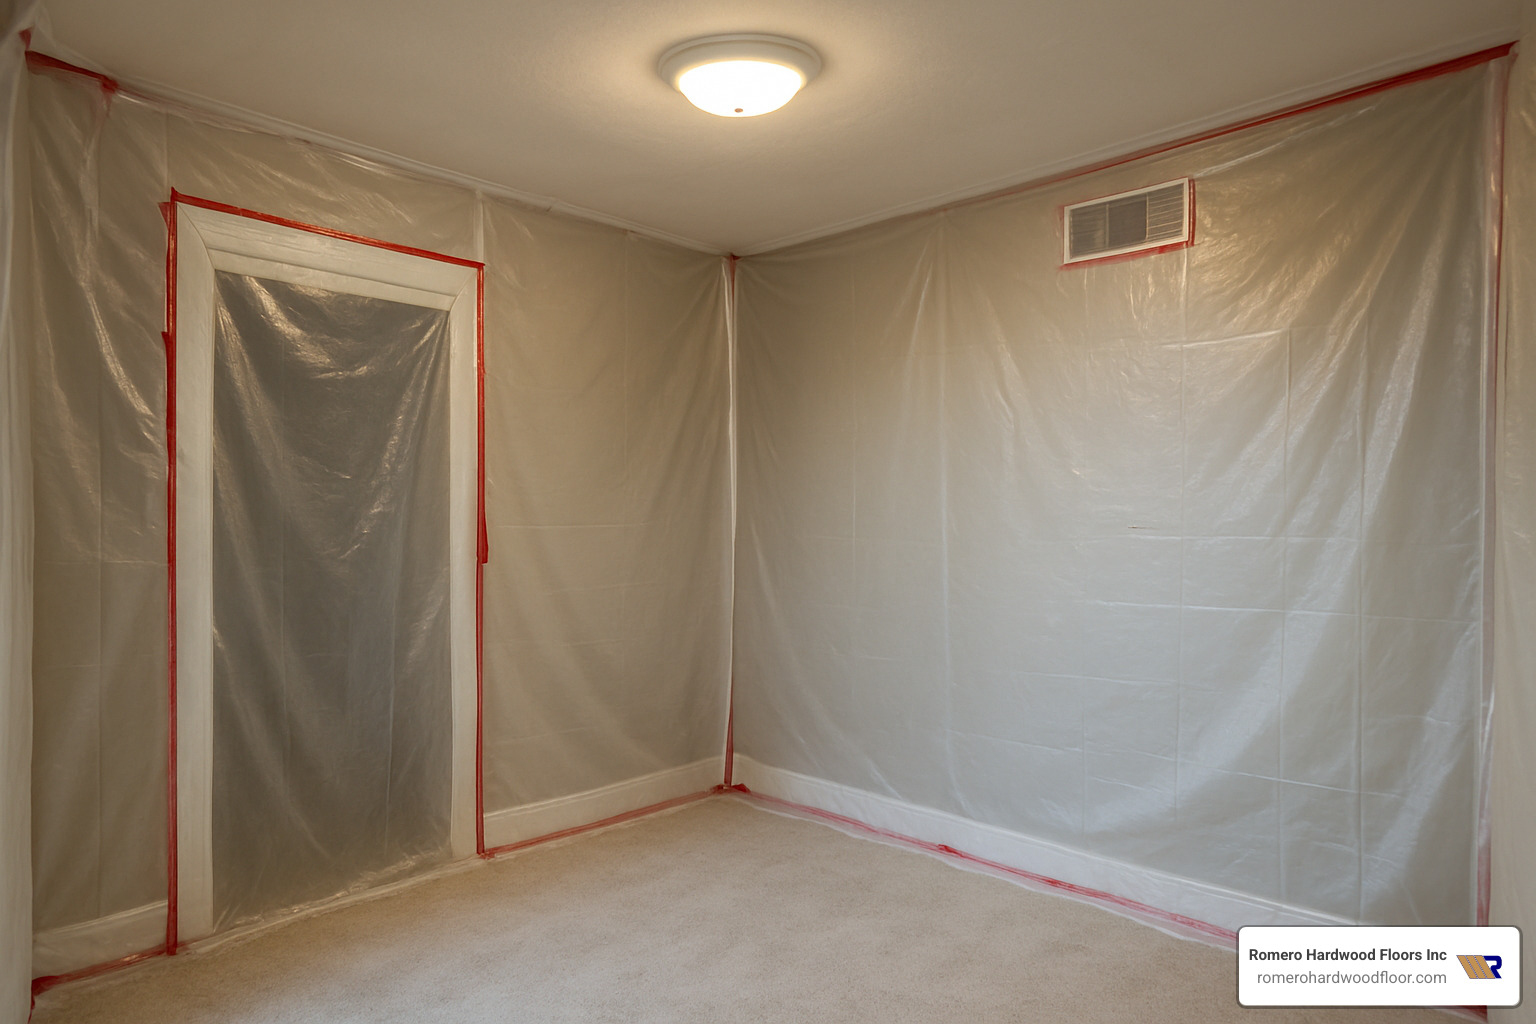
Clear the room, pull baseboards gently, and number them for re-installation. Seal every doorway and HVAC vent with plastic. Hammer down protruding nails, remove staples, and patch deep gouges with matching filler. Vacuum twice—once before and once after filler dries. A clean start prevents most finish disasters. More prep tips: Solid Wood Floor Restoration.
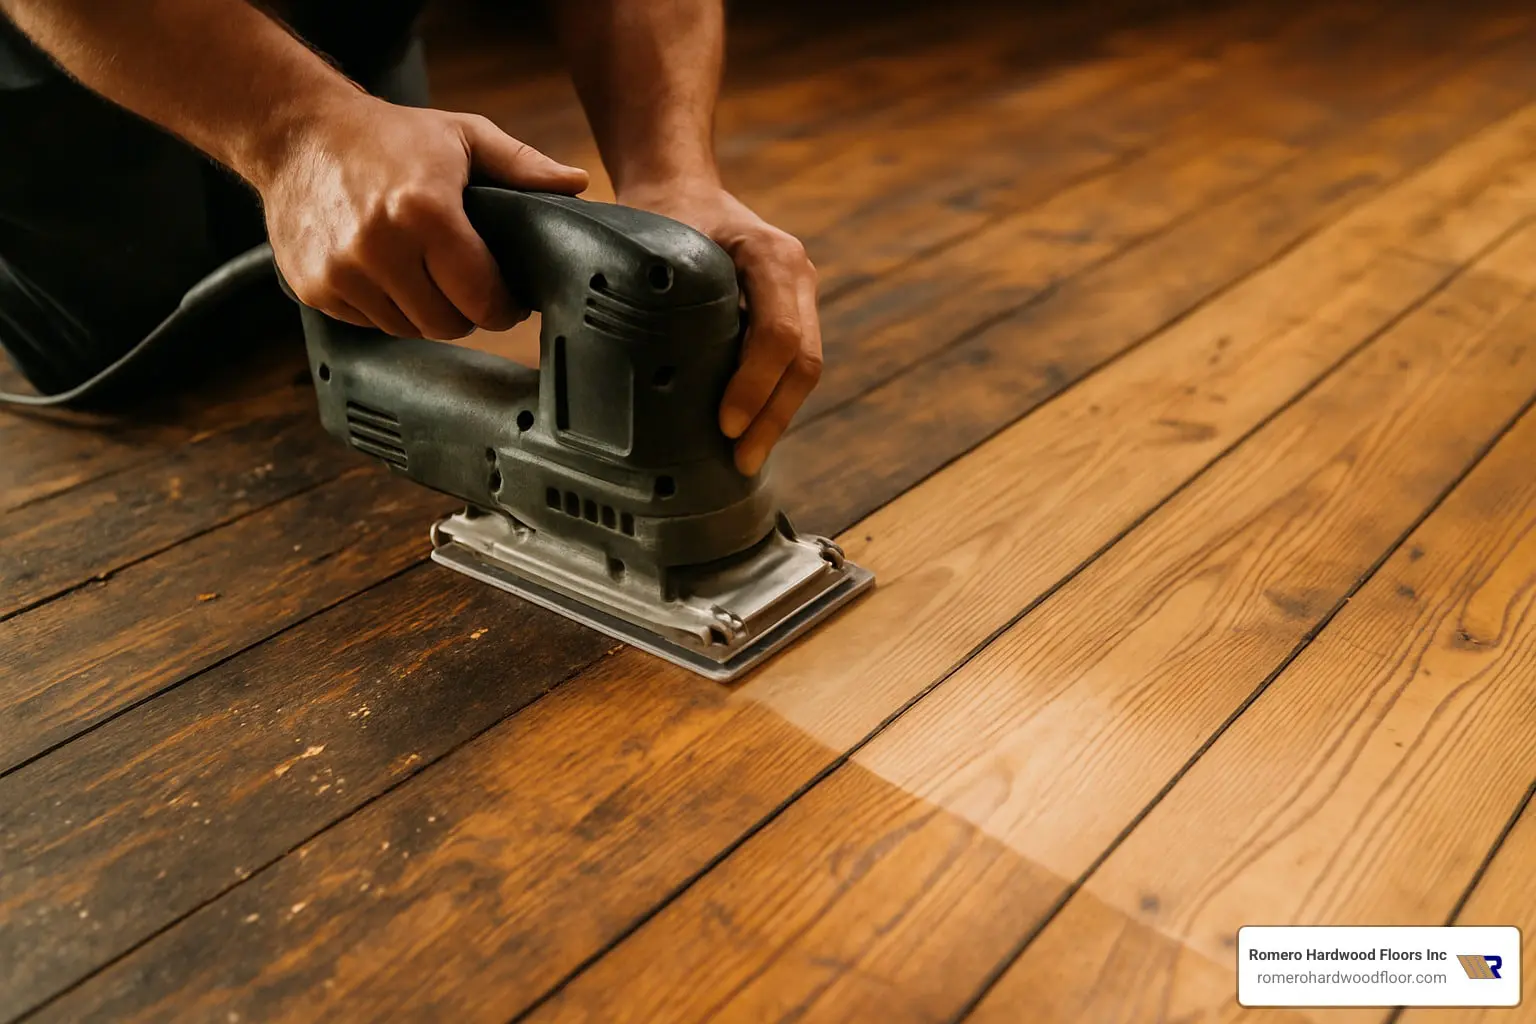
Step 2: Sanding—Where Projects Are Won or Lost
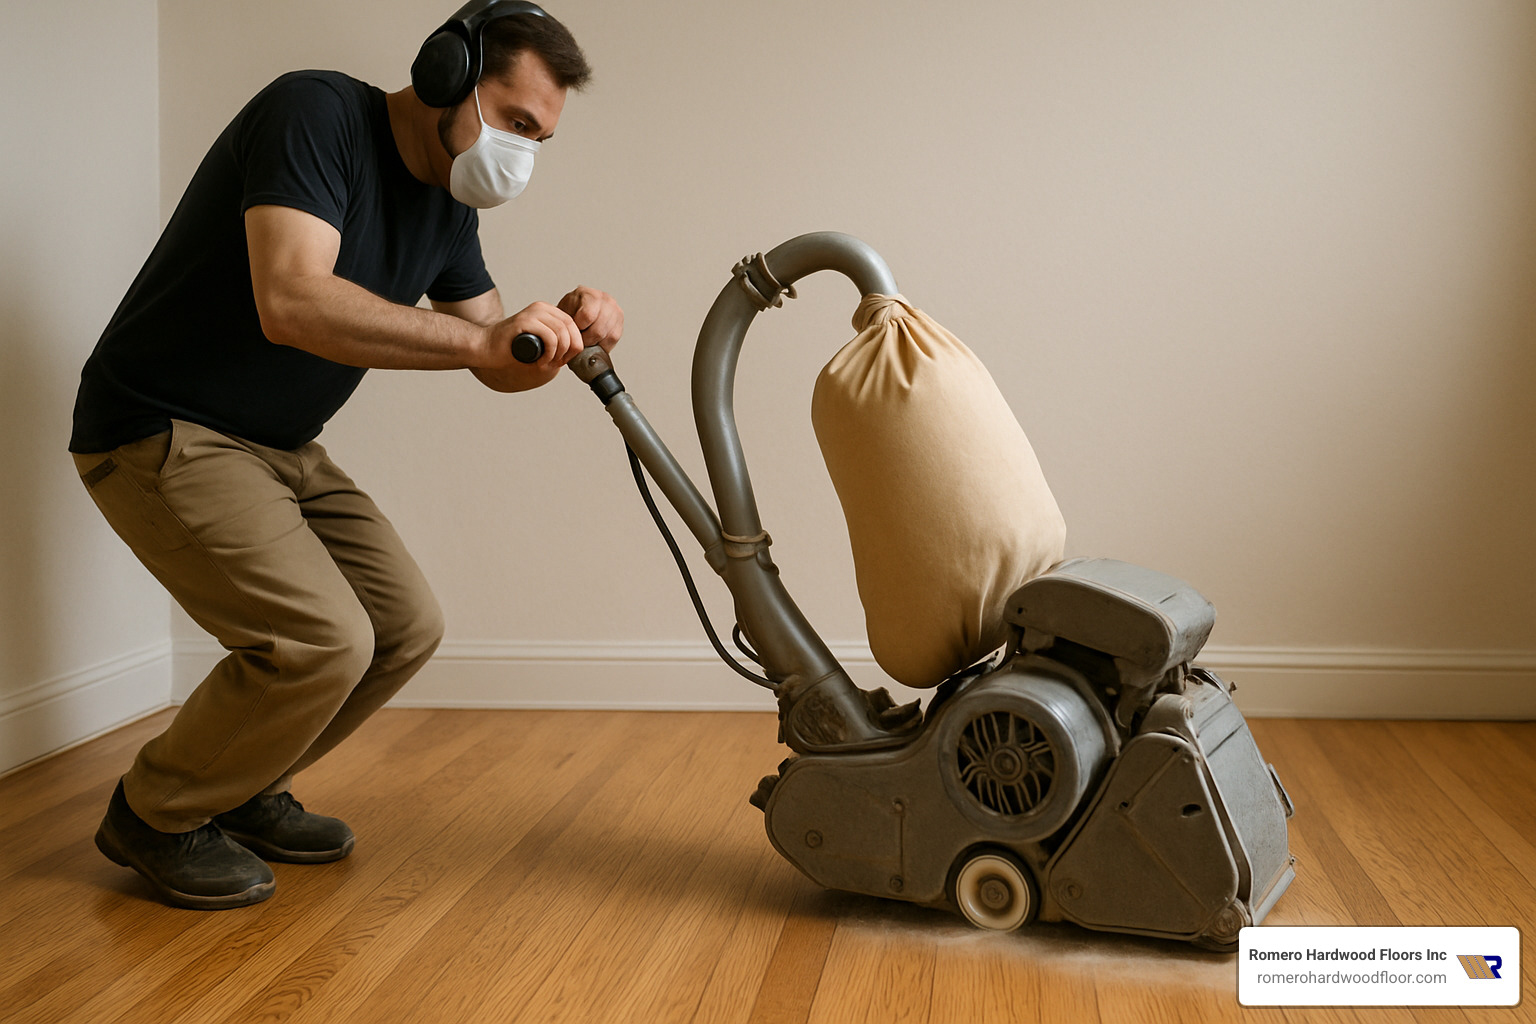
- Start with 40-grit to erase finish.
- Move to 60-grit to remove coarse scratches.
- Finish with 100-grit, then a 120-grit screen for a polish.
Keep the sander in motion, work with the grain, and overlap each pass by one board. Edges require an edger or hand sanding. Change paper as soon as it stops cutting—dull paper burns wood and leaves ripples. Detailed techniques can be found at Hardwood Floors Sanding.
Step 3: Optional Stain & Water Popping
To even out color—especially on maple or pine—mist the surface with a 2-parts-water / 1-part denatured alcohol mix (water popping) and let it dry 30 minutes. Test stain in a closet; hues shift on different species. Apply in 4-sq-ft sections, wipe excess within 10 minutes, and let dry 24–48 hours. Tips: How To Stain Hardwood Floors.
Step 4: Protective Finish
| Finish | Durability | Recoat Time | Look | VOCs |
|---|---|---|---|---|
| Oil-based poly | Excellent | 8 h | Warm amber | High |
| Water-based poly | Very good | 3 h | Clear-natural | Low |
| Natural oil | Good | 24 h | Matte | Low |
| Wax | Fair | 2 h | Soft glow | None |
Stir—never shake—your finish. Apply thin coats with a lamb-wool pad or synthetic brush, keeping a wet edge. Lightly sand with 220-grit between coats. Three oil-based or four water-based layers provide long-term protection. Maintain 65–75 °F and 30–50 % humidity, and plan your exit path so you don’t walk across wet sealer. More on selecting finishes: Best Hardwood Floor Finish and EPA info on VOCs.
Avoiding Common Pitfalls and Challenges
Most refinishing mishaps trace back to one of six issues: uneven sanding, lap marks, finish bubbles, trapped dust, blotchy stain, or peeling finish.
Keep the sander moving to prevent waves. Work in small sections and maintain a wet edge to avoid lap marks. Stir, don’t shake finish to eliminate bubbles and apply multiple thin coats instead of one thick layer. Vacuum and tack between each step—dust that lands on wet poly is there for life. Softwoods benefit from pre-stain conditioner or water popping to curb blotches, and a light 220-grit scuff between coats secures adhesion. See real-world fixes at Hardwood Floor Repair And Refinishing.
Controlling Dust
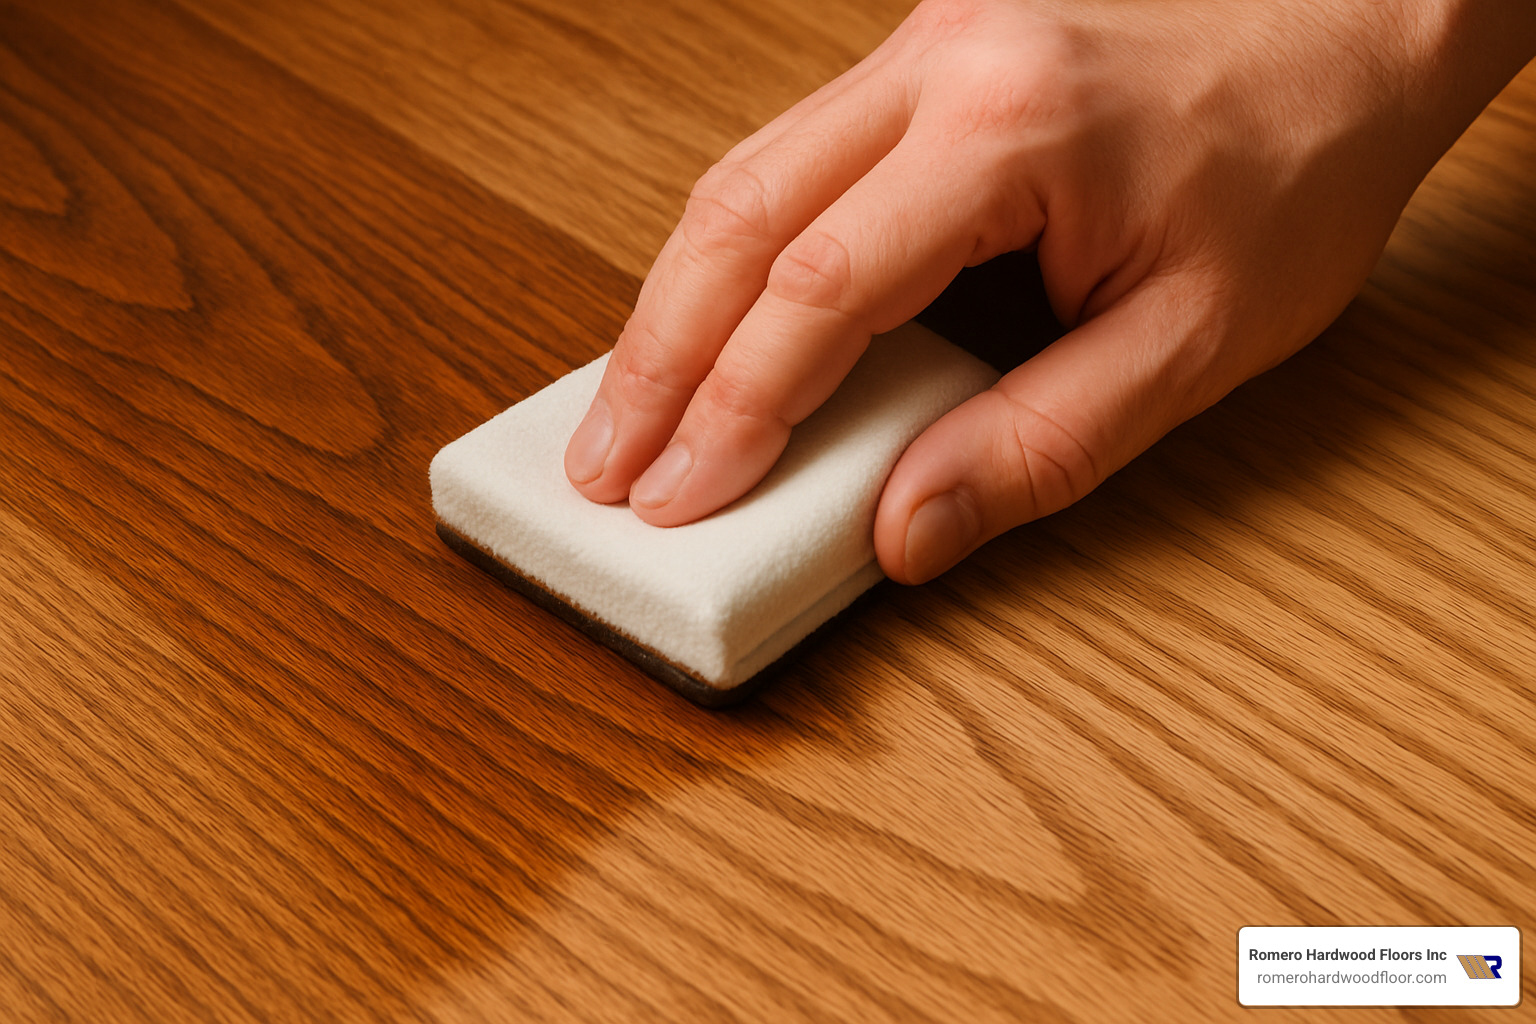
Plastic barriers over doors and vents, a shop-vac with a clean filter, and felt-bottomed vacuum heads keep debris away from your finish. Shut down HVAC while sanding, run exhaust fans to the outside, and give dust 15 minutes to settle before final tack-off.
Long-Term Care for Your Newly Refinished Floors
First Month: Gentle Use
• Walk in socks for 24 h; shoes after 48 h.
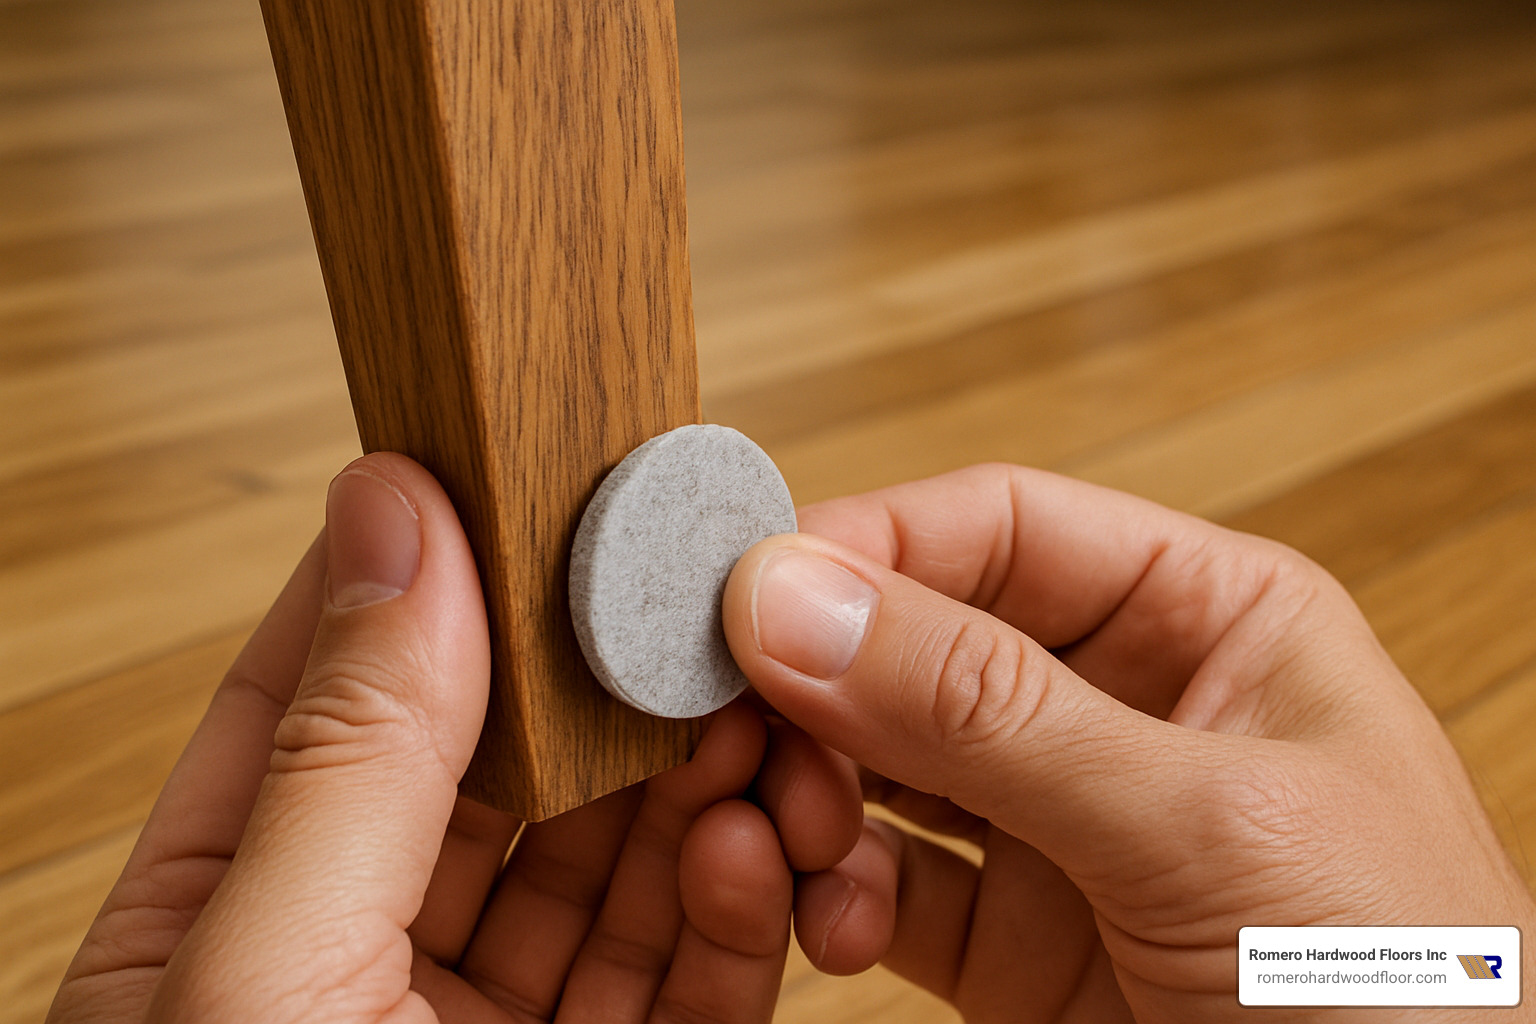
• Wait one week before returning furniture—use felt pads immediately.
• Hold rugs for 2–4 months so the finish can breathe.
• Dry mop only; avoid liquids while the coating cures.
Routine Maintenance
- Sweep or microfiber-dust daily to remove grit.
- Damp-mop weekly with a hardwood-approved cleaner—never plain water, vinegar or steam.
- Keep indoor humidity 30–50 % to minimize seasonal gaps or cupping.
- Trim pets’ nails and replace worn felt pads.
Research shows that floors kept clean and scratch-free often go 7–10 years before the next recoat—twice as long as neglected surfaces.
Frequently Asked Questions about Refinishing Floors
How much will it cost?
Internet averages (not Romero pricing) place DIY at $500–$2,500 for most homes, mainly covering tool rental and finish materials. Professional service generally runs $3–$10+ per sq ft, depending on location, floor condition and chosen finish.
How long does it take?
DIY: 4–7 working days plus a full week of cure time before furniture. Pros often complete the labor in 3–5 days, but the cure window is identical.
Can every wood floor be refinished?
Most solid hardwoods can, provided there’s 1/8 in. above the tongue-and-groove and no severe water damage or delamination. Engineered floors with thin wear layers and boards riddled with rot usually need replacement. When in doubt, ask for a professional thickness check.
Conclusion: Enjoy Your Restored Floors
Refinishing rescued your original hardwood from the landfill, boosted home value and gave you a gleaming new focal point—all without the cost of full replacement. With simple maintenance the finish should last a decade or more.
If you live in Beverly, Chelsea, Danvers, East Boston, Gloucester, Lynnfield, Malden, Manchester by the Sea, Marblehead, Medford, Melrose, Nahant, Peabody, Reading, Revere, Rockport, Salem, Saugus, Somerville, Stoneham, Swampscott, Wakefield, Winchester, Winthrop or Woburn, the team at Romero Hardwood Floors Inc. is ready to help with future projects or tricky repairs.
Ready for professional advice or a fast quote? Request an estimate for your flooring project today!